Meta Description: Backyard mini farms feeding tips can help you in sparing your grocery bill quickly. Here are 11 clever, money-saving tips for growing more food with less work and effort.
11 Money-Saving Tips For Feeding Backyard Mini Farms
Growing your own food always seemed like a farmer’s thing. But today, millions of families are transforming small backyards, patios and even rooftops into productive mini farms. The best part? All you need is a bit of land, minimal expense and zero previous experience.
With the right backyard mini farms feeding techniques, you can slash your grocery bill, eat fresher food and cultivate a hobby that literally pays out.
This guide describes 11 practical, proven strategies to help you grow more, waste less and save real money every season.
Why Backyard Mini Farms Are Booming Right Now
Food costs have soared in the past few years. A single grocery store run can cost a family of four far more than $200. More people are searching for ways to reclaim what they eat — and what they pay.
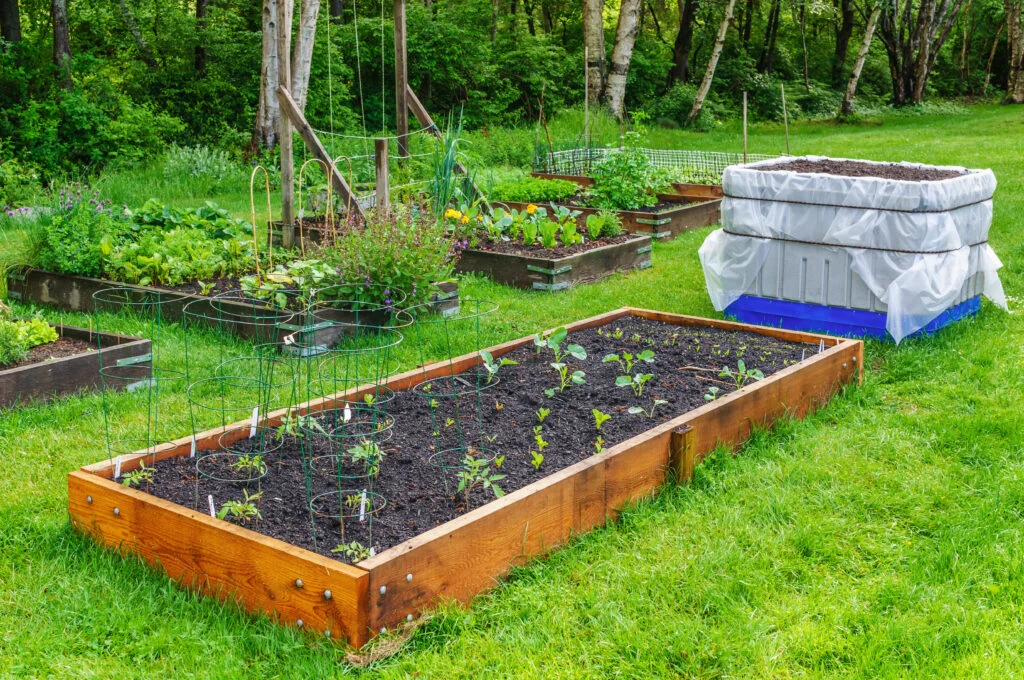
A mini farm in the backyard need not be elaborate. Even a 10×10-foot plot of land can yield hundreds of dollars worth of vegetables per year. With a little smart planning and a few insider feeding tricks, you can still extract even more value from that small space.
Let’s get into the tips.
Tip 1: Formulate a Soil Feeding Plan Before You Plant Anything
Most gardeners impulse buy fertilizer. They buy whatever is on sale or choose a random bag at the garden center. That approach wastes money.
The first step to a proper soil feeding plan is a simple soil test. Many local extension offices provide them free or for less than $15. The test tells you precisely what your soil lacks — nitrogen, phosphorus, potassium or trace minerals.
Once you know what you have, you only purchase what you need. No more guessing. No more wasted product.
How to Build Your Plan
Before the growing season begins, jot down a simple calendar. Record when you will add compost, apply a slow-release fertilizer at planting and then an application of quick liquid feed mid-season. This three-step rhythm is the engine of every money-making mini farm.
A planned approach can triple or more the amount you save compared to random, impulse feeding.
Tip 2: Compost at Home, Rather Than Buying It
Bags of compost — often found at garden stores — can cost between $8 and $15 each. A healthy backyard mini farm can consume a lot of compost each season. That adds up fast.
The solution is simple: make your own. Home composting converts kitchen scraps and yard waste — items you’d be tossing anyway — into nutrient-rich, free soil food.
What to Compost
You’ll want a balance of “greens” (nitrogen-rich materials) and “browns” (carbon-rich materials):
Greens: Vegetable peels, fruit scraps, coffee grounds, grass clippings and fresh plant trimmings
Browns: Dried leaves, cardboard, paper bags, straw, wood chips
Try for about two parts browns to one part greens. Moisten the pile like a wrung-out sponge and turn it every week to two weeks. You can have finished compost in as little as six to eight weeks when the weather is warm.
For soil amendments alone, one compost bin can save a family $100 to $200 annually.
Tip 3: “Feed the Soil, Not the Plant”
There’s a world of difference between feeding your soil and directly fertilizing plants. Synthetic fertilizers nourish plants immediately but bypass the soil altogether. Soil becomes weaker and weaker over time — which means you’re spending increasing amounts of money on fertilizer every year, just to perform at the same level.
The more intelligent strategy is to build the biology of your soil. Healthy soil is rich in fungi, bacteria and beneficial microbes. These tiny organisms decompose organic material and supply nutrients to plant root systems naturally.
Practical Steps
Regularly add organic matter (compost, aged manure, worm castings). Soil life is fed from the top down, so use mulch on the surface. Do not till too deeply, as this destroys the ecosystem underneath.
With biologically rich soil, plants grow robust and require much less external fertilizer. That means you end up spending less — and your harvests actually get better.
Tip 4: Grow High-Value Crops That Return the Most
Not all vegetables are equally effective when you’re growing on a budget. Some crops pay off multiple times over their cost to grow. Others barely break even.
If your goal is to save money, growth needs to be strategic.
The Best Bang-for-Your-Buck Crops
Fresh culinary herbs — basil, cilantro and parsley — are some of the most valuable things you can grow per square foot. A few sprigs of fresh basil at the grocery store can cost you $3 to $4. A single plant can yield that same amount every couple of days all summer long.
Heirloom or specialty varieties of tomatoes and peppers also offer a big payback, particularly when prices reach premium levels at farmers’ markets.
Low-value crops such as corn, melons and pumpkins take a lot of room, and they’re often inexpensive at the store. Save those for when you have room to spare.
Tip 5: Master Liquid Feeding — The Secret Weapon for Fast Results
Liquid fertilizers are taken in via leaves as well as roots. They act quickly — often within 24 to 48 hours. This makes them perfect for giving a quick kick to tired or pale plants.
The cost-saving aspect is that you use them only when plants tell you they need a lift — not on some fixed schedule. Look for yellowing leaves (a common nitrogen signal) or slow growth (could be phosphorus or potassium).
Homemade Liquid Fertilizers That Are Practically Free
Compost tea: Add finished compost to a bucket and fill it with water. Let sit for 24 to 48 hours, stirring every so often. Strain and dilute to the color of weak tea. Apply it as a soil drench or as a foliar spray.
Banana peel water: Place banana peels in water for 24 hours. The water absorbs potassium — great for fruiting plants like tomatoes and peppers.
Diluted fish emulsion: Fish emulsion is available cheaply in bulk and is rich in nitrogen and trace minerals. Dilute to the package instructions and apply every two to three weeks during active growth.
These homemade, low-cost alternatives can replace expensive commercial liquid feeds for the majority of the season.
Tip 6: Use Mulch Strategically to Reduce the Cost of Watering and Feeding
Mulch is one of the most underrated tools in a mini farm. Applying a 2 to 3-inch layer of mulch on your soil surface does many things at once:
It retains moisture so you can water less. It moderates soil temperature. It slowly decomposes and enriches the soil. It suppresses weeds so you spend less time and money on weed control.
Free and Cheap Mulch Sources
You don’t need to purchase bags of mulch from a garden center. Try these free or low-cost alternatives:
Fallen leaves are abundant and completely free. Run them over with a lawnmower to shred them and they’ll decompose faster. Straw is cheap and works great in a vegetable garden. Many tree-trimming services will deliver wood chips for free — check sites like ChipDrop or ask local arborists. Lay cardboard flat under other mulch for additional weed suppression; it decomposes and incorporates into the soil over time.
With the right amount of mulch applied, you may need to water 50% less or more during hot weather. If you pay for water, that’s a direct cost saving.
Tip 7: Rotate Your Crops to Balance Soil Nutrients
Planting crops in the same spot year after year depletes certain nutrients and builds up soil diseases. You end up having to buy more fertilizer to compensate — and you’re getting worse results.
Crop rotation corrects the problem at no cost.
A Simple 4-Bed Rotation
| Bed | Year 1 | Year 2 | Year 3 | Year 4 |
|---|---|---|---|---|
| A | Tomatoes / Peppers | Brassicas | Root veg | Legumes |
| B | Brassicas | Root veg | Legumes | Tomatoes / Peppers |
| C | Root veg | Legumes | Tomatoes / Peppers | Brassicas |
| D | Legumes | Tomatoes / Peppers | Brassicas | Root veg |
Legumes (beans, peas) actually take nitrogen from the air and fix it into the soil. Plant them before heavy-feeding crops like tomatoes, and those beds get a natural nitrogen boost for free. That lessens the amount of fertilizer you have to purchase.
A 4-bed rotation is easy to manage and can dramatically improve soil health in just two seasons.
Tip 8: Save Your Own Seeds Year After Year
Each spring, buying seed packets is a real hit to the wallet — particularly if you grow lots of different varieties. Seed packets tend to range from $3 to $6 each, and that can add up quickly.
Seed saving reduces this cost to virtually zero after your first season.
Which Seeds Are Easy to Save
Choose open-pollinated and heirloom varieties. These are plants that grow true to type from seed. Look for the terms “open-pollinated,” “heirloom” or “OP” on the packet.
Tomatoes, peppers, beans, peas, lettuce and squash are all easy seed-savers for beginners. Make sure to dry the seeds thoroughly before placing them in a cool, dark, dry location for storage. A jar full of paper envelopes works fine.
Hybrid seeds (labeled F1) generally won’t reproduce reliably, so those are worth re-buying each year. But switching to open-pollinated varieties where you can saves $30 to $60 a season for an average mini farm.
Tip 9: Feed Your Plants at the Right Time of Day
It may seem like a small detail, but properly timing your feeding sessions reduces waste and gives plants better access to nutrients.
Apply fertilizers — both liquid and granular — early in the morning. Here’s why: in the morning, plants are most metabolically active. Stomata (tiny pores on leaves) are open. Soil temperatures are rising, which enhances microbial activity and nutrient uptake.
Refrain from feeding during the hot afternoon hours. Liquid fertilizers applied to stressed or hot leaves may cause leaf scorch. In extremely high heat, fertilizer granules can also volatilize and lose some of their nitrogen.
Evening is fine, but not ideal — if the foliage stays wet overnight it can encourage fungal issues.
A Simple Weekly Feeding Routine
Monday morning: Look for signs of nutrient stress in the plants.
Wednesday morning: If necessary, apply liquid feed.
Saturday morning: Check moisture levels; add more mulch if thin.
This routine takes less than 30 minutes per week and makes sure your plants never go without what they need at crucial growth stages.
Tip 10: Use Companion Planting to Lower Your Feeding Bill Naturally
Companion planting is when you intentionally place certain plants beside each other to benefit them both. Some combinations suppress pests. Others actually improve the soil or help neighboring plants absorb nutrients better.
This is a free, built-in feeding upgrade that most mini farmers overlook.
Best Companion Planting Combinations for a Money-Saving Garden
The Three Sisters (corn, beans, squash): This Native American combination has been used for centuries. Corn provides a tall structure for beans to climb. Beans fix nitrogen into the soil, feeding the corn and squash. Squash grows wide, shading the soil to maintain moisture and suppress weeds. Together they form a self-sustaining mini ecosystem that requires minimal outside inputs.
Tomatoes and basil: Basil can enhance tomato flavor and is said to deter aphids and whiteflies — pests that damage crops and cost you money in lost harvests.
Carrots and onions: These two repel each other’s worst enemies — carrot fly and onion fly respectively. Healthier plants need less intervention.
Marigolds everywhere: Plant marigolds around the edge of any vegetable bed to deter nematodes, aphids and other insects. A single packet of marigold seeds costs roughly $2 and can safeguard hundreds of dollars’ worth of vegetables.
If you want to explore more growing strategies like these, Backyard Mini Farms is a great resource for beginner and experienced growers alike.
Tip 11: Track What You Grow and Spend Every Season
This final tip is the one most people skip — and it’s the one that brings everything else together.
A simple growing journal shows you what’s actually working and where money is being wasted. Without tracking, you’re guessing every year. With it, you can see precisely how much your seeds cost, how much fertilizer you used and how much food you were able to harvest.
What to Track
All you need is a simple notebook or free spreadsheet. Write down:
Your overhead costs (seeds, fertilizer, amendments, tools). What you planted, when and where. What you harvested, with an approximate weight or quantity. Any pest or disease issues and how you dealt with them. What worked and what you need to do differently next year.
Over two or three seasons, this data shows you which crops yield the highest return per dollar spent, which feeding strategies actually move the needle and where you’re spending money without realizing it.
Tracking alone has helped many seasoned mini farmers reduce their gardening budget by 30% to 40%, while actually boosting their harvests.
Quick Reference: Cost vs. Savings Summary
| Strategy | Upfront Cost | Estimated Annual Savings |
|---|---|---|
| Soil testing | $0–$15 | $50–$100 |
| Home composting | $20–$50 (bin) | $100–$200 |
| Seed saving | $0 after year 1 | $30–$60 |
| Homemade liquid fertilizer | $0–$10 | $40–$80 |
| Free mulching | $0 | Water savings: 20–25% reduction |
| Crop rotation | $0 | Savings from soil fertility and pest management |
| Companion planting | $2–$5 | $50–$150 |
| Tracking journal | $0–$5 | 30–40% waste reduction |
Putting It All Together: A Mini Farm Feeding Calendar Month-By-Month
Most of the season runs on very low or no-cost feeding strategies. The only real spending happens at planting time. Everything else is built from things you already have — kitchen scraps, fallen leaves, water and a little time.
Frequently Asked Questions
How much can a backyard mini farm realistically save me in one year?
A well-managed mini farm using intelligent feeding strategies can save a family of four anywhere from $400 up to over $1,500 each year in groceries, depending on how big the garden is, what you grow and how effectively you manage your inputs. Most first-year gardeners are amazed at how fast the savings accumulate once they stop purchasing pricey inputs and begin making their own.
Do I have to buy expensive fertilizers for my vegetables to grow well?
No. Some of the best-fed vegetable gardens are fed entirely on homemade compost, compost tea and crop rotation. Commercial fertilizers are helpful in certain instances, but they’re almost never necessary for a well-managed small backyard food garden.
What is the biggest mistake new mini farmers make when it comes to feeding?
Over-fertilizing. Too much nitrogen — particularly from synthetic sources — causes plants to produce lots of lush green leaves but fewer fruits and vegetables. More fertilizer is not always better. Use a soil-based approach and only feed when plants are showing signs that they need it.
How do I know if my soil needs feeding?
Your plants will tell you. Yellowing lower leaves are a common sign of nitrogen deficiency. Phosphorus problems may show up as purple-tinged leaves. Weak stems and poorly developed fruit may indicate potassium. A soil test is the most accurate way to find out what might be missing before investing in any amendment.
Can I start composting if I only have a small yard or an apartment with a balcony?
Absolutely. Worm composting (vermicomposting) works well in a small bin that can live under your kitchen counter or on a balcony. Worms turn food scraps into rich castings — arguably the best soil amendment you can use — with almost no space, no odor and minimal effort.
Is it still worth growing food in containers on a patio?
Yes. Containers on a sunny patio can yield an astonishing quantity of food. Everything from herbs to cherry tomatoes to lettuce, peppers and green onions grow well in containers. Feed container plants more regularly than ground beds — every one to two weeks with diluted liquid feed — because nutrients wash out with watering faster.
When should I start a backyard mini farm?
The time is now, even if starting small. You could start a compost bin this week. Test your soil this month. You can plan your beds and order seeds in the off-season. Every decision you make today saves you money next season.
The Bottom Line
A mini farm in the backyard doesn’t have to break the bank. In fact, some of the best-fed, highest-yielding mini farms are actually those that spend the least on inputs.
All 11 backyard mini farms feeding tips in this guide — everything from building a soil plan and home composting to saving seeds and tracking your results — point in the same direction. Work with nature, not against it. Use what you have. Plan ahead.
Begin with two or three tips you think you can manage. Perhaps you start composting this week and take a soil test this month. Add one more strategy each season. In two to three years, you will be running a mini farm that is capable of feeding your family for very little cost.
That’s the essence of smart feeding — and it’s within reach for anyone with a plot of dirt and an eagerness to learn.