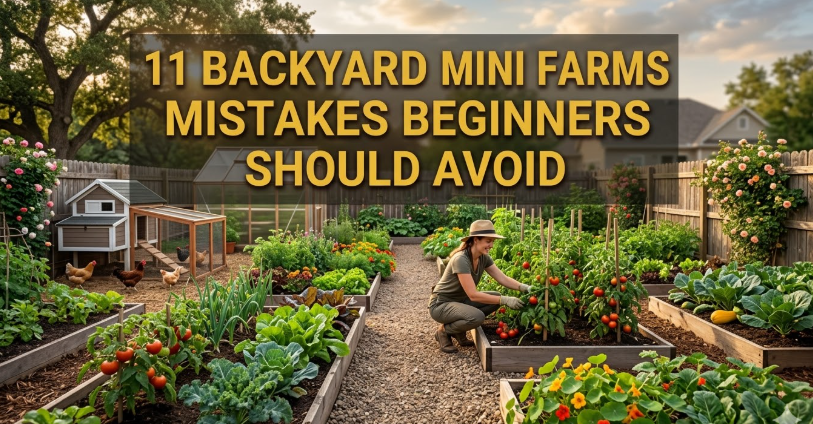
7 Smart Backyard Mini Farms Upgrades I Wish I Did Earlier
You know, when I first carved out that scrappy little patch behind my house for what I grandly called a “mini farm,” I thought I had it all figured out. A few packets of seeds from the market, some dug-up dirt, and a hose that I dragged around like it was my best friend. Tomatoes struggled, the beans got leggy and fell over, and by midsummer everything looked half-dead from the constant battle with watering, weeds, and whatever critter decided my kale was its personal buffet. I was out there every single evening, shoes soaked, back aching, muttering to myself that this homesteading dream was more hassle than harvest. Fast forward a couple of seasons and a whole lot of trial-and-error headaches, and now that same backyard pumps out enough veggies, herbs, and even a few eggs to feed my family through most of the year with way less sweat. The secret? Seven upgrades that feel so obvious now but that I put off way too long because I figured “good enough” was enough. If you’re just starting or stuck in that same frustrating loop I was in, listen up. These aren’t fancy catalog dreams requiring a huge budget or perfect land. They’re the practical, sweat-tested changes that actually moved the needle for me, turning chaos into something that feels almost effortless on good days. I wish I’d done every single one in year one. Let me walk you through them the way they unfolded for me, complete with the dumb mistakes, the aha moments, and the stuff you can copy tomorrow if you want.
The first upgrade that still makes me groan when I remember the old days is putting in a proper drip irrigation system with a basic timer. Back then, I was hand-watering everything with that sad garden hose, guessing when the soil was dry enough, overdoing it on some beds and underwatering others until the leaves yellowed. In the peak heat, I’d spend forty minutes every evening just dragging the hose around, getting mud on my pants and watching water run off uselessly while the roots stayed thirsty. One July I lost half my cucumber vines to inconsistent moisture – they got blossom end rot so bad I nearly quit. Then a neighbor showed me his setup and I finally caved. I started small with a kit that cost maybe the price of two takeout dinners: some half-inch tubing, a pressure reducer that screws onto the outdoor tap, a handful of emitters, and a cheap digital timer I plugged in right there.
Laying it out took an afternoon. I unrolled the main line down the center of each raised bed, poked in the emitters every foot or so right at plant bases – one gallon-per-hour for the thirsty tomatoes, half that for the herbs. I capped the ends with little plugs and secured everything with landscape staples so it wouldn’t shift when I walked by. Added a simple splitter so one tap ran two zones, and set the timer for twenty minutes at dawn and again at dusk. Covered the lines with a thin layer of straw mulch to hide them and cut evaporation. The first week I kept checking because I couldn’t believe how quiet and effective it was – no more puddles, no wet foliage inviting fungus, just steady deep drinks that reached the roots without me lifting a finger. Yields jumped noticeably; my peppers went from sad little things to loaded bushes by August. Water bills dropped too, which was a nice surprise in those dry stretches.
If I had one regret it’s buying the cheapest rubber soaker hose first – it cracked after one season and leaked all over. Switched to the polyurethane kind that’s labeled safe and flexible, and it’s still going strong years later. For anyone in a hot climate like mine, add a basic rain sensor to the timer so it skips on wet days. You can expand it later with battery valves if you get fancy, but even this basic version saved me hours every week and kept the garden alive when I went away for a weekend. I kick myself thinking of all those wasted evenings I could have spent actually enjoying the harvest instead of playing water boy. Start with one bed if you’re nervous – the difference is night and day and you’ll wonder why you waited.
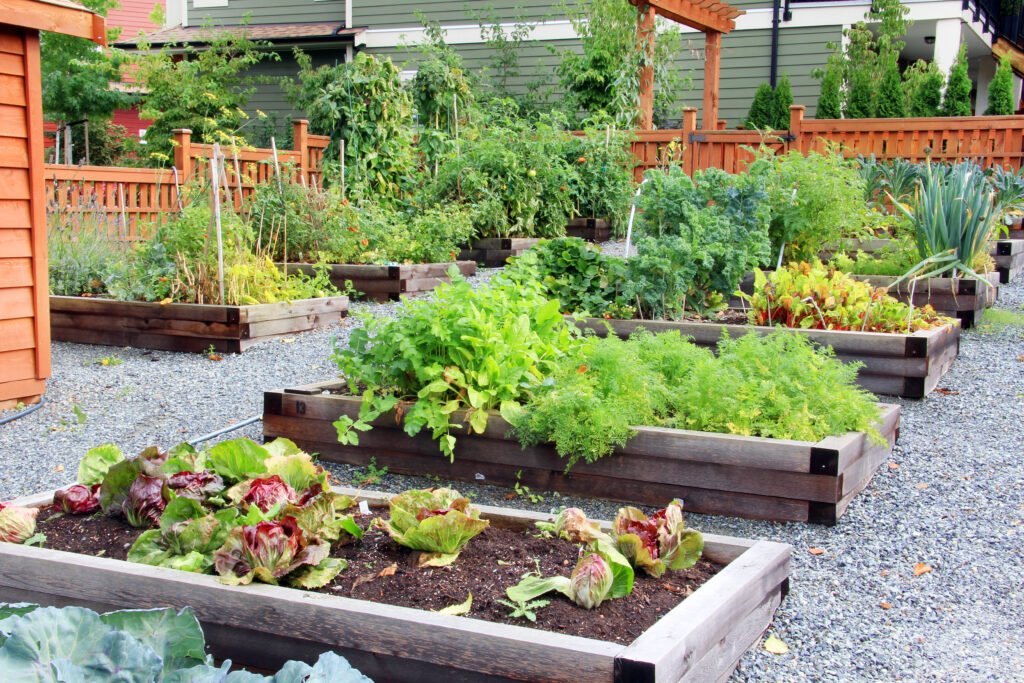
Upgrade number two hit me even harder because I had fought with terrible soil for so long. I built basic raised beds out of scrap wood the first year, filled them with whatever garden center mix was on sale, and watched everything struggle because the dirt compacted, nutrients washed away, and weeds laughed at me. Digging and amending every spring felt like punishment. Then I learned about no-dig methods with a heavy mulch layer and self-watering tricks built in, and it was like the garden woke up. I redid all four of my main beds using the lasagna style: cardboard base to smother weeds, then alternating layers of compost, old leaves, grass clippings, and a top dressing of aged manure I got cheap from a local farm. For the self-watering part I buried sections of perforated pipe horizontally near the bottom before filling – old PVC with holes drilled every few inches, connected to a short vertical riser so I could top it up with compost tea or rainwater occasionally.
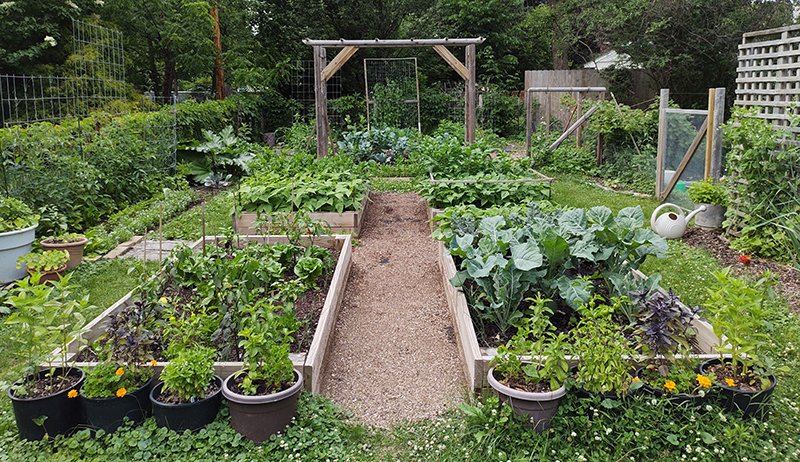
The beds are only 4 by 8 feet each but they feel twice as deep now because the mulch breaks down slowly, feeding the soil life constantly. I plant right into the top layer without tilling, add fresh compost between crops, and top with straw or wood chips that keep moisture locked in and weeds almost nonexistent. My first harvest after switching was ridiculous – lettuce that stayed sweet instead of bolting early, carrots that didn’t fork into weird shapes, and tomatoes that ripened evenly without splitting after every rain. The beds stay cooler in summer heat too, which is huge where summers bake everything. One bed I even made wicking style with a reservoir at the bottom using landscape fabric and gravel; it pulls water up by capillary action and I only refill it once a week.
Mistake I made was skimping on the initial fill – used too much straight soil and it took an extra season to balance. Now I mix roughly one-third compost, one-third aged bark, and the rest native soil plus worm castings from my bins. Cost per bed upgrade ran under a hundred bucks if you scavenge materials. Readers always ask about drainage in rainy periods; I just slope the beds slightly and add gravel channels at the low end. This upgrade alone cut my weeding time by eighty percent and boosted output so much I started giving away surplus to neighbors. If you’re still fighting bare dirt and constant amendments, do this next weekend. Your back and your plants will thank you.
Third on my regret list is the composting system I finally scaled up properly. Early on I had one tiny tumbler bin that filled up in a week and smelled like regret whenever I opened it. Kitchen scraps piled up, garden waste sat in heaps attracting flies, and I was still buying bags of fertilizer like a sucker. Switching to a three-bin pallet system plus a worm bin changed the game entirely. I used free pallets wired together into bays about four feet square, lined the bottoms with hardware cloth to keep rodents out, and added simple lids from old roofing tin. One bay for fresh stuff, one for turning, one for finished gold. Alongside that I built a basic worm bin from two stacked plastic storage tubs – drilled holes for air and drainage, filled the bottom with shredded newspaper and coconut coir, then added a pound of red wigglers I ordered online.
Now every peel, coffee ground, and pulled weed goes straight in. The worm bin lives under the kitchen sink in winter and outside in shade the rest of the year; I feed it fruit scraps and eggshells, harvest castings every couple months that I mix into teas for foliar sprays. The big bins heat up nicely in summer, killing weed seeds, and by fall I have enough finished compost to top-dress everything twice over. The smell disappeared, the flies went elsewhere, and my soil went from tired to teeming with life – earthworms showing up naturally in the beds now. One funny story: I once added too many onion scraps and the worms staged a mass exodus across the patio. Lesson learned – balance the greens and browns better.
For small spaces this scales perfectly; even one bin plus worms will handle a family’s waste. I spent maybe fifty dollars total on materials and never looked back. The upgrade pays for itself in free fertilizer and reduced trash. Plus there’s that satisfying feeling when you scoop out rich black compost that smells like forest floor and know it’s all from stuff you used to throw away. If your compost pile is still a sad, stinky mess, build the bins this month. You’ll wonder how you gardened without it.
Number four was all about going up instead of out because my ground space was maxed after the first couple beds. I had vines sprawling everywhere, tripping me, shading lower plants, and generally wasting real estate. Installing vertical systems – trellises, cattle panel arches, and hanging planters – felt like I suddenly gained another garden. I salvaged old fencing for uprights, zip-tied cattle panels into sturdy arches over two beds, and planted pole beans, cucumbers, and even small melons that climb right up. For the walls I screwed on gutter planters and repurposed shoe organizers filled with herbs and strawberries. Added a simple A-frame trellis from bamboo for peas and tomatoes tied with soft twine.
The yield explosion was immediate. Beans that once gave me handfuls now produce buckets because air circulation improved and picking became eye-level easy. Cucumbers hang clean and straight instead of rotting on the ground. I even trained a passionfruit vine along the fence that gives us fruit and shade. Maintenance is a breeze now – no more bending double to hunt for hidden squash. One upgrade I added later was netting draped over the arches for pest protection without chemicals; it doubles as bird deterrent in fruit season. Cost was ridiculously low – most materials scavenged or under twenty bucks new.
In tighter yards this is gold; my total growing area effectively doubled without adding a single square foot of footprint. Mistake I made initially was using flimsy string that snapped in wind – switched to coated wire and never had another collapse. For hot areas add shade cloth over the top during peak sun to keep things from scorching. This one upgrade made harvesting fun instead of a chore and let me squeeze in flowers for pollinators too. If your plants are fighting for floor space, hammer in those trellises tomorrow. You’ll harvest more and smile more doing it.
The fifth change I delayed too long was adding a simple hoop house structure to stretch the seasons. My first gardens ended abruptly with the first cool nights or heat waves; I’d watch perfectly good plants stall or bolt. Building a basic tunnel from PVC hoops and clear plastic changed that completely. I used ten-foot PVC pipes bent into arches every four feet over a 10 by 20 bed area, secured the bases with rebar pounded into the ground, and draped UV-resistant plastic sheeting clipped with landscape pins. Added roll-up side vents with bungee cords for easy access and temperature control. Inside I fit two long beds plus a central path.
Suddenly I was harvesting salad greens into late fall and starting spring crops weeks earlier. Peppers and tomatoes inside produced almost double because wind and frost stayed out. One winter I even grew carrots under row cover inside the hoop and they stayed sweet. The structure cost less than a nice dinner out – pipes, plastic, clips all from the hardware store. I leave it up year-round now, just swapping covers for shade cloth in summer to beat the heat. Personal story: the first year I used it, we ate fresh basil in November while neighbors’ gardens were bare. Felt like cheating in the best way.
Common mistake is skipping the vents – without them it turns into a sauna. I also added a cheap soil thermometer to watch conditions. For monsoon areas make sure the ends can be fully opened for airflow and add gravel base paths to avoid mud. This upgrade turned my mini farm from seasonal hobby to near year-round producer. If your growing window feels too short, throw up hoops this weekend. The extra months of food are addictive.
Sixth is the indoor seed starting station I finally dedicated space to instead of crowding the kitchen table every spring. Before, I’d scatter trays on windowsills, lose half to damping off or poor light, and end up buying expensive transplants anyway. Clearing a corner of the spare room for two wire shelves with shop lights on timers, heat mats underneath, and a small fan for air circulation was simple but transformative. I use reusable trays with dome lids, a basic soil block maker for no plastic waste, and a cheap timer that runs the lights fourteen hours a day. Bottom shelf holds supplies and a notebook for tracking varieties and dates.
Now my transplants are stocky, healthy, and ready exactly when I need them. I start hundreds for pennies compared to store prices – tomatoes, peppers, eggplants all hardened off perfectly in the nursery phase before moving out. The fan prevents mold and the mats keep soil at the right temp for fast germination. One upgrade that paid huge dividends was adding a small grow light strip over the herbs I keep going indoors year-round; fresh cilantro and basil in January feels luxurious. Total setup ran around seventy dollars including lights.
I used to waste money and time on weak seedlings; now every plant I set out thrives. Tip for beginners: label everything obsessively and water from the bottom to avoid fungus. If you’re still juggling trays on the dining table, claim that corner space. Your garden will start stronger and you’ll save a bundle.
Finally, the seventh upgrade that completed the loop is the outdoor washing and harvest station combined with better organization for tools and processing. I used to haul everything inside, clog the sink with dirt, and lose tools in the grass. Built a simple three-bay sink from stock tanks on a sturdy table under a lean-to roof made from leftover corrugated panels. One bay for rinse, one with a scrub brush, one for final clean. Added shelves above for baskets and a hose hookup with spray nozzle. Beside it I mounted a pegboard for tools – pruners, trowels, labels all in one spot so I grab and go. Even threw in a small bench for sitting while bunching greens.
Harvesting became efficient and actually enjoyable instead of a muddy chore at dusk. Produce stays cleaner, I can hose off right there, and nothing tracks into the house anymore. Paired with the compost bins nearby, the whole workflow flows smoothly. One addition was a basic mesh screen for drying herbs and a notebook hook for quick notes on what worked. Cost was minimal – scavenged most, maybe eighty bucks new. The peace of mind knowing everything has a home and the garden stays tidy is priceless. I no longer dread the end-of-day cleanup; it’s quick and satisfying.
If your tools scatter and your kitchen turns into a mud pit after harvest, build this station. It ties the whole mini farm together.
Looking back, each of these upgrades started as a small fix for a specific pain point but snowballed into a system that works with me instead of against me. The drip saves water and time, the beds and compost build fertility without effort, vertical and hoops maximize every inch and month, the starting station gives strong plants, and the station keeps the joy in the daily work. Together they turned my backyard from a frustrating experiment into a reliable source of food, pride, and even a little income from surplus sales to friends. I still make mistakes – overplanting zucchini one year, forgetting to vent the hoop another – but recovery is fast now because the foundation is solid.
If you’re reading this and feeling overwhelmed, pick just one to start with this weekend. Maybe the irrigation or the compost because the quick wins build momentum. Measure your space, scavenge what you can, and remember it’s supposed to be fun, not perfect. Over time you’ll tweak for your own climate, family size, and quirks – hotter summers might need more shade, smaller yards lean harder into vertical. The point is you don’t need acres or expertise to make it sing. I’ve got neighbors now copying bits and pieces, trading seedlings, and sharing harvests. That’s the real magic. My only real wish beyond doing these sooner is that I’d taken more photos along the way to see the transformation clearly. But hey, there’s always next season. Grab some supplies, get your hands dirty in a smarter way, and watch your own little farm surprise you with how generous it can be. You’ll be writing your own “wish I did earlier” list before you know it, and trust me, that’s a great problem to have.