I still remember standing in my backyard three summers ago, staring at a handful of sad-looking zucchinis and wondering what I was doing wrong. My neighbor two houses down had tomatoes practically falling off the vine. I had scraggly little plants struggling to stay upright. Same neighborhood, same general climate, same number of hours in the day — but her harvest looked like a farmers market and mine looked like a science experiment gone wrong.
That frustration sent me down a rabbit hole. I started tracking everything, testing small changes, reading obsessively, and — most importantly — making a lot of embarrassing mistakes that I’m about to save you from.
What followed over the next two seasons was genuinely shocking to me. My weekly harvest nearly doubled. Not because I had more space or spent more money, but because I stopped guessing and started farming smarter.
Here are the 9 tips that made the actual difference.
1. Fix Your Soil Before You Plant Anything
This is the one I wish someone had told me on day one. I spent two full growing seasons planting into mediocre soil and then wondering why everything looked “fine but not great.” The soil isn’t just dirt — it’s the foundation that determines how much nutrition your plants can actually pull up.
I started getting my soil tested using a cheap kit from the garden center (the Luster Leaf Rapitest kit is about $20 and surprisingly accurate). Found out my pH was hovering around 5.5 — way too acidic for most vegetables. Added garden lime to bring it up, mixed in a good 3-inch layer of compost, threw in some worm castings, and the difference by the following season was dramatic.
Aim for a pH between 6.0 and 7.0 for most vegetables. Tomatoes, peppers, and squash especially love that range.
The other thing I started doing was building my own compost pile from kitchen scraps. It sounds like a lot of effort but it isn’t — a simple bin in the corner, fruit peels, coffee grounds, eggshells, and dried leaves. After a few months you’ve got rich, free soil amendment. You can dive deeper into this with these 10 secret soil hacks that are genuinely worth trying.
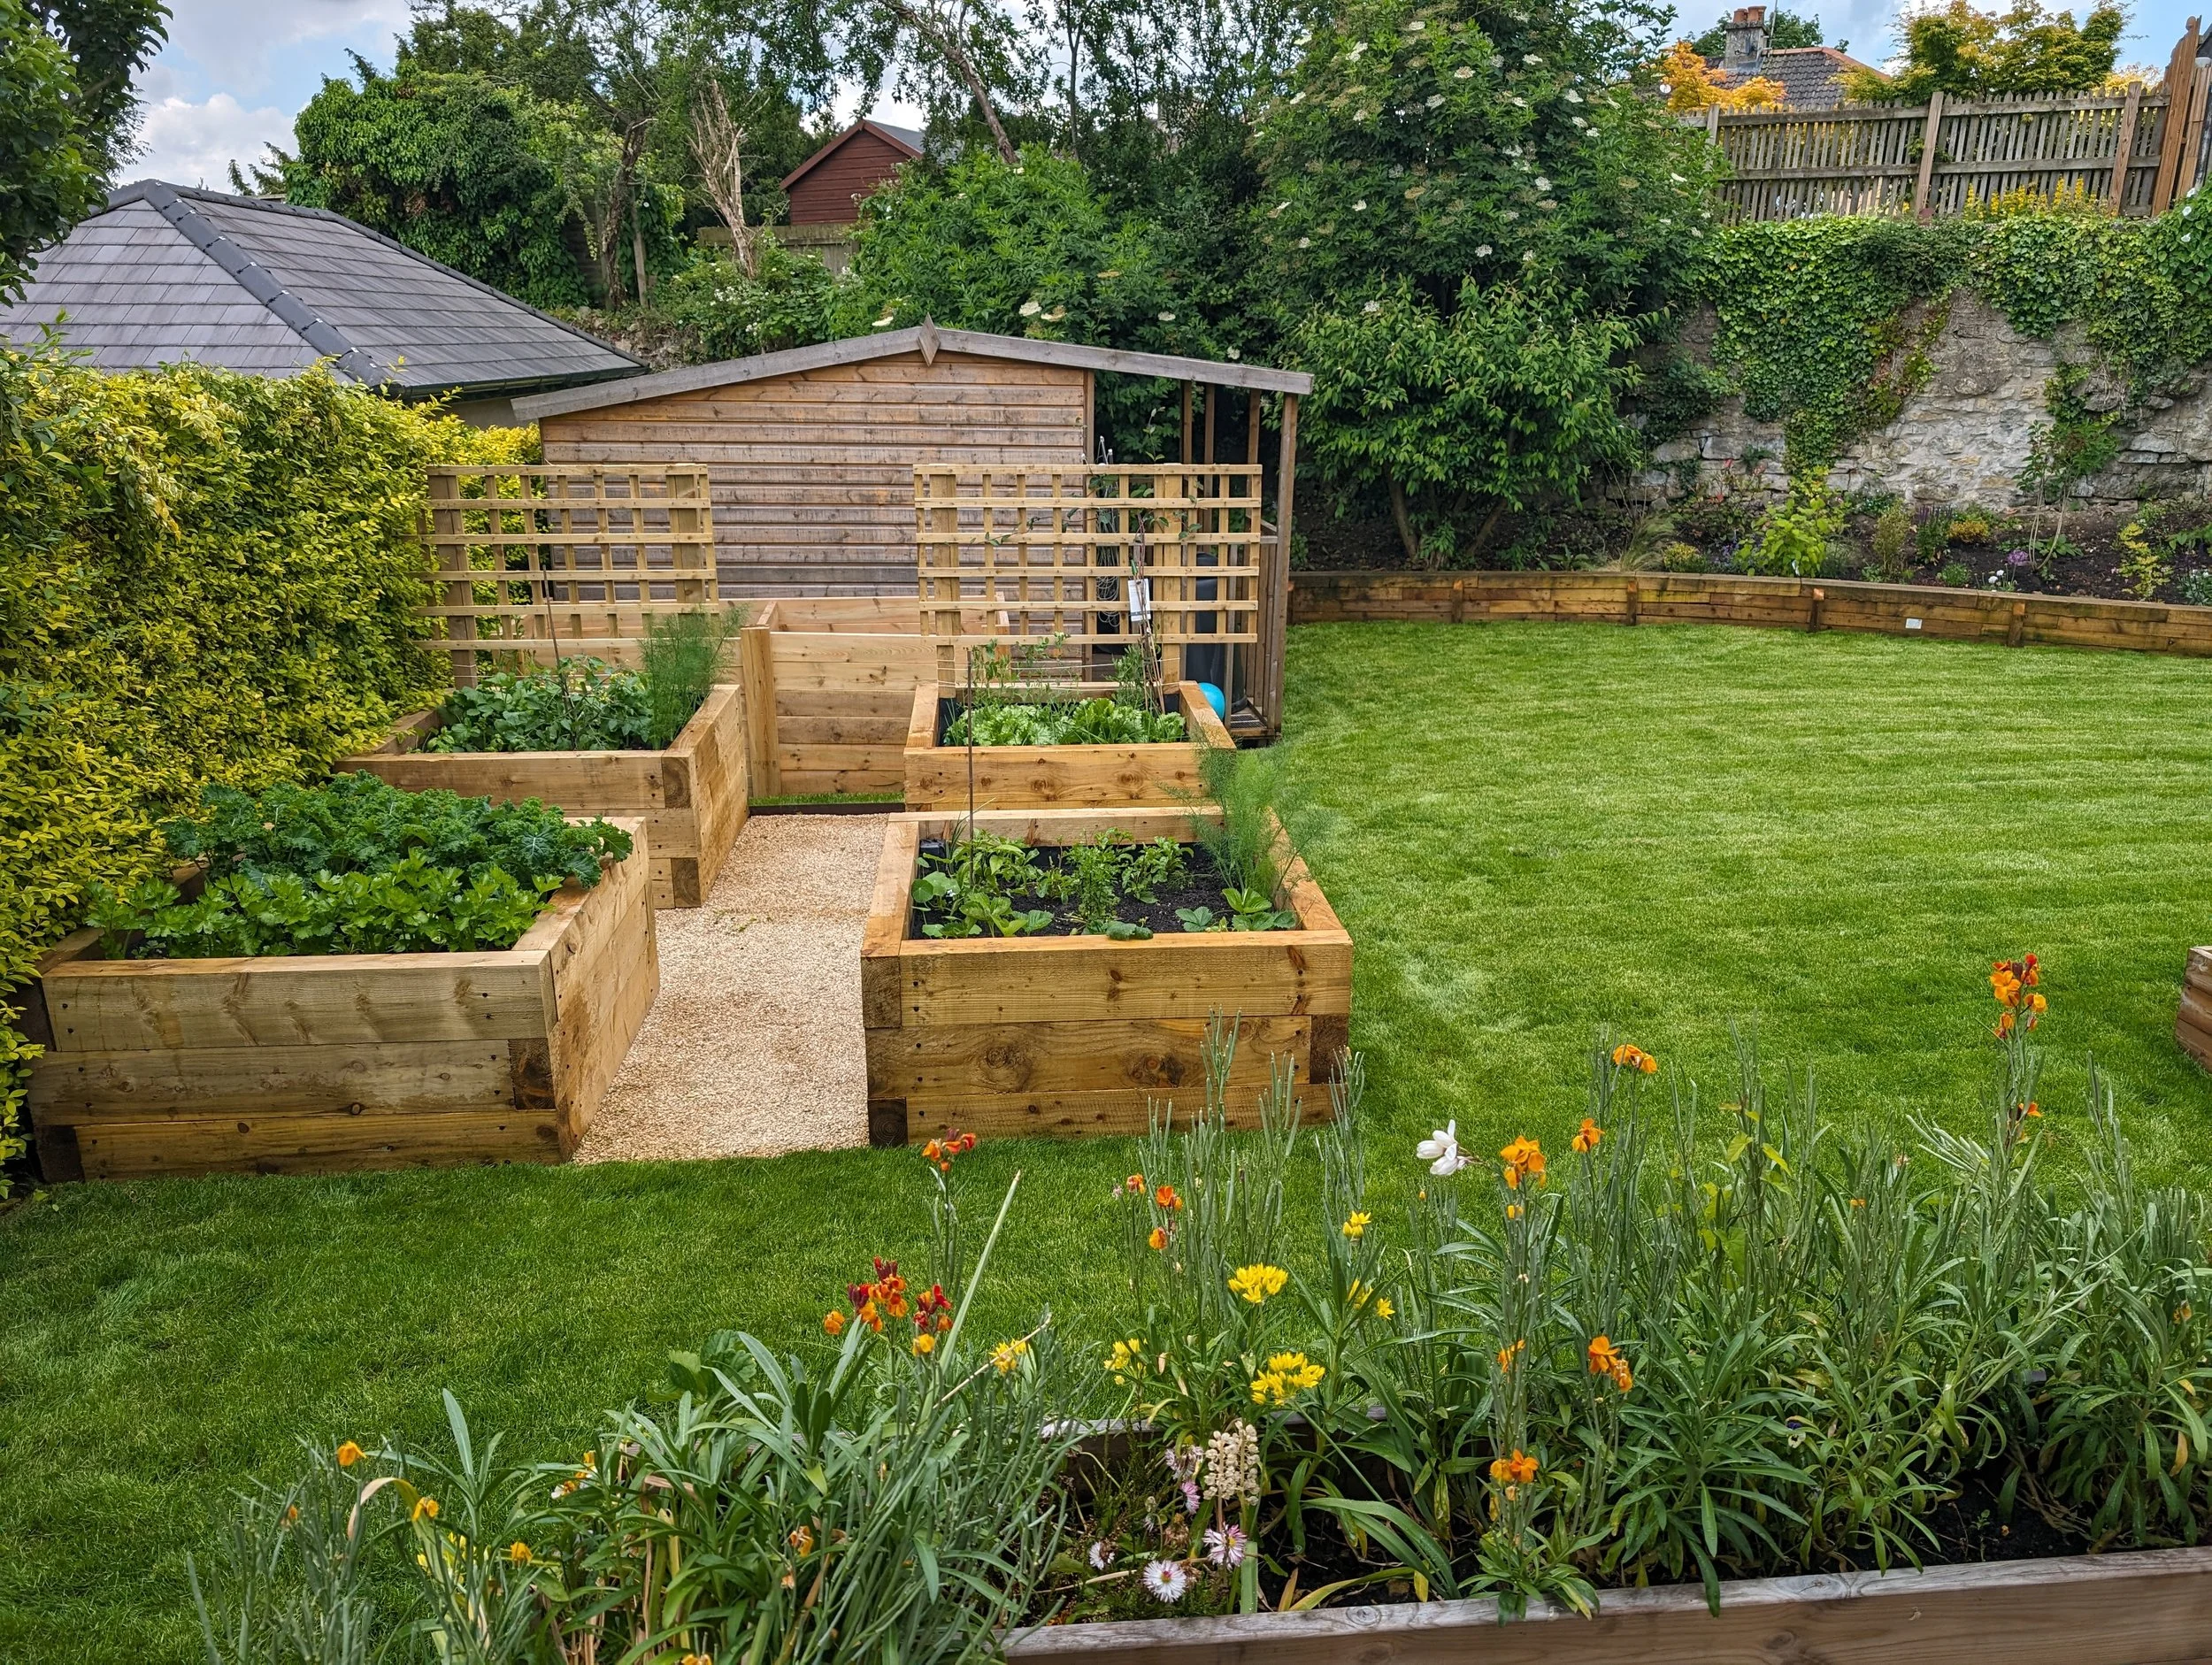
2. Switch to Raised Beds If You Haven’t Already
I planted in the ground for my first two years. Then I built three 4×8 raised beds using untreated pine boards and landscape fabric on the bottom, filled them with a mix of topsoil, compost, and perlite.
The results weren’t subtle.
Raised beds drain better, warm up faster in spring, are easier to weed, and let you control exactly what your plants are growing in. I was planting earlier in the season and harvesting more per square foot — somewhere between 30 and 40% more per bed compared to my old ground plots, based on my rough tracking.
The other underrated benefit: your back will thank you. No more bending down to ground level for every single thing you do out there.
If you’re trying to decide how to lay them out in a limited space, these smart raised bed layouts for small yards gave me some ideas that I actually ended up using.
3. Learn Companion Planting (It Really Does Work)
I was skeptical about this one for a while. It sounds almost too old-fashioned and folklore-y. But after trying it, I’m now a believer.
The basics: some plants genuinely help each other when grown nearby. Basil planted next to tomatoes is said to repel thrips and aphids — and in my experience, my tomato beds with basil nearby had noticeably fewer pest issues than the ones without. Marigolds around the perimeter of any vegetable bed keep a surprising number of bugs away.
The classic “Three Sisters” combination — corn, beans, and squash — is another one that works. The corn gives the beans something to climb, the beans fix nitrogen into the soil, and the squash leaves shade the ground and retain moisture.
Things to avoid: don’t plant fennel near anything else. It’s allelopathic, meaning it actively suppresses the growth of nearby plants. Learned that the hard way after a fennel plant basically bullied everything around it in a 2-foot radius.
4. Set Up Drip Irrigation Instead of Watering by Hand
For my first few seasons, I watered with a hose like everyone seems to do. The problem with this is that you’re spraying water over foliage (which encourages mold and fungal issues) and most of it evaporates before it gets where it needs to go — the root zone.
Drip irrigation changed everything. I set up a basic system using half-inch poly tubing and emitter drippers for each plant. The whole setup for three raised beds cost me around $60 from the hardware store, connected to a basic timer that I got on Amazon for another $20.
Now my beds water themselves at 6 AM every other day. The plants stay healthier because the leaves stay dry. I use about half the water I used to. And I stopped losing plants to me forgetting to water during a busy week.
If water conservation is something you care about, these water-saving tricks specifically for backyard setups are worth a read.
5. Actually Map Where Your Sun Hits
This seems obvious but most beginners (myself included) don’t actually do it. We just plant where it looks sunny and hope for the best.
Spend one day doing this properly. Go outside every two hours from 8 AM to 6 PM and take a quick photo or sketch of which parts of your yard are in direct sun vs. shade. You’ll be surprised — my backyard has three pretty distinct zones and I had no idea until I mapped it.
Fruiting crops — tomatoes, peppers, cucumbers, squash — need at least 6 hours of direct sun, ideally more. Leafy greens like spinach, lettuce, and kale can get by with 4 hours. Herbs vary, but most want 5 or more.
Once I started matching plants to the right sun zones, my peppers stopped being stubbornly green all summer and my lettuce stopped bolting in two weeks.
6. Use Succession Planting for Continuous Harvests
This tip alone probably added the most to my overall harvest weight by the end of the season.
Most beginners plant everything at once in spring, then harvest a big pile of stuff all at once in summer, and then the garden goes quiet. Succession planting means staggering your seed starts so you always have something coming in.
Here’s what I do now: every two to three weeks, I start a new small batch of quick-maturing crops — radishes, lettuce, beans, and spinach are my go-tos. By the time I’ve finished harvesting one round, the next batch is ready to go in the ground.
It takes a little bit of planning but the payoff is a constant flow of fresh produce from May through October instead of a two-week avalanche in July.
| Crop | Days to Harvest | Succession Interval |
|---|---|---|
| Radishes | 25–30 days | Every 2 weeks |
| Lettuce | 45–60 days | Every 3 weeks |
| Bush beans | 50–60 days | Every 3 weeks |
| Spinach | 40–50 days | Every 2 weeks |
| Beets | 55–70 days | Every 3 weeks |
7. Mulch Like You Mean It
I used to skip mulching because it felt like an extra step. Big mistake.
A 3-inch layer of straw, wood chips, or shredded leaves around your plants does three things really well: it holds moisture in the soil (which means less watering), it regulates soil temperature, and it dramatically cuts down on weeds.
That last one is what sold me. The weeding time I was spending before was honestly embarrassing. After laying thick mulch around everything, the weed situation became almost manageable. I went from spending 45 minutes a week pulling weeds to maybe 10.
Straw is my favorite — it’s cheap, light, and breaks down slowly. Avoid fresh wood chips from diseased trees and stay away from hay (it’s full of weed seeds, which sort of defeats the purpose).
8. Get Ahead of Pests Instead of Reacting to Them
Here’s a mistake I made in year one: I noticed the holes in my kale leaves and thought “it’ll be fine.” It was not fine. A week later the plants were skeletal.
Pest management in an organic backyard garden is really about prevention and early detection. Here’s what works for me:
Walk your beds every morning. Seriously, five minutes. You’ll catch infestations when they’re still small and manageable rather than when they’ve become a crisis.
For aphids and soft-bodied insects: diluted neem oil spray (1 tablespoon neem oil + a few drops of dish soap in a quart of water) applied in the early morning works well and won’t hurt beneficial insects as much as chemical pesticides will.
Row covers are underrated. A simple floating row cover over your brassicas — broccoli, cabbage, kale — keeps cabbage moths from laying eggs and basically eliminates caterpillar damage.
And plant flowers. Marigolds, nasturtiums, and zinnias attract beneficial insects like ladybugs and lacewings that eat the bad guys. It makes your garden prettier and keeps pests in check. Win-win.
9. Harvest Early and Harvest Often
This one surprised me the most when I first learned it. I was leaving things on the plant longer, thinking I was being patient and letting them get “more ripe.” Turns out I was signaling to the plant to slow down production.
When you pick a fruit or vegetable, the plant interprets that as “I need to keep producing to fulfill my reproductive purpose.” Leave everything on too long and the plant thinks it’s done its job and starts winding down.
I started harvesting zucchini and cucumbers while they were still small (6–8 inches for zucchinis, 4–5 inches for cucumbers) and the production rate went noticeably up. Tomatoes picked just as they color fully. Beans pulled as soon as they fill out.
The other thing nobody told me early on: check under leaves. A lot of fruits hide there, and if you miss them they’ll grow massive and go woody, which both wastes the plant’s energy and signals it to slow down.
The Mistakes That Slowed Me Down Early On
Before I wrap up, a few honest lessons from things that went wrong:
Planting too close together was my biggest early error. The spacing on seed packets exists for a reason. Crowded plants compete for nutrients, airflow drops and fungal disease spreads faster, and you end up with more plants producing less food.
Over-fertilizing, particularly with nitrogen, will give you beautiful leafy green plants that produce almost no fruit. Nitrogen drives leaf growth. For fruiting crops, you actually want to dial it back once the plant is established.
Starting too many varieties at once is a beginner trap. Your first or second season, pick five or six things you actually eat and get good at growing those. You’ll learn more from doing a few crops really well than from juggling fifteen different things you half-understand.
What Actually Changed Everything
Honestly? It wasn’t any one single tip. It was treating my backyard like a small system — where soil feeds the plant, water timing matters, spacing affects airflow, and harvest timing signals production.
Once I started thinking about all these pieces together instead of in isolation, things clicked. The harvest numbers went up, the weed time went down, and I stopped feeling like I was just guessing.
If you’re just getting started and want a clear picture of what tools and setup you actually need, this guide on essential backyard farming tools every beginner needs is a practical starting point before you spend any money.
Your backyard has more capacity than you think. Give these a proper try for one full season and see what happens.
Want to keep improving your setup? Check out these 11 powerful backyard gardening tips that actually work — they pair well with everything covered above.