Meta Description: Backyard mini farms vegetable beds for small spaces help you grow fresh food anywhere. 9 Smart, Space-Saving Ideas for a Productive Garden in Even the Smallest of Yards.
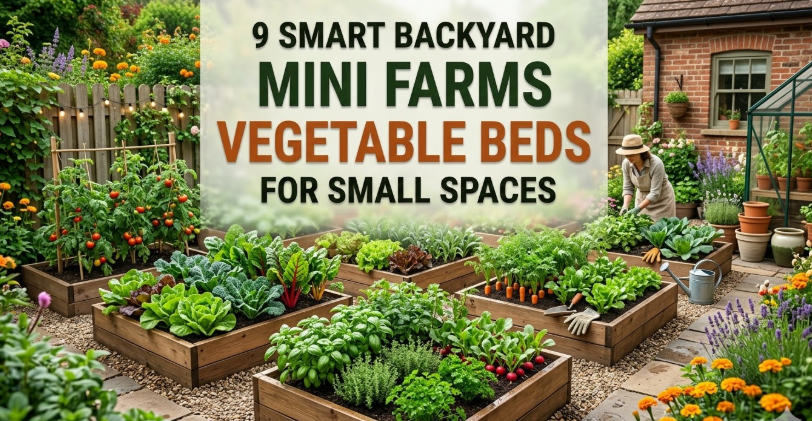
9 Smart Mini Farm Vegetable Beds For Small Spaces
You don’t need hundreds of acres to grow your own food. A tiny back garden, a sunny terrace, or even a little space of dirt along a fence can all become a miniature farm. Millions more are realizing that growing vegetables at home is simpler than they imagined — and far more satisfying.
The best part? You don’t need to be an expert in gardening. With the right configuration, even a novice can harvest fresh tomatoes, lettuce, herbs, and more from a tiny outdoor area.
In this guide, you will find 9 intelligent backyard mini farms vegetable beds that are ideal for small areas. Every idea is practical, affordable, and intended to help you grow more food in a smaller area.
Let’s dig in.
Why Small-Space Vegetable Gardening Is On the Up-and-Up
Never before have so many people turned to home gardening. Soaring grocery prices, a craving for fresher food, and increased interest in sustainability are all contributing to this trend.
The good news is that small-space gardening has evolved. Today’s gardeners also have access to more ingenious bed designs, improved soil mixes, and compact vegetable varieties that yield a lot in small spaces.
You don’t need a big investment for your own backyard mini farm. Many setups can be built for less than $100 and yield hundreds of dollars worth of vegetables every season.
Even apartment-dwellers and renters are joining the fun. Container gardens, vertical beds, and raised planters enable growing food almost anywhere.
What Makes a Great Vegetable Bed for Small Spaces?
Before diving into the individual ideas, it’s good to know what makes a great mini farm bed different from just an okay one.
Here are the key features to look for:
| Feature | Why It Matters |
|---|---|
| Good drainage | Prevents root rot and overwatering |
| Deep enough soil | Roots need room to grow well |
| Sun access | Most vegetables require 6–8 hours of sunlight daily |
| Easy to reach | You should be able to tend plants without straining |
| Efficient use of space | Make the most out of every square inch of growing area |
| Pest and weed control | Keeps your vegetables healthy and makes maintenance easier |
Keep these in mind as you explore the 9 options below.
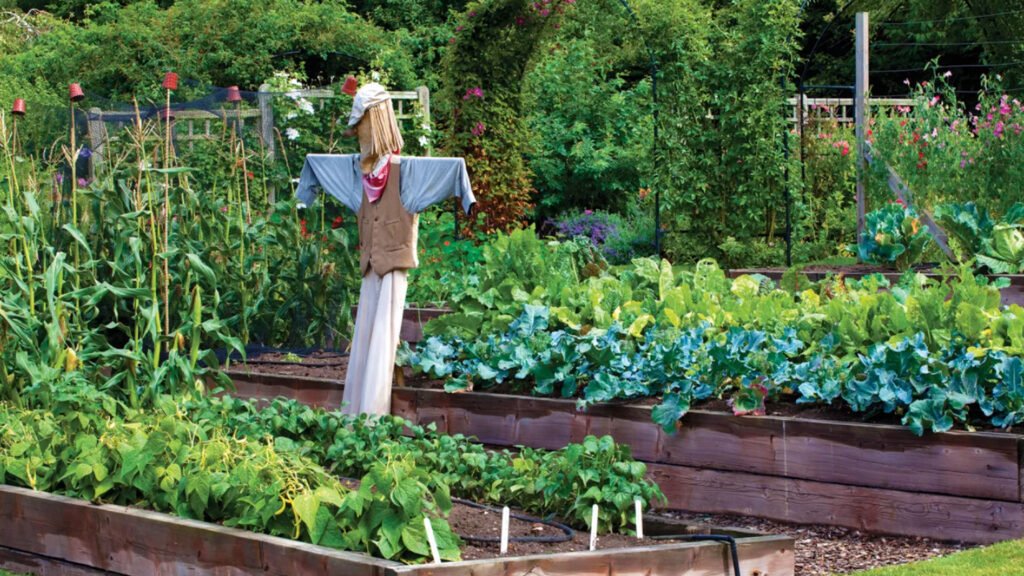
1. Classic Raised Bed Gardens — The Framework of Any Mini Farm
The most common method of growing in a backyard mini farm is using raised beds, and there’s good reason for that. They allow you to set your soil quality, drainage, and plant spacing exactly as you see fit.
Why Raised Beds Work So Well
When you make a raised bed, you fill it with a vegetable-oriented custom soil mix. That means no compacted clay, no rocky ground, and no weeds from the native soil creeping into your crops.
A standard raised bed is typically 4 feet wide. That gives you enough width to reach the center from either side without walking on the soil. Compacted soil is one of the worst enemies root systems have, so this matters a lot.
The ideal depth for most vegetables should be 12 inches. For root crops like carrots or beets, go deeper — at least 18 inches.
Best Vegetables for Raised Beds
- Tomatoes
- Peppers
- Lettuce and spinach
- Cucumbers
- Bush beans
- Kale and Swiss chard
Quick Setup Tips
Don’t make beds longer than 8 feet so you can reach both ends easily. Use untreated cedar or pine wood for the frame, as both are naturally rot-resistant. Place cardboard on the bottom before adding soil to block out weeds.
Pro tip: A 4×8 foot raised bed will grow enough salad greens to feed four people all spring and fall.
2. Square Foot Gardening Beds — Fit More Veggies Into Each Square Inch
Square foot gardening is an approach developed by Mel Bartholomew back in the 1970s. The concept is simple but brilliant: divide your bed into a grid of 1-foot squares, planting a different crop in each square.
How the Grid System Works
Rather than planting in long rows with wide spaces (as you would with traditional gardening), you plant based on how many plants fit into one square foot. Here’s how that breaks down:
| Plant | Per Square Foot |
|---|---|
| Tomatoes | 1 |
| Peppers | 1 |
| Lettuce | 4 |
| Spinach | 9 |
| Carrots | 16 |
| Radishes | 16 |
| Basil | 4 |
| Parsley | 1 |
This approach wastes virtually no space. A 4×4 foot bed has 16 squares — you could grow 16 different types of vegetables in an area smaller than a coffee table.
Why This Technique Is Better Than Old-School Row Gardening
Conventional gardening was built for huge farms using tractors. Square foot gardening is meant for people with tiny lots. You use less water, fewer seeds, and a fraction of weeding time.
It’s also easier to monitor what is growing where, rotate your crops from one season to the next, and deal with pests within individual squares.
3. Vertical Garden Beds — Grow Your Plants Up, Not Out
When ground space runs out, the solution is to go up. Vertical garden beds are mounted on walls, fences, or freestanding frames, turning a flat surface into a multi-level growing area.
Types of Vertical Growing Systems
Pocket planters: Fabric pockets mounted to a wall or fence. Each pocket holds one plant. These are great for herbs, lettuce, strawberries, and small peppers.
Stacked planter towers: Tiered containers stacked on top of each other. Water from the top tier streams down through every level.
Trellis systems: Not technically a “bed,” but planting climbing vegetables like cucumbers, peas, or pole beans along a trellis dramatically increases your yield per square foot.
PVC pipe planters: Drill holes into PVC pipes, pack them with soil, and mount horizontally on a fence. Each hole holds one plant.
Best Plants for Vertical Beds
- Lettuce and arugula
- Strawberries
- Herbs (basil, cilantro, mint, parsley)
- Cherry tomatoes (with support)
- Peas and beans (on a trellis)
A 6-foot vertical planter mounted to a 4-foot-wide fence segment can accommodate as many plants as a 24-square-foot ground bed. That’s a massive space gain.
4. Container Cluster Mini Farms — No Ground Required
Not all backyards have usable soil. Some yards are mostly concrete, gravel, or hard clay. This is where container clusters take center stage.
Building a Container Cluster
A container cluster mini farm is exactly what it sounds like: a grouping of pots, buckets, grow bags, and planters clustered together to create a productive little garden.
The key is variety. Use different container sizes for different crops:
- 5-gallon buckets — great for tomatoes, peppers, eggplant
- 10-gallon grow bags — ideal for potatoes, larger herbs, bush squash
- Long window boxes — perfect for lettuce, radishes, onions
- Half whiskey barrels — excellent for compact fruit trees or large tomato plants
Tips for Container Success
Always use a high-quality potting mix, not garden soil. Garden soil compacts in containers and blocks drainage.
Make sure every container has drainage holes. Waterlogged roots die fast.
Group containers close together. This creates a microclimate that retains moisture and attracts more pollinators.
Water containers more frequently than in-ground beds — they dry out faster, especially in summer heat.
5. Hugelkultur Beds — The Self-Watering Mini Farm Trick
Hugelkultur (pronounced “hoo-gul-cul-tur”) is a German composting and gardening technique that’s perfect for small-space mini farms. It may sound fancy, but the idea is simple.
How Hugelkultur Works
You build a mounded bed by layering logs, branches, leaves, grass clippings, and compost. As the wood rots inside over time, it acts like a sponge — soaking up water and releasing it slowly to plant roots.
After the first year, a well-built hugelkultur bed can cut your watering needs by more than half.
Building a Small Hugelkultur Bed
Here’s the basic layering order from bottom to top:
- Logs and large branches (the foundation)
- Smaller sticks and twigs
- Leaves and grass clippings
- Compost or aged manure
- Topsoil mixed with compost (the planting layer)
The completed bed will be mounded 1–3 feet above ground level. It settles down over several years as the wood decomposes.
Best Crops for Hugelkultur
- Squash and pumpkins
- Tomatoes
- Beans
- Kale and collards
- Potatoes
This type of bed is particularly useful in dry climates where water conservation is a priority.
6. Keyhole Garden Beds — Harvest While Feeding the Bed
A keyhole garden is a circular raised bed with a narrow path cut into the center — shaped like the keyhole of a door lock. At the center stands a compost basket.
The Genius of the Design
The circular layout means every plant is reachable from the keyhole path. The central compost basket is permanently fed with kitchen scraps. Water and nutrients from the basket slowly seep outward, feeding all the plants in the bed.
This is one of the most self-sufficient small-garden designs ever devised. Originally developed for drought-prone areas of Africa, it works in any climate.
Ideal Dimensions
A keyhole bed is generally 6 feet in diameter with a 2-foot path carved into the middle. The bed walls are usually 2–3 feet high, allowing you to work without bending all the way to the ground.
What to Grow in a Keyhole Bed
- Leafy greens (quickest to benefit from the central composting)
- Herbs
- Root vegetables
- Tomatoes and peppers around the outer edges
7. Lasagna Garden Beds — No Digging, No Tilling, No Stress
If digging up your yard sounds like too much work, lasagna gardening is for you. Also known as sheet mulching, this technique allows you to create a garden bed directly on top of your existing lawn or soil — no digging necessary.
How to Layer a Lasagna Bed
Just like making a real lasagna, you build it in alternating layers:
Layer 1 (Bottom): Cardboard or newspaper directly on top of the grass. This smothers the lawn and breaks down into the soil over time.
Layer 2: A few inches of compost or aged manure.
Layer 3: A thick layer of brown material — dried leaves, straw, shredded newspaper.
Layer 4: Another layer of green material — grass clippings, vegetable scraps, coffee grounds.
Keep alternating until the bed is 18–24 inches tall.
Top layer: 4–6 inches of finished compost and topsoil. This is where you plant.
The Waiting Game (And How to Skip It)
Ideally, you build a lasagna bed in fall and plant in spring, giving everything time to decompose. But if you’re impatient, add a thicker layer of finished compost on top and plant immediately.
Best for Beginners
This method is ideal for people who are brand new to gardening. It’s low-effort, improves soil quality dramatically over time, and works on almost any surface — even over concrete if you’re using it in combination with a frame.
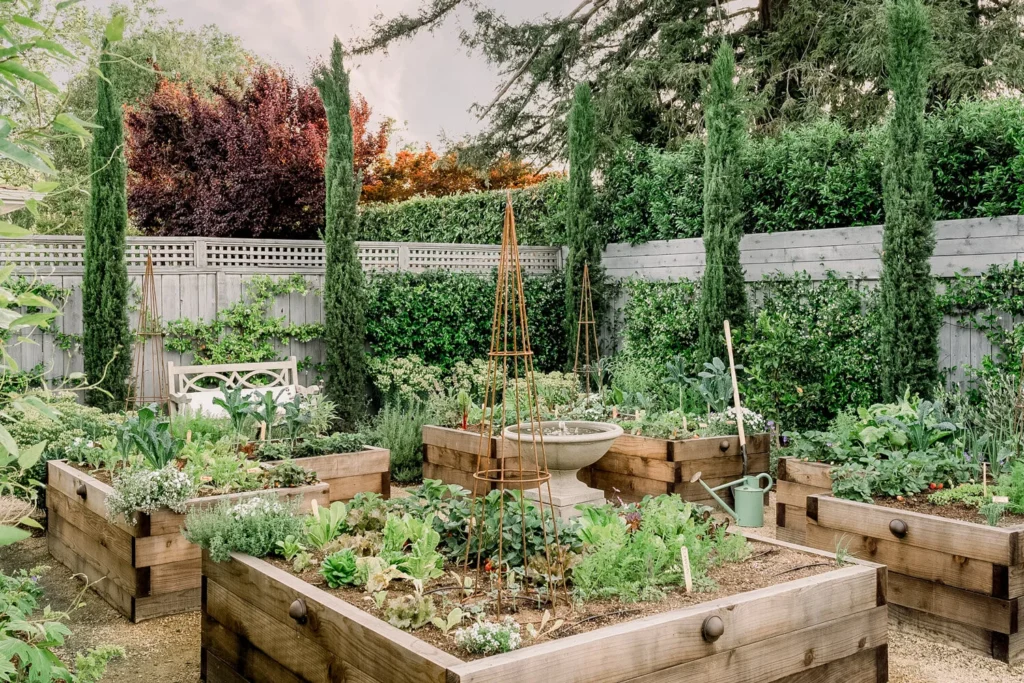
8. Tiered Step Garden Beds — Make Slopes and Small Hills Work for You
If your backyard is on a slope or hill, don’t fight it. Build a tiered step garden that transforms that slope into a series of flat growing terraces.
Why Slopes Are Actually an Advantage
Tiered gardens on slopes drain beautifully. Water flows from the top tier down into the tiers below, reducing waste. Taller tiers at the back also create natural shade for lower-growing crops that prefer cooler conditions.
Visually, a tiered step garden is one of the most attractive mini farm designs you can create. It turns an awkward yard feature into a stunning edible landscape.
Building the Tiers
Use timber, stone, brick, or concrete blocks to build the walls for each tier. Each level should have at least 12 inches of soil depth.
Stagger the tiers so each level gets its own sun exposure. Taller plants (like tomatoes or corn) go on lower tiers so they don’t block sunlight from upper tiers.
Planting Strategy for Tiered Beds
| Tier Level | Best Crops |
|---|---|
| Top (most sun) | Herbs, lettuce, radishes |
| Middle | Peppers, beans, beets |
| Bottom (most space) | Tomatoes, squash, cucumbers |
9. Windowsill-to-Backyard Seedling-to-Bed System — Make the Most of Every Growing Day
This final idea isn’t a single bed type — it’s an entire mini farm system that extends your growing season by starting plants indoors before transferring them to your outdoor beds.
The Concept
Most vegetable seeds don’t germinate well when temperatures are cool. Waiting until it is safe outside means losing weeks — sometimes months — of growing time. The solution is to start plants indoors on a windowsill or under grow lights, then transfer them to your outside beds once conditions become favorable.
This system works seamlessly with all of the bed types above. For more inspiration and detailed guides on building your own productive outdoor growing space, visit Backyard Mini Farms — a great resource for small-space growers at every level.
How to Run the System
Step 1: Start seeds indoors 6–8 weeks before your last expected frost date. Use seed trays or small pots filled with seed-starting mix.
Step 2: Place them in a sunny south-facing window or under a grow light for 14–16 hours per day.
Step 3: Once seedlings are 3–4 inches tall and the weather is warming, harden them off by setting them outside for a few hours each day over 7–10 days.
Step 4: Transplant into your outdoor mini farm beds.
Step 5: Immediately start a second batch of seeds indoors to continue the harvest cycle.
Why This System Can Double Your Output
By staggering your plantings this way, you’re never waiting around for an empty bed. When one crop finishes, a new transplant is already ready to go in. This technique, known as succession planting, can dramatically boost your total harvest from the same small space. The University of Minnesota Extension has a helpful guide on starting seeds indoors for those who want to dive deeper into this method.
All 9 Mini Farm Bed Types: Side-by-Side Comparison
| Bed Type | Cost to Build | Skill Level | Best For | Watering Needs |
|---|---|---|---|---|
| Classic Raised Bed | $50–$150 | Beginner | Most vegetables | Moderate |
| Square Foot Garden | $50–$150 | Beginner | Maximum variety | Moderate |
| Vertical Garden | $30–$100 | Beginner | Herbs, greens | Frequent |
| Container Cluster | $40–$200 | Beginner | No-ground setups | Frequent |
| Hugelkultur Bed | $10–$50 | Intermediate | Drought-prone areas | Low (after year 1) |
| Keyhole Garden | $60–$150 | Intermediate | Self-sustaining setups | Low |
| Lasagna Garden | $20–$60 | Beginner | No-dig installations | Moderate |
| Tiered Step Garden | $100–$300 | Intermediate | Sloped yards | Moderate |
| Seedling-to-Bed System | $20–$80 | Beginner | Season extension | N/A |
Simple Tips to Get the Most Out of Your Backyard Mini Farm
Regardless of the type of bed you choose, these habits will help you grow more food with less effort:
Test your soil. Even raised beds benefit from a soil test every year or two. Knowing your pH and nutrient levels helps you fertilize smarter.
Companion plant. Certain plants grow better together. Tomatoes love basil nearby. Beans fix nitrogen that feeds corn. Research companion planting pairs to boost your yields.
Mulch generously. A 2–3 inch layer of straw or wood chip mulch around plants holds moisture, suppresses weeds, and moderates soil temperature.
Water at the base, not overhead. Wet leaves invite disease. Use drip irrigation or a watering can aimed at the soil for the best results.
Keep a garden journal. Write down what you planted, when you planted it, and how it performed. This is pure gold when planning next season.
FAQs About Backyard Mini Farms Vegetable Beds
Q: How much sunlight should a backyard mini farm vegetable bed get? Most vegetables need a minimum of 6 hours of direct sunlight per day. Leafy greens like lettuce and spinach can get by with 4–5 hours, making them ideal for partially shaded spots.
Q: What is the ideal size for a beginner vegetable bed? A 4×4 foot or 4×8 foot raised bed is the perfect starting point. It is small enough to manage easily but large enough to grow a meaningful variety of vegetables.
Q: Can I grow vegetables in a backyard mini farm without a lawn? Absolutely. Container clusters, vertical beds, and lasagna gardens all work on patios, concrete surfaces, and gravel yards. You don’t need native soil at all.
Q: How do I keep pests out of my small vegetable beds? Use floating row covers for insect protection. Companion planting (like marigolds around tomatoes) deters many common pests. Hand-picking larger pests like caterpillars is very effective in small beds.
Q: How often should I water my backyard vegetable beds? Most vegetable beds need 1–2 inches of water per week. In hot summer weather, containers may need watering every day. Check soil moisture by sticking your finger 2 inches into the soil — if it’s dry, it’s time to water.
Q: What vegetables grow best in small spaces? Lettuce, radishes, spinach, herbs, cherry tomatoes, bush beans, peppers, and kale are all excellent choices for small-space mini farms. Look for compact or “bush” varieties on seed packets.
Q: Is it cheaper to grow your own vegetables than to buy them? After the initial setup cost, yes — significantly cheaper. A single 4×8 raised bed can produce $400–$600 worth of vegetables per season in most climates. The break-even point is usually within the first or second growing season.
Conclusion — Start Your Mini Farm With One Bed
Starting a mini farm in your backyard doesn’t have to be overwhelming. You don’t need a huge yard, a big budget, or years of experience.
Start with one bed. Pick the idea from this list that best fits your space, your budget, and your lifestyle. Plant a few of your favorite vegetables. Learn as you grow.
Once you taste a tomato you grew yourself, or toss a salad made entirely from your own backyard, you’ll want to expand. That’s how mini farms grow — one bed at a time.
The 9 backyard mini farms vegetable beds in this guide give you everything you need to get started. Whether you choose a classic raised bed, a vertical wall planter, a no-dig lasagna garden, or a self-sustaining keyhole bed, the result is the same: fresh, homegrown food from your own small space.
Your mini farm is waiting. All it needs is you.