Meta Description: Growing vegetables to start a backyard mini-farm is easier than you think. Try 7 easy-to-grow vegetables literally right in your own backyard — even if you’ve never farmed a day in your life.
Vegetables Anyone Can Grow, 7 Easy Backyard Mini Farms
Ever looked at your backyard and thought “If only I could grow my own food there?”
You absolutely can — and it’s easier than a lot of people think.
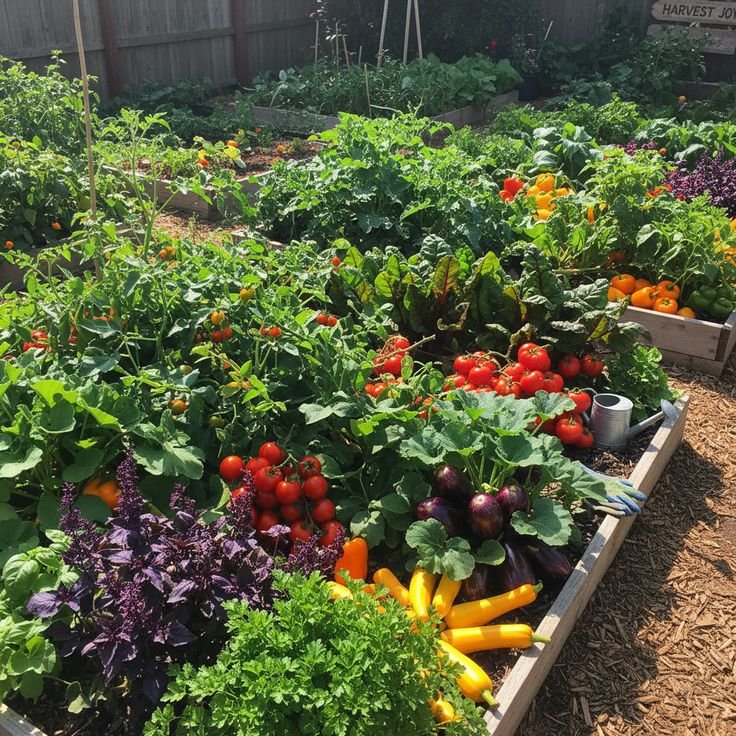
Backyard mini farms have become more popular over the past few years. More families are transforming small patches of lawn, raised beds or even container gardens into productive little growing spaces. You don’t need acres of land. You don’t have to be a farmer. You just require the correct vegetables and some advice.
In this article, we guide you through 7 of the easiest mini farm vegetables to grow in your backyard successfully. These plants are forgiving, productive and deeply rewarding to grow, whether you have a large yard or a small patio — or even just some containers.
Let’s dig in.
How to Start Your Own Backyard Mini Farm
Before we dive into the vegetables, let’s discuss why so many are making this switch.
Growing your own food is not merely a hobby. It’s a lifestyle change that comes with very real, tangible benefits.
You save money. One tomato plant can yield 10–20 pounds of tomatoes in one season. At grocery store prices, that’s a big savings.
You eat fresher. Store-bought produce can travel hundreds of miles before it arrives on your table. Garden to plate happens in just minutes with homegrown vegetables.
It’s healthy for your mental health. Studies have consistently found that gardening lowers stress and anxiety. There’s something so gratifying about growing your own food.
You have control over what you put in your food. No unknown pesticides. No mystery chemicals. Just healthy, homegrown goodness.
And maybe most importantly — it’s fun. There’s nothing more rewarding than seeing a tiny seed turn into something you can eat.
How to Choose Your Vegetables for Your Mini Farm
Not all vegetables make the best candidates for backyard growing. Some need a ton of space. Others demand perfect conditions. For a mini farm beginner, you want plants that are:
- Simple to grow from seed or transplant
- Tolerant of minor growing mistakes
- Productive in small spaces
- Quick to reward you with a harvest
These 7 vegetables check all of those boxes. They’re perfectly suited to raised beds, in-ground gardens and container setups. If you want to explore more ideas and tips beyond this article, Backyard Mini Farms is a great resource to bookmark for your growing journey.
Vegetable #1 — Tomatoes: Mini Farm Backyard Superstar
There’s a reason tomatoes are at the top of almost any backyard gardening list. They’re versatile, productive and nothing quite compares to the flavor of a fresh sun-warmed tomato harvested straight from the vine.
Choosing the Right Variety
If you’re really short on space, cherry tomatoes are your best friend. Varieties such as ‘Sun Gold’, ‘Sweet Million’ or ‘Juliet’ bear hundreds of fruits per plant and don’t take up much space.
For slicing tomatoes, try ‘Bush Early Girl’ or ‘Celebrity,’ both of which are disease-resistant and compact.
Container gardeners should choose patio varieties bred for pots, such as ‘Tumbling Tom’ or ‘Patio F Hybrid.’
Growing Tips That Actually Work
Tomatoes thrive on full sun. Give them at least 6–8 hours of direct sunlight each day and they will reward you generously.
Plant them deep. Plant the stem up to the lowest set of foliage. Roots will develop along the buried stem, resulting in a sturdier, more drought-resistant plant.
Water consistently. Irregular watering is one of the leading causes of problems like blossom end rot and cracked fruits. Try to give it about an inch of water a week.
Stake or cage them early. Don’t wait until the plant is weighed down and sagging — provide your support at planting time.
Common Beginner Mistakes to Avoid
One of the most common mistakes is planting too early. Tomatoes hate cold soil. Transplant outdoors only when nighttime temperatures remain consistently above 50°F.
Overwatering is another big one. Soggy soil leads to root rot. Allow the top inch of soil to dry out a bit between waterings.
Vegetable #2 — Zucchini: The Plant That Just Keeps Giving
If you’ve ever heard someone make a joke about anonymous zucchini deposits on their neighbor’s porch, that’s because this plant is unbearably productive.
One or two plants really is plenty for most families. Sometimes even a single plant is excessive.
Why Zucchini Is So Good on Mini Farms
Zucchini grows fast. You can get from seed to harvest in less than 60 days. The plants are resilient, versatile and seldom troubled by pests.
With a bit of training, they can also grow vertically. If you’re tight on horizontal space, you can train zucchini up a trellis to conserve room.
Planting and Caring for Zucchini
After your last frost date, sow seeds directly in the soil. Plant 2–3 seeds per hole, and thin down to the strongest plant when they are a few inches tall.
Zucchini loves warmth and sunlight. Provide it 6+ hours of sunlight and rich, well-draining soil.
Harvest often. This is critical. The more you harvest, the more the plant gives. Leave zucchini on the vine too long and you get a baseball bat — still edible, but tougher and less flavorful.
Once your plants start producing, check them daily. Seriously, daily.
Container Growing
You can even grow zucchini in containers, but size matters — at least a 5-gallon pot; more like 10 gallons if you can manage it. For tighter spaces, use a dwarf type such as ‘Astia’ or ‘Patio Star.’
Vegetable #3 — Lettuce: Fast, Fresh and Ideal for Smaller Spaces
If there is a crop on this entire list that is the easiest to grow, it would have to be lettuce. It grows quickly, it doesn’t take up much space, and you can harvest it using the “cut and come again” technique — snipping off outer leaves while the plant continues to grow.
The Cut-and-Come-Again Method Explained
Instead of pulling the whole plant out immediately, you pick off the outside leaves. Do not remove the center growth point (called the crown). The plant continues to grow fresh leaves for weeks or even months.
This technique allows you to continuously harvest one small patch of lettuce throughout the whole growing season for your salads.
Best Lettuce Varieties for Mini Farms
Loose-leaf types are the best for cut-and-come-again harvests. Try ‘Black Seeded Simpson,’ ‘Red Sails’ or ‘Oak Leaf.’
For heads, consider ‘Tom Thumb,’ a small buttery variety that matures in only 65 days and has a beautiful compact form for tight spots.
Where Lettuce Grows Well (and Where It Struggles)
Lettuce prefers cool weather. It is perfect for spring and fall growing in nearly all climates. Hot summer temperatures cause lettuce to “bolt” — it sends up a flower stalk, and the leaves become bitter.
In hot climates, plant it where it receives some afternoon shade. Or use shade cloth in the hottest months.
Lettuce grows nicely in shallow containers — window boxes even work well. The roots don’t go very deep, so you don’t need much soil volume.
Vegetable #4 — Green Beans: Dependable, Nutritious and Simple to Grow
Green beans (also known as snap beans or string beans) are a backyard mini farm staple for good reason. They’re forgiving, productive and yield a crisp snap when picked fresh off the vine.
Bush Beans or Pole Beans — Which to Grow?
This will be the first decision you make with green beans, and it will affect your setup.
Bush beans stay compact — typically no more than 2 feet tall. They don’t require staking or trellising. They tend to produce all their beans at once over a 2–3 week period, which is great for canning or preserving. ‘Provider’ and ‘Blue Lake Bush’ are reliable performers.
Pole beans grow tall — often 5–8 feet — and require a trellis or poles to climb. The upside? They bear beans continuously over a longer season. Classic choices are ‘Kentucky Wonder’ and ‘Rattlesnake.’
For most mini farm novices, bush beans are the better option to start with.
How to Properly Plant Green Beans
Green beans are direct-sown. They don’t transplant well, so skip the seed trays and plant directly into the garden bed after your last frost.
Plant seeds 1 inch deep and 2–3 inches apart. When they sprout, thin them to 4–6 inches.
Don’t add nitrogen-heavy fertilizer. Beans fix their own nitrogen from the air — too much supplemental nitrogen increases leafy growth and cuts back bean production.
Water regularly, in particular when flowers and pods are forming.
Vegetable #5 — Cucumbers: Crunchy, Refreshing and Unexpectedly Prolific
Cucumbers are one of those vegetables that taste exponentially better plucked from the garden than anything you’d find in a grocery store. They’re crunchy, full of water and have a clean flavor that grocery store cucumbers just can’t match.
Essential Steps for the Best Cucumbers
Cucumbers are warm-weather lovers. Don’t rush them. Plant when soil temperatures are at least 60°F.
They also need consistent moisture. Cucumbers are roughly 95 percent water — when the plant doesn’t get enough, the fruits become bitter and tough.
Mulching around the base of the plant helps maintain soil moisture and suppress weeds.
Growing Vertically to Save Space
Like zucchini, cucumbers spread out a great deal if they’re allowed to sprawl. Train them up a trellis and you can grow the same number of plants in half the footprint.
Vertical growing also keeps the fruits clean, improves airflow (and disease prevention) and makes harvesting a lot easier.
Top Varieties for Backyard Mini Farms
For slicing cucumbers, consider ‘Marketmore 76’ or ‘Spacemaster,’ which is specifically bred for small spaces.
For pickling, ‘National Pickling’ is an old-school tried-and-true.
For something slightly different, try ‘Lemon Cucumber’ — a yellow variety about the size of a tennis ball that is mild, crisp and prolific.
Vegetable #6 — Radishes: The Quickest Harvest You’ll Ever See
Radishes are a great confidence booster for beginners. Certain varieties will go from seed to harvest in as little as 22–25 days.
That’s under a month from planting to eating. For first-time vegetable growers, pulling your first radish out of the ground is truly thrilling.
Why You Need to Grow Radishes on Your Mini Farm
They fill gaps. You could be harvesting radishes in the same bed while other vegetables are still getting established. They’re great companion plants and occupy very little space.
They’re also incredibly low-maintenance. Sow, water, wait a few weeks, harvest. That’s basically it.
How to Plant and Harvest Radishes
Direct-sow seeds in the soil, half an inch deep and an inch apart. They germinate quickly — usually within 3–5 days.
Thin them when they reach about an inch in height. Overcrowding causes radishes to take on strange shapes.
Harvest promptly. When left in the ground for too long, radishes become woody and pithy. When they’re the size of a marble or small golf ball, pull them.
Beyond the Basic Red Radish
The common small red globe radish is hardly all there is — there’s a whole wide world to discover. Daikon radishes are long, mild and popular in Asian cooking. French Breakfast radishes are elongated and crisp. Watermelon radishes have a green skin and a beautiful pink inside — and their taste is milder than you’d expect.
Vegetable #7 — Spinach: Nutrient-Dense and Ideal for Cool Weather
Last on this list is spinach, one of the most nutritious vegetables you can grow at home. It’s packed with iron, vitamins A and C and a host of other nutrients.
It also does well in cooler weather — making it a perfect candidate for early spring and fall planting, when many other vegetables aren’t yet in season.
Growing Spinach Successfully
Spinach likes cool temperatures — between 35°F and 75°F. It will bolt (flower and turn bitter) in hot weather, just like lettuce.
Plant seeds directly into the garden bed approximately half an inch deep. Spinach germinates easily even in cooler soil — you can start it about 4–6 weeks before your last frost date.
Thin seedlings to about 3–4 inches apart for best leaf development.
Like lettuce, harvest outer leaves regularly. This keeps the plant productive for weeks.
Best Varieties for Mini Farm Growing
‘Bloomsdale Long Standing’ is a classic, crinkle-leaved variety well known for bolt resistance and good flavor.
‘Space’ is a smooth-leaved, compact variety that’s great for container growing.
‘Giant Noble’ has large, flat leaves and is a good choice if you want high-yield harvests.
How to Plan Your Backyard Mini Farm Layout
It makes a huge difference if you plan your space before you plant. Here’s an approach that works really well for beginners.
Start Small and Expand
A 4×8 foot raised bed is the perfect size for beginners. It’s large enough to grow a few different types of vegetables, but not so much that you feel overwhelmed.
You can easily fit tomatoes (1–2 plants), lettuce (a row or two), radishes (a row) and spinach in one bed with no crowding.
As you become more confident, gradually add additional beds or containers.
Think About Sunlight First
Spend a day observing your yard before you spend one penny on seeds. Note where you get full sun (6+ hours), partial sun (3–6 hours) and shade (under 3 hours).
Put your sun-loving vegetables — such as tomatoes, cucumbers and zucchini — in the sunniest areas. Lettuce, spinach and radishes all tolerate partial shade and can fill in the shadier corners.
Companion Planting Basics
Some vegetables grow better together. Tomatoes and basil are a classic pairing — basil is said to repel certain pests and improve tomato flavor. Radishes planted near cucumbers can help deter cucumber beetles.
Green beans and cucumbers are also good companions. Do not plant fennel near most vegetables — it can stifle many common garden plants.
Soil, Watering and Feeding — The Fundamentals You Should Know
What Makes Good Garden Soil
A productive mini farm is built on healthy soil. The ideal vegetable garden soil is:
- Loose and well-draining (never compacted or waterlogged)
- Rich in organic matter
- Slightly acidic to neutral (pH 6.0–7.0)
When making a raised bed, a blend of 60 percent topsoil, 30 percent compost and 10 percent perlite or coarse sand makes for good growing material.
If you’re planting in the ground, mix 2–4 inches of compost into your existing soil before planting.
Watering Smarter, Not More
Most vegetable gardening mistakes are related to water — whether it be over- or under-watering.
A good rule of thumb: most vegetables require about 1 inch of water per week from either rain or irrigation. In hot, dry spells, make that 1.5–2 inches.
Water deeply and less frequently. This encourages roots to grow deep and makes plants more resistant to drought. Watering often and too shallowly leads to root systems that are more superficial.
Water in the early morning where possible. Watering in the evening keeps foliage wet overnight, which promotes fungal diseases.
A drip irrigation system or soaker hose is a worthwhile investment for any mini farm. It applies water right to the root zone, minimizes evaporation and keeps foliage dry. According to the University of California Agriculture and Natural Resources, drip irrigation can reduce water use by up to 50 percent compared to conventional sprinkler systems — a major win for both your plants and your water bill.
Feeding Your Mini Farm Vegetables
Vegetables are heavy feeders. They require nutrients in order to grow, flower and produce.
The best general-purpose fertilizer is compost. Incorporate it into the soil before planting and apply it as a top dressing during the season.
At planting time, a balanced slow-release granular fertilizer (such as a 10-10-10 formula) provides plants with an excellent head start.
For quick fixes, liquid fertilizers such as fish emulsion or liquid kelp can be applied every 2–3 weeks during the growing season.
One exception: green beans and other legumes do not require nitrogen fertilizer. They produce their own.
How to Deal With Pests Without Losing Your Mind
Every garden gets pests. It’s just part of growing food. The trick is to notice trouble early and respond sensibly — not overreact.
The Most Common Mini Farm Pests
Aphids are small, soft-bodied insects that congregate on new growth and suck plant juices. They’re easy to handle — a good blast of water knocks them off. An insecticidal soap spray finishes the job.
Caterpillars (especially cabbage loopers and tomato hornworms) can eat plants rapidly. Pick them off by hand when you see them. Bacillus thuringiensis (Bt) is an organic spray that works specifically on caterpillars.
Squash bugs attack zucchini and cucumbers. Examine the undersides of leaves for their bronze-colored egg clusters and scrape them off.
Slugs love lettuce and spinach. A shallow dish of beer buried to the rim next to affected plants serves as an excellent trap.
Prevention Is Better Than Treatment
Plants in good health are more resistant to pests than stressed ones. Keep your plants well-watered and fertilized.
Planting flowers nearby will attract helpful insects such as ladybugs, lacewings and parasitic wasps. Marigolds and nasturtiums are especially good companions in vegetable gardens.
Rotate your crops each year. Planting the same vegetable in the same place year after year builds up pest populations and soil diseases. Try to rotate families of vegetables to different beds each season.
Backyard Mini Farms Seasonal Planting Calendar
Timing matters. Plant at the wrong moment and even the simplest vegetables will struggle.
Here’s a basic seasonal breakdown for temperate climates (adjust based on your USDA hardiness zone):
Early Spring (4–6 weeks before last frost): Lettuce, spinach, radishes. These cool-season crops tolerate light frosts.
After Last Frost Date: Tomatoes, cucumbers, zucchini, green beans. These warm-season crops require settled, frost-free weather.
Summer: Keep harvesting warm-season crops. Sow a second round of lettuce and spinach in a shaded spot or under shade cloth.
Early Fall (6–8 weeks before first frost): Plant another round of lettuce, spinach and radishes. Cool fall weather brings out the best flavors in these crops.
Frequently Asked Questions About Backyard Mini Farms Vegetables
Q: How much space do I really need for a backyard mini farm?
All you need is 4 square feet of space to start. One 4×4 raised bed or a group of containers on a patio can produce lettuce, radishes, spinach and even a small tomato plant. Space is hardly ever the limiting factor — sunlight and soil quality are much bigger deal-breakers.
Q: Do I have to make raised beds, or can I just plant in the ground?
Both work well. Raised beds offer more control over soil quality and usually warm up quicker in the spring. In-ground planting costs less to set up. If your existing soil is heavy clay or low quality, raised beds are preferable.
Q: How often should I water my mini farm?
Most vegetable gardens require approximately 1 inch of water each week. In hotter weather, make that 1.5–2 inches. The secret is watering deeply a couple of times a week instead of small amounts every single day. Check the soil — if the top inch is dry, it’s time to water.
Q: Can I grow these vegetables in containers on an apartment balcony?
Yes, absolutely. Lettuce, radishes, spinach and herbs thrive in containers. Tomatoes and cucumbers require larger pots (at least 5 gallons) but are totally doable. Just make sure your containers have drainage holes and choose dwarf varieties.
Q: When is the ideal time to start a backyard mini farm?
Spring is the most popular season to start, but you can get going in pretty much any season. If it’s summer, begin with tomatoes, cucumbers, zucchini and green beans. In fall or early spring, start with lettuce, spinach and radishes.
Q: Are these vegetables safe for kids to help grow?
Absolutely. Gardening makes a great activity for kids. Radishes are particularly fun for children because they grow so quickly and deliver results you can see in a short period of time. Engaging kids in planting, watering and harvesting instills healthy habits and helps them understand where their food comes from.
Q: How do I know when each vegetable is ready to harvest?
Each one has visual cues. Tomatoes turn their full color and yield slightly when squeezed. Zucchini is best harvested at 6–8 inches. You can harvest lettuce and spinach leaves as soon as they’re a couple of inches long. Radishes are done when they reach marble-to-golf-ball size. Cucumbers should be firm and evenly green. Green beans should snap cleanly when bent.
Building It All Together — Your Mini Farm Begins Today
It isn’t complicated to grow your own backyard mini farm vegetables. It only requires a little advance planning, some patience and a willingness to learn from experience.
Start small. Choose two or three vegetables from this list that most excite you and go from there. Don’t feel like you have to grow everything in your first season.
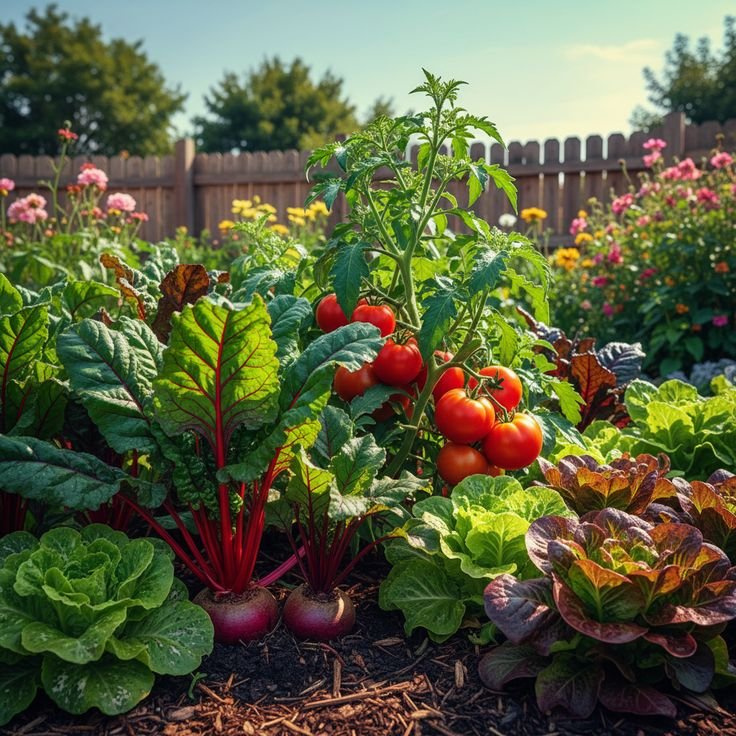
The seven vegetables on this list — tomatoes, zucchini, lettuce, green beans, cucumbers, radishes and spinach — are truly beginner-friendly. They’re forgiving of mistakes, productive in small spaces and rewarding to eat.
Every master gardener you’ve ever admired began just where you are right now — with a plot of dirt, some seeds and many questions.
Your backyard mini farm is ready. The best time to start is always now.
Ready to take the next step? Select one vegetable from this list, purchase a packet of seeds and plant it this week. You will be surprised by what you are able to grow.