Meta Description: A backyard mini farm planning mistake can translate into lost time, lost money and lost harvests. 6 Mistakes to Avoid for a Successful Backyard Farm (and How Not to Make Them)
My Regretful Backyard Mini Farms Planning Mistakes And How To Avoid Them
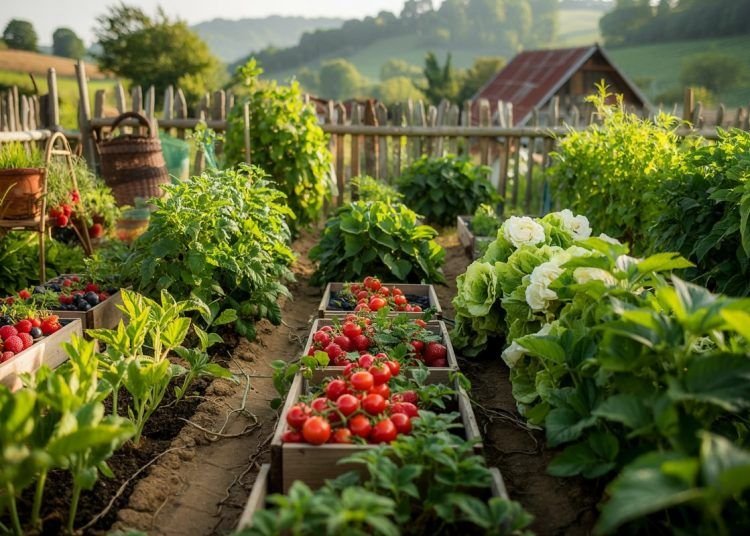
Beginning a backyard mini farm is an exciting thing. You envision rows of fresh vegetables, carefree chickens and herbs sprouting just steps from your door. But the reality? Planning missteps can render that dream a stressful, expensive disaster.
I learned this the hard way.
After years of experimenting in a small space, I want to share six big backyard mini farm planning mistakes I made — so you don’t have to make them yourself. Whether you’re a newbie or well into the muck, these lessons can save you hundreds of dollars and a heap of frustration.
Let’s dig in.
Mistake No. 1: I Dismissed the Sun — And My Plants Suffered
The First Thing You Should Do: Sunlight Mapping
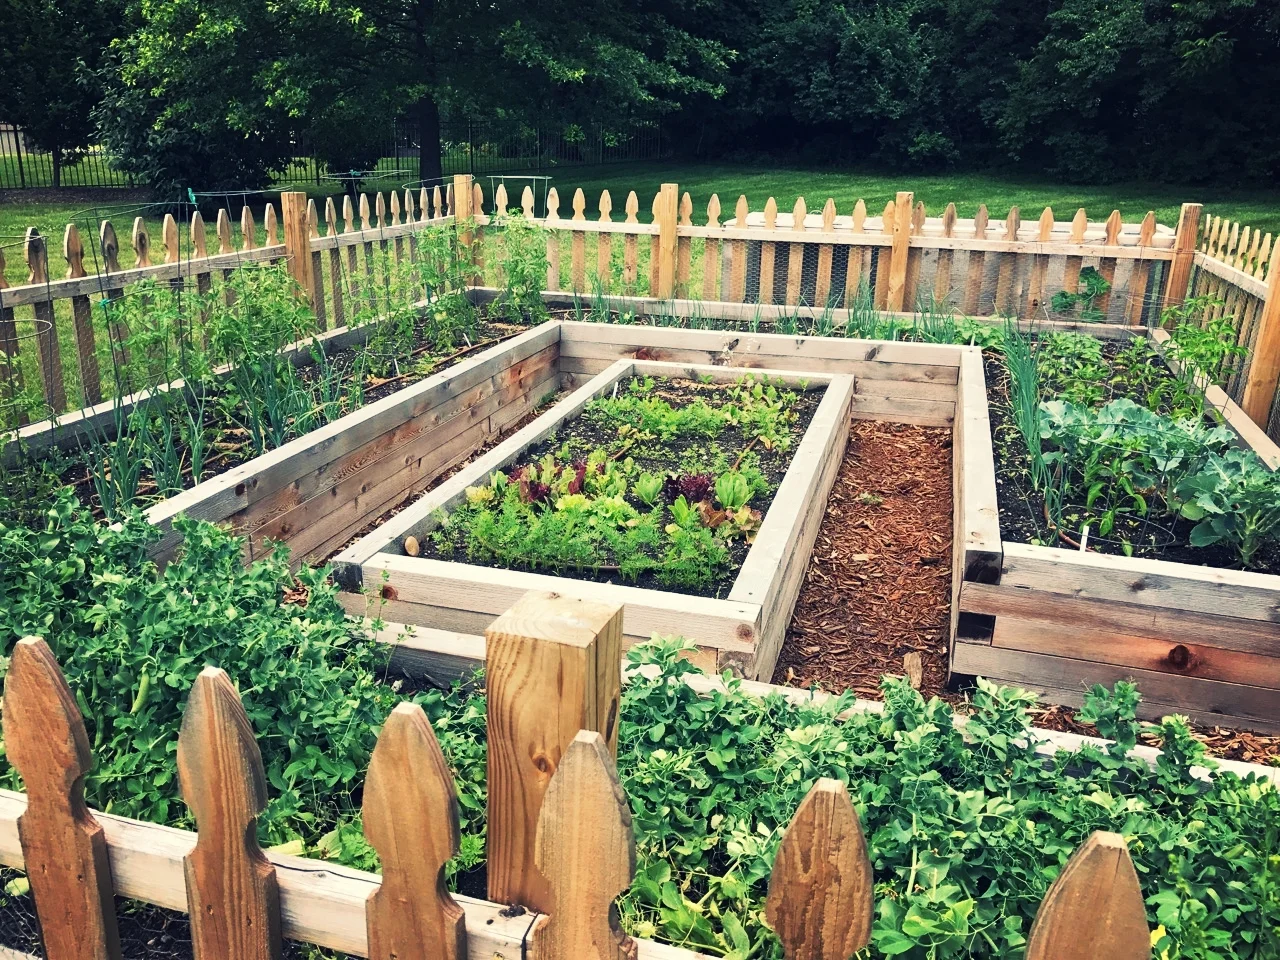
When I created my backyard mini farm, I chose the prettiest corner of my yard. It looked perfect. Level ground, easy access, near the water hose.
The only issue: it received only about three hours of direct sunlight daily.
Vegetables need 6 to 8 hours of full sun most days, though some prefer partial shade. Tomatoes, peppers, squash, beans — all of them need that light. Without it, plants become tall and spindly, much less productive, and easy fodder for disease.
I planted anyway. I thought: “It’s going to be OK.”
It wasn’t fine.
How to Actually Map Your Sunlight
Before you plant a single seed in the ground, devote one full day to simply watching your yard. Check it every hour. Take note of where the sun hits and for how long.
For an even simpler estimate of shade patterns from trees and buildings, you can use free tools such as the Sun Seeker app or Google Maps satellite view.
| Sunlight Level | Hours Per Day | Best For |
|---|---|---|
| Full Sun | 6–8+ hours | Tomatoes, peppers, squash, corn |
| Partial Sun | 3–6 hours | Lettuce, spinach, herbs, kale |
| Shade | Less than 3 hours | Mushrooms, some ferns (not most vegetables) |
Use your sun map to plan your growing zones. Plant your heavy feeders — tomatoes and cucumbers — where the sun is most intense. Reserve the shadier areas for leafy greens or compost piles.
Mistake No. 2: I Planted Too Much, Too Quickly
The “I Want Everything” Trap
My first seed order still stands out in my memory. I purchased tomatoes, peppers, zucchini, watermelon, pumpkins, beans, carrots, beets and three kinds of lettuce — also basil, cilantro, dill and lavender.
For a 10×12 foot space.
This is one of the most common beginner mistakes when planning backyard mini farms. The thrill kicks in and you simply … order all the things. You think: “It’s a mini farm; I should plant as much as I can.”
But here’s what actually happens:
- Plants fight over sunlight, space, water and nutrients
- You fail to keep up with watering, weeding and harvesting
- Crowded beds become a haven for pests and disease
- You get overwhelmed and quit
Start Small, Grow Smart
Instead, start with 5 to 7 types of plants your family eats anyway. Space plants so they can breathe. One zucchini plant requires 3 to 4 square feet. A watermelon vine will spread 6 feet in every direction.
Use the Square Foot Gardening method as a guideline:
| Plant | Space Required Per Plant |
|---|---|
| Tomato | 1 square foot (caged/staked) |
| Zucchini | 3–4 square feet |
| Pepper | 1 square foot |
| Carrot | 16 per square foot |
| Lettuce | 4 per square foot |
| Basil | 4 per square foot |
Plan on paper first. Draw your beds. Measure everything. Only then should you begin to purchase seeds or transplants.
Mistake No. 3: I Underestimated Water — By a Lot
Water Is the One Thing You Can’t Skip
Here’s a little secret nobody mentions while you’re scrolling through pretty garden pictures on Instagram: plants are thirsty. Constantly.
My little backyard mini farm needed watering almost daily during peak summer. Sometimes twice. And because I hadn’t planned ahead, I found myself dragging hoses around every morning before work — or forgetting altogether and coming home to wilted plants.
Lack of water is among the top reasons for garden crop loss. It influences fruit size and flavor as well as overall plant health. Under-watered tomatoes crack. Under-watered peppers drop their flowers. Under-watered lettuce turns bitter and bolts to seed.
Plan Your Water System Before You Plant
The fix I wish I had from day one? Drip irrigation.
A simple drip irrigation kit for a small backyard farm can range from $30 to $80. It delivers water directly to the root zone, reduces water waste by up to 50 percent, and you can hook it up to a timer so it automatically waters your plants.
Here’s a simple comparison:
| Watering Method | Water Efficiency | Time Required | Cost to Set Up |
|---|---|---|---|
| Hand watering | Low | High (daily) | Almost free |
| Sprinkler | Medium | Medium | $20–$50 |
| Drip irrigation | High | Very low (automated) | $30–$80 |
| Soaker hose | High | Low | $15–$40 |
Also consider your water source. Is your hose close enough? Do you need a rain barrel? Is your water pressure sufficient for drip lines? These are questions to address in the planning stages — not after you have 40 tomato seedlings in the ground.
Mistake No. 4: I Didn’t Pay Any Attention to Soil Quality
“Dirt Is Dirt” — The Most Expensive Lie I Told Myself
I thought the soil in my yard was fine for growing food. After all, grass grows there. Trees grow there. Why wouldn’t vegetables?
This line of reasoning cost me a full growing season.
The soil in most backyards is hard, nutrient-poor and full of clay or sand. It doesn’t drain well, it doesn’t hold moisture properly, and it’s often lacking the organic matter that vegetables require to thrive.
In my case, a basic soil test showed my soil had a pH of 5.2 — far too acidic for most vegetables, which prefer between 6.0 and 7.0 — and was severely deficient in nitrogen and phosphorus.
Test First, Then Fix
A simple soil test kit can be found for about $15 at any garden center, or you can mail a sample to your local agricultural extension office for a more detailed analysis.
Once you know what you’re dealing with, you can fix it:
Common Soil Problems and Solutions:
- Too acidic (low pH): Add garden lime
- Too alkaline (high pH): Add sulfur or peat moss
- Poor drainage: Incorporate compost and perlite, or create raised beds
- Nutrient deficiency: Amend with aged compost, balanced fertilizer, or worm castings
- Compacted soil: Aerate and mix in organic matter
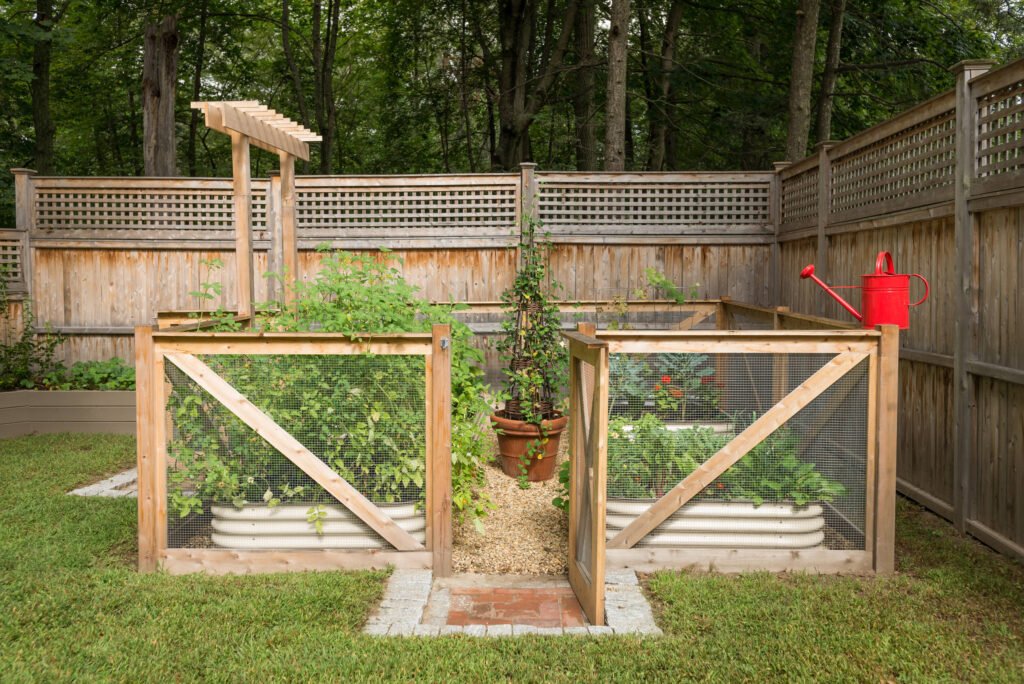
If you want the fastest shortcut, skip the guesswork entirely — raised beds with purchased soil mix are the way to go. The typical composition of a good raised bed mix is about 60% topsoil, 30% compost and 10% perlite or coarse sand. This provides your plants with ideal growing conditions from day one.
For more tips on building and managing a productive growing space, visit Backyard Mini Farms — a great resource for home growers at every level.
Raised Beds vs. In-Ground Growing
| Factor | Raised Beds | In-Ground |
|---|---|---|
| Soil control | Full control | Limited |
| Drainage | Excellent | Depends on soil |
| Weed pressure | Lower | Higher |
| Startup cost | Higher | Lower |
| Accessibility | Easier | Standard |
| Best for | Beginners, poor soil areas | Those with good native soil |
Mistake No. 5: I Didn’t Have a Plan for Pests and Disease
“I’ll Cross That Bridge When I Come to It” Doesn’t Work
Picture this: it’s July. Your tomato plants are big and green with small fruit on the vine. You’re already imagining the pasta sauce and caprese salad. Then one morning you step outside and half the leaves are stripped, spattered with yellow spots, or completely wilted.
That was me. Every summer for the first three years.
The reality is that pests and disease are not surprises. They are guarantees. At some point, every backyard mini farm will face aphids, caterpillars, fungal problems or root rot. The difference between a harvest that fails and one that succeeds is whether you have a plan in place before the problem begins.
I didn’t have a plan. I would be Googling symptoms at 10pm, ordering products that wouldn’t arrive for a week, and by the time I got around to attempting to treat anything, the damage was done.
Incorporate Pest Management Into Your Planning
Here’s what I do now that actually works:
Prevention first:
- Rotate crops every season to prevent pests from building up in the soil
- Grow companion flowers such as marigolds and nasturtiums to help ward off common pests
- Give plants plenty of space for airflow (lessens fungal disease)
- Water at the roots, not on the foliage
Early detection:
- Walk around the garden daily, flipping leaves over to look for eggs and insects
- Learn what healthy plants look like so you can identify problems early
Treatments — keep these on hand:
| Pest/Problem | Organic Solution | When to Apply |
|---|---|---|
| Aphids | Neem oil spray or insecticidal soap | At first sign |
| Caterpillars/worms | Bt (Bacillus thuringiensis) spray | When larvae are visible |
| Fungal disease | Copper fungicide or baking soda spray | Preventively and at first sign |
| Slugs | Iron phosphate bait | Evening, near soil level |
| Whiteflies | Yellow sticky traps + neem oil | Ongoing |
According to the University of California Integrated Pest Management Program, early identification and consistent monitoring are the most effective strategies for keeping garden pests under control without heavy chemical use.
Having these products already on your shelf means you can act fast. When it comes to garden pests, prompt action is everything.
Mistake No. 6: I Never Considered Layout and Workflow
A Gorgeous Farm You Can’t Actually Use
My first backyard mini farm layout looked fantastic on paper. Neat rows, raised beds in a grid, everything symmetrical. I was proud of the design.
Then I actually tried to use it.
The beds were too wide to reach the middle without stepping in. The pathways between beds were so narrow I couldn’t kneel down without bumping into things. My compost bin sat unused at the far end of the yard. The tools were stored in the garage, leaving me running back and forth constantly.
Great layout isn’t just about aesthetics. It has to do with how you actually move through and interact with your space every day.
Design It for How You Actually Live
Here are the layout rules I wish I had followed from day one:
Bed width: Raised beds should never be wider than 4 feet. This allows you to reach the center from either side without stepping in. If the bed is against a wall or fence, limit its width to 2 feet.
Pathway width: Main pathways should measure between 24 to 30 inches. This allows you to kneel, use a wheelbarrow, or carry a harvest basket comfortably.
Compost location: Your compost bin should be located close to your growing beds — within 20 to 30 feet. If it’s not convenient, you won’t use it properly.
Tool storage: Keep a small outdoor tool organizer or designated space near your garden so you’re not wasting time walking back and forth.
Water access: Every bed should be reachable by a hose or drip line without long extensions.
A Simple Layout Checklist
| Element | Recommended Measurement / Placement |
|---|---|
| Raised bed width | Maximum 4 feet (2 feet if against a wall) |
| Pathway width | 24–30 inches minimum |
| Compost bin location | Within 30 feet of main beds |
| Water source | Within easy hose reach |
| Tool storage | Near garden entrance |
| Seating/work area | Shaded spot near beds |
Think as well about what you grow where. Tall crops like corn or trellised tomatoes should go on the north side of your garden so they don’t shade shorter plants. Heavily producing plants you harvest daily — tomatoes and peppers — should be closest to your back door for easy access.
The Reality of Backyard Mini Farm Planning
Every single one of my mistakes boiled down to the same thing: I was too eager to start growing and skipped the planning.
Planning feels slow. It feels like you’re going nowhere. But every hour you spend preparing before you plant will save five hours of solving problems later on.
A backyard mini farm doesn’t have to be fancy. It just needs to be thought through.
Here’s a quick checklist of everything to review before you get started:
| Planning Step | Why It Matters |
|---|---|
| Map your sunlight | Sets plants up for getting the light they need |
| Start small | Prevents overwhelm and crowding |
| Plan your water system | Reduces daily labor and crop stress |
| Test and improve your soil | Gives plants the nutrition they need |
| Create a pest management plan | Avoids harvest failure |
| Design for daily workflow | Makes farming easier and more sustainable |
Frequently Asked Questions About Planning Backyard Mini Farms
Q: What is the minimum space I need for a mini farm in my backyard? You can begin a productive mini farm in as little as 100 square feet. Even a 4×8 foot raised bed can yield substantial amounts of vegetables. Stick to high-yielding crops like lettuce, tomatoes and herbs for the most return per square foot.
Q: Is setting up a backyard mini farm expensive? It doesn’t have to be. A basic setup with two 4×8 raised beds, soil, seeds and simple drip irrigation might cost $150 to $300. You can save by making your own compost, constructing beds using repurposed wood and starting plants from seed rather than purchasing transplants.
Q: What crops are easiest to grow on a backyard mini farm? Good plants for beginners include zucchini, lettuce, radishes, green beans, cherry tomatoes and herbs like basil, chives and kale. These crops are forgiving, productive and grow relatively quickly.
Q: What are the natural ways to keep pests away from my backyard mini farm? Plant companion flowers such as marigolds, lavender and nasturtiums next to your vegetables. They attract beneficial insects and deter common pests. Also keep your garden tidy, rotate crops every season and inspect plants daily so you catch problems early.
Q: Do you have to use raised beds for a backyard mini farm? Not necessarily, but they do make things easier — especially if you have poor soil quality. Raised beds give you total control over your soil mix, drain better than in-ground beds and tend to have fewer weeds. They are the ideal starting point for beginners or anyone dealing with heavy clay or rocky ground.
Q: When is the right time to start planning a backyard mini farm? The optimal time to plan is two to three months before your local last frost date. That gives you time to build beds, amend soil, order seeds and set up irrigation before planting season starts. In many parts of the country, that means planning in late winter — January or February.
Q: How can I tell if my backyard gets enough sun for a mini farm? Spend one day watching your yard and keep track of how many hours of direct sunlight each area receives from 8am to 6pm. Most vegetable crops flourish in any area that gets 6 or more hours of direct sun. You can also use the Sun Seeker or Sun Surveyor app to model sun patterns throughout the year.
Final Thoughts
We all make backyard mini farms planning mistakes — it’s all part of the journey. The key is learning from them, and ideally, learning from someone else’s mistakes before making your own.
Start with your sun map. Keep your first season simple. Install your water system before planting. Fix your soil before you have to. Build a pest management toolkit. And design your space for the way you actually live — not just the way it looks in photos.
Do those six things, and your backyard mini farm will have a far better chance of being everything you dreamed it would be when you first imagined growing your own food.
It’s all worth every bit of effort. I promise.