Meta Description: 4 Easy Backyard Mini Farms Starter Projects Anyone Can Build — find out simple, affordable projects to grow your own food in the backyard without any farming experience at all.
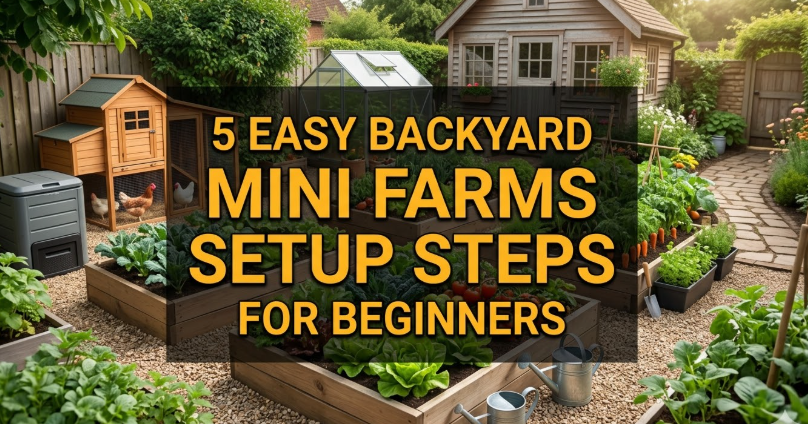
4 Backyard Mini Farms Starter Projects You Can All Make
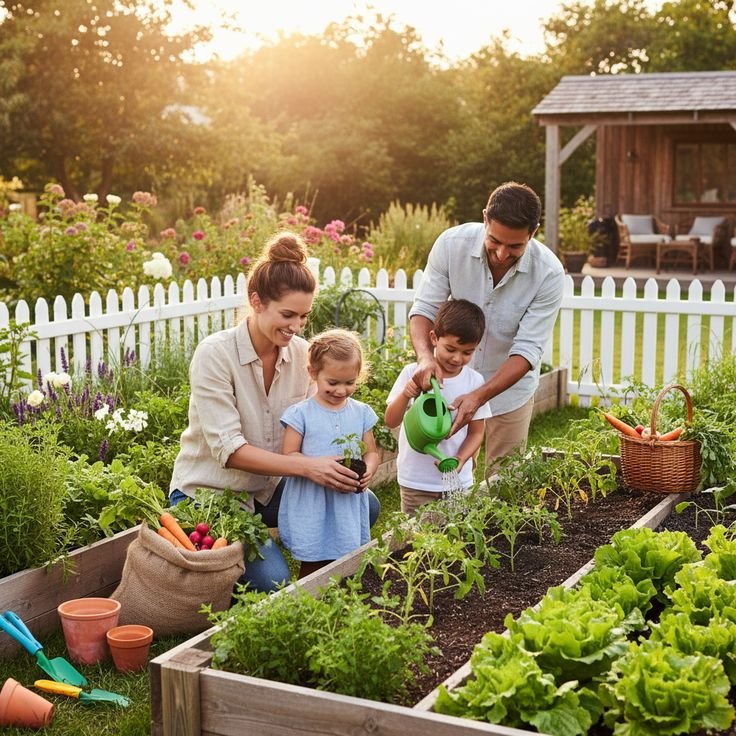
Your Yard Is a Farm That Hasn’t Been Planted Yet
Farming is often seen as acres of farmland, thousands of dollars worth of equipment, and years of experience. That is simply not true.
You can mini farm in your yard this weekend. Your yard does not have to be big. It doesn’t matter if you’ve never grown anything in your life. Look for a project that occupies an in-between space.
Backyard mini farms are literally just that. It is an on-site mini food-growing setup. You can raise vegetables, herbs, eggs, or even fish — all on your own property.
Every year, more families are doing just this. Food prices keep rising. Consumers are increasingly interested in understanding the source of their food. And to be perfectly honest, there’s just something deeply gratifying about eating something you grew yourself.
This guide includes four beginner-friendly mini farm projects for your backyard. They are all practical, affordable, and manageable — even for total beginners. By the time you’re done, you’ll have a clear idea of what project would work in your space, your budget, and with your goals.
Let’s dig in.
Why You Should Start a Backyard Mini Farm Now
It’s good to know why a lot of folks are making this move before diving into the projects.
Growing your own food pays off over time. One tomato plant can yield 10 to 15 pounds in a season. A small herb garden can save you anywhere from $5 to $10 a week at the grocery store.
There are also health benefits. Homegrown food is fresher. It has more nutrients. And you decide precisely what goes on it — no secret pesticides, no mysterious chemicals.
Children gain a sense of responsibility and learn science just by pitching in. And for adults, gardening has been shown to lower stress and elevate mood.
The best part? You don’t have to make a huge initial investment. Many of these projects can be done for less than the cost of dinner out.
What Makes a Good Starter Mini Farm Project
Not every backyard project is beginner-friendly. A good starter project should tick a few boxes:
Affordability — You shouldn’t have to spend hundreds of dollars before seeing any results.
Little to No Maintenance — Beginners desperately need early wins. Complicated systems lead to frustration.
Quick Results — Fast-growing crops help keep motivation high.
Small Space — Not everyone has a large yard. The best beginner projects work even in tight spaces.
Scalable — You should be able to expand easily after mastering the basics.
Each of the four projects below satisfies all five of these criteria. They are roughly ranked from easiest to slightly more involved — but all of them are genuinely beginner-friendly.
Project 1: The Raised Bed Vegetable Garden
Why Raised Beds Are the Way to Go
A raised bed garden is the number one backyard mini farm starter project — and for good reason. It works almost anywhere. It gives you total control of your soil. And it produces real, usable food faster than you’d think.
A raised bed is simply a wooden or metal frame filled with quality soil and placed on top of your existing ground. You build up, not down. This takes care of one of the biggest challenges beginners face — native soil that is less than ideal.
The vast majority of backyard soil is too hard, too clay-heavy, or filled with rocks. A raised bed allows you to bypass all of that. Starting from day one, you fill it with the perfect mix.
What You Need to Build One
Building a basic raised bed is genuinely simple. Here is what you need:
- 4 wooden boards (8 feet long, 2 inches thick) — Cedar or pine both work. Cedar lasts longer.
- Corner brackets or screws to hold the frame together
- Landscape fabric to line the bottom (optional but helpful)
- Soil mix — a blend of compost, topsoil, and perlite works best
A standard raised bed is 4 feet wide by 8 feet long. That size lets you reach the center from either side without stepping in and compacting the soil.
Total startup cost: roughly $50–$120, depending on materials and how much soil you need.
What to Plant in Your Raised Bed
Some crops are perfect for beginners. They grow fast, require little fuss, and produce well in small spaces.
| Crop | Days to Harvest | Difficulty | Notes |
|---|---|---|---|
| Lettuce | 30–45 days | Very Easy | Great for cut-and-come-again harvesting |
| Radishes | 22–30 days | Very Easy | Fastest crop you can grow |
| Green Beans | 50–60 days | Easy | Prolific producers in small space |
| Zucchini | 50–65 days | Easy | One plant feeds a family |
| Cherry Tomatoes | 60–70 days | Moderate | Need a stake or cage |
| Kale | 50–60 days | Easy | Harvest outer leaves as needed |
Stick to two or three crops maximum your first season. Beginners become quickly overwhelmed trying to grow everything at once.
Raised Bed Tips That Actually Matter
Water consistently. Raised beds dry out faster than in-ground gardens because they have more exposed surface area. Check moisture daily in summer.
Mulch the top of the soil. A 2-inch layer of straw or wood chips keeps moisture in and weeds out.
Feed your soil, not just your plants. Add compost at the start of every season. Healthy soil grows healthy plants — that is the whole game.
Project 2: The Backyard Herb Spiral
A Smart Design That Does More in Less Space
An herb spiral is one of the most creative and space-efficient mini farm projects you can build. It looks beautiful. It grows a great variety of herbs. And it works on smart design, not hard work.
The concept is simple. You build a spiral-shaped mound of soil and stone that rises from the ground. The spiral creates different growing zones — dry at the top, moist at the bottom. This means you can grow herbs that need opposite conditions in the same small footprint.
Herbs that prefer dry, hot conditions — like rosemary and thyme — go at the top. Herbs that love moisture — like mint and chives — go at the base.
One herb spiral just 6 feet in diameter can grow 15 to 20 different herbs. That is a lot of flavor packed into a very small space.
If you want to explore more ideas like this, Backyard Mini Farms is a great resource packed with practical guides for home growers of all experience levels.
How to Build an Herb Spiral Step by Step
You do not need professional help. You do not need power tools. Here is the basic build:
Step 1: Mark a circle about 5–6 feet in diameter on the ground.
Step 2: Remove all grass inside that circle.
Step 3: Lay a base of rocks, bricks, or cinder blocks in a spiral pattern — starting wide at the outside and winding upward toward the center.
Step 4: Fill with soil as you go. Use free-draining, sandy soil toward the top. Use richer, moister soil toward the bottom.
Step 5: Plant your herbs according to their sun and water needs.
Total cost: $30–$80, depending on whether you source stones for free or buy them.
Best Herbs to Plant in Your Spiral
| Zone | Conditions | Best Herbs |
|---|---|---|
| Top (sunny, dry) | Full sun, low water | Rosemary, Thyme, Oregano, Sage |
| Middle | Moderate sun and water | Basil, Parsley, Cilantro, Dill |
| Bottom (shaded, moist) | Partial shade, more water | Mint, Chives, Lemon Balm, Sorrel |
Why an Herb Spiral Saves You Money Fast
Fresh herbs at the grocery store are surprisingly expensive. A small bunch of basil costs $2–$4 and wilts within days. A healthy basil plant in your spiral gives you fresh leaves for months.
If your household uses herbs regularly, an herb spiral can easily save $15–$30 per month on grocery bills. That means it pays for itself within the first few weeks of use.
Project 3: The Backyard Chicken Coop (Small Flock Setup)
Fresh Eggs Every Morning — Closer Than You Think
Raising a small flock of backyard chickens is one of the most rewarding mini farm projects you can take on. It sounds intimidating at first. But with just 3 to 6 hens, the daily workload is minimal. And the payoff — fresh eggs every single morning — is hard to beat.
A flock of 4 hens typically produces 3 to 4 eggs per day. That is roughly 20 to 25 eggs per week — enough for a family, with some to share.
Backyard chicken keeping has exploded in popularity over the last decade. Many suburban and even some urban areas now allow small backyard flocks. Always check your local zoning rules before getting started.
According to the American Veterinary Medical Association, backyard poultry keeping can be done safely and responsibly with proper housing, nutrition, and basic health monitoring.
What Your Chickens Will Need
Chickens are simple animals with simple needs. Get these four things right and your flock will thrive:
A safe coop: Chickens need protection from predators at night. The coop should be dry, well-ventilated, and predator-proof. Allow at least 4 square feet per bird inside the coop.
A run: This is an outdoor enclosed area where chickens can move during the day. Allow at least 10 square feet per bird in the run.
Food and water: Chickens eat commercial laying feed. Fresh, clean water is essential every single day. A feeder and waterer are inexpensive and easy to find.
Nesting boxes: One box per 3–4 hens is enough. Hens lay in private, dark spaces.
Startup Cost Breakdown for a Small Flock
| Item | Estimated Cost |
|---|---|
| Coop (pre-built or DIY) | $150–$400 |
| 4 laying hens (chicks or pullets) | $40–$120 |
| Feeder and waterer | $20–$40 |
| First bag of feed (50 lbs) | $20–$30 |
| Bedding (straw or pine shavings) | $10–$20 |
| Total Startup | $240–$610 |
Ongoing monthly costs are low — roughly $15–$30 per month for feed and bedding for 4 hens.
Best Chicken Breeds for Beginners
Not all chickens are created equal. Some breeds are calmer, hardier, and better layers than others. For beginners, these four breeds are hard to go wrong with:
Rhode Island Red — Hardy, friendly, and lays about 250–300 eggs per year. A classic starter breed.
Plymouth Rock (Barred Rock) — Docile and cold-hardy. Great with kids. Excellent layer.
Australorp — Holds the world record for egg laying. Calm and easy to manage.
Buff Orpington — Fluffy, gentle, and great for families. Solid layer.
Daily and Weekly Chicken Tasks
The daily routine takes about 10 minutes. Feed and water in the morning. Collect eggs. Close the coop at night.
Weekly tasks include cleaning waterers, refreshing bedding as needed, and checking the coop for any signs of damage.
Once a month, do a deeper clean of the coop. That is it. Chickens are much less work than most people imagine.
Project 4: The Backyard Container Garden (For Smaller Spaces)
No Yard? No Problem.
Not everyone has a big backyard. Some people have a small patio. Others have a balcony or a narrow strip of concrete along the side of the house.
A container garden makes a backyard mini farm possible in almost any space. You grow everything in pots, buckets, fabric bags, or other containers. The results can be just as impressive as a full in-ground garden — if you choose the right containers and the right crops.
Container gardening has one huge advantage: mobility. You can move your plants to follow the sun. You can bring them inside if frost threatens. You can rearrange your whole setup in an afternoon.
Choosing the Right Containers
Size matters with containers. Small pots dry out too fast and restrict root growth.
As a general rule:
- Herbs → At least 6-inch diameter pots
- Lettuce, spinach, radishes → 8–12 inch pots or shallow window boxes
- Peppers, eggplant → At least 5-gallon containers
- Tomatoes → 10–15 gallon containers minimum
- Potatoes → Large fabric grow bags (7–10 gallons)
Drainage holes are non-negotiable. Plants sitting in waterlogged soil will die. Every container must have a hole at the bottom.
What to Fill Your Containers With
Never use regular garden soil in containers. It compacts too much and suffocates roots.
Use a quality potting mix instead. Look for one that contains perlite or vermiculite. These lightweight materials improve drainage and prevent compaction.
Mix in a slow-release fertilizer when you plant. Container plants need more frequent feeding than in-ground plants because nutrients wash out with every watering.
Best Crops for Container Gardening
| Crop | Container Size | Special Notes |
|---|---|---|
| Cherry Tomatoes | 10–15 gal | Need full sun and staking |
| Peppers | 5 gal | Love heat; great in containers |
| Lettuce | 8–12 in wide box | Shade-tolerant; fast-growing |
| Green Onions | 6-inch pot | Extremely easy; regrow from scraps |
| Strawberries | Hanging basket or pot | Beautiful and productive |
| Herbs (Basil, Parsley) | 6-inch pot | Compact and highly useful |
| Radishes | 8-inch pot | Ready in under 30 days |
Container Garden Watering Tips
Containers dry out fast — especially in summer heat. Small pots may need watering twice a day during heat waves.
Check moisture by pushing your finger an inch into the soil. If it feels dry at that depth, water thoroughly until it drains from the bottom.
Consider self-watering containers if you travel or forget to water regularly. They have a reservoir that feeds moisture to roots as needed. They cost a bit more but save a lot of plants.
A Side-by-Side Comparison of All Four Projects
Here is how these four backyard mini farm projects stack up across the most important factors:
| Project | Startup Cost | Space Needed | Daily Time | Difficulty | First Results |
|---|---|---|---|---|---|
| Raised Bed Garden | $50–$120 | 32 sq ft | 10–15 min | Very Easy | 3–6 weeks |
| Herb Spiral | $30–$80 | 28 sq ft | 5 min | Very Easy | 2–4 weeks |
| Backyard Chickens | $240–$610 | 50–80 sq ft | 10–15 min | Moderate | 5–6 months |
| Container Garden | $20–$80 | Any size | 5–10 min | Very Easy | 3–6 weeks |
How to Choose the Right Project for Your Situation
Choosing the right first project is half the battle. Here is a simple way to decide:
If you have decent outdoor space and want variety → Start with the raised bed garden. It is the most versatile and rewarding first project.
If your space is tiny but you cook with herbs a lot → Build an herb spiral. Low cost, low effort, big flavor payoff.
If you want a living, breathing farm animal experience → Go with backyard chickens. Check local rules first. The reward of fresh eggs is truly wonderful.
If you have a patio, balcony, or barely any outdoor space → Container gardening is your answer. Zero excuses needed.
You can also combine projects. Many mini farmers start with a raised bed in year one, add an herb spiral in year two, and eventually add chickens or expand their container setup. Start small. Build confidence. Scale up from there.
Common Mistakes Beginners Make — And How to Skip Them
Every beginner makes mistakes. Here are the most common ones — and how to avoid them from day one.
Overplanting. More plants do not mean more food. Crowded plants compete for light, water, and nutrients. Give each plant room to breathe.
Watering on a schedule instead of checking the soil. Plants need water when the soil is dry — not every day at 6pm automatically. Check the soil first. Adjust based on weather.
Using the wrong soil. Cheap, low-quality soil produces weak plants. Invest in a quality potting mix or compost-rich garden soil. It pays off fast.
Expecting perfection immediately. Your first season will not be perfect. Something will not grow. A pest will show up. That is normal. You are learning. Every failure teaches you something.
Ignoring sun requirements. Most vegetables need 6–8 hours of direct sun per day. Place your beds or containers where this actually happens — not where it simply looks nice.
Frequently Asked Questions
How much space do I need to start a backyard mini farm? You can start with as little as a few square feet. A container garden works on a balcony. A 4×4 raised bed is enough for a meaningful harvest. Space helps, but it is not the main requirement.
How much does it cost to start a backyard mini farm? The cheapest projects — a container garden or herb spiral — can be started for $20–$80. A raised bed runs $50–$120. Chickens are the biggest investment at $240–$610 upfront, but costs drop significantly after setup.
Do I need any gardening experience to get started? No. All four of these projects are designed for beginners. The raised bed, herb spiral, and container garden require no prior experience. Chickens require a bit more research but are still very manageable for first-timers.
Can I do a backyard mini farm in an apartment or with no yard? Yes — with limitations. Container gardening works on balconies and patios. An herb spiral needs a small ground space of about 6 feet in diameter. Chickens and raised beds require outdoor ground space.
How long before my backyard mini farm produces food? Radishes and some herbs can be ready in as few as 3 weeks. Most vegetables take 6–10 weeks. Chickens take the longest — about 5–6 months if you start with chicks.
Is it really cheaper to grow your own food? Over time, yes — especially for herbs, salad greens, eggs, and tomatoes. The first season may feel expensive because of setup costs. By year two, your cost per meal drops significantly.
What is the easiest backyard mini farm project for a complete beginner? Either the herb spiral or a simple container garden. Both require minimal tools, minimal space, and minimal expertise. You can have both up and producing within a month.
Your Mini Farm Starts With One Small Step
The hardest part of any backyard mini farm is simply deciding to start.
Once you choose your first project and take that first step — whether it is buying wood for a raised bed, picking up a few pots and seeds, or reading up on local chicken ordinances — the rest becomes much easier.
These four projects are more than just hobbies. They are the beginning of a genuine shift in how you think about food, self-reliance, and what your own backyard can do.
You do not need to build everything at once. You do not need a perfect plan. You just need to pick one project, learn as you go, and let those small wins build your confidence.
Your backyard is waiting. And your mini farm is closer than you think.