Meta Description: Backyard mini farms planning doesn’t have to be overwhelming. Discover 9 proven tips to grow food in tiny yards — from vertical gardening to soil prep and smart layouts.
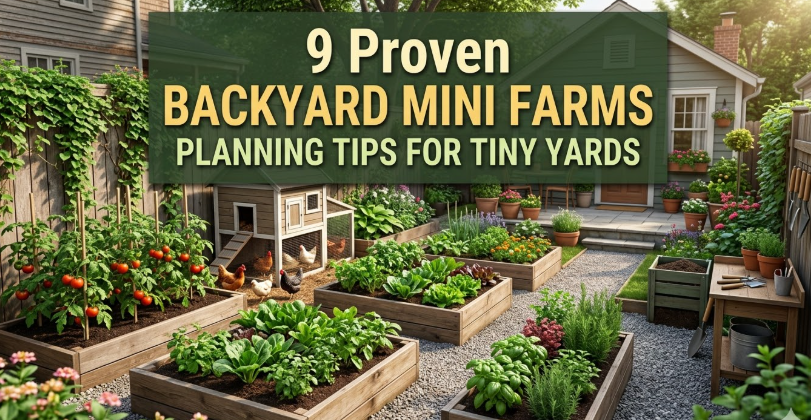
9 Proven Backyard Mini Farms Planning Tips for Tiny Yards
Growing your own food is one of the most gratifying things you can do. And the great news? You do not need acres of land to do it.
A tiny backyard, a skinny side yard, even a concrete patio — all can be turned into productive mini farms. The right backyard mini farms planning approach will enable you to grow vegetables, herbs, and fruits in spaces that most people dismiss as too small.
This guide includes 9 practical, proven tips from real urban gardeners. No matter if you have 100 square feet or 500, these techniques will keep every inch working for you.
Let’s dig in.
Tip 1: Map Your Space Out Before You Plant Anything
The most common error that newcomers make is purchasing plants and seeds without knowing their yard.
Take a whole day — or even a full week — to watch your outdoor space. Notice how the light shifts from one spot to another. Pay attention to where shadows fall in the morning, at midday, and late afternoon.
This observation alone can spare you months of frustration.
Why Sunlight Mapping Matters
Most vegetables require 6 to 8 hours of direct sunlight a day. You can overwater or fertilize them, but if you planted in the wrong place, they will have a hard time.
Here’s a quick reference:
| Sunlight Type | Hours Per Day | Best Crops |
|---|---|---|
| Full Sun | 6–8+ hours | Tomatoes, peppers, squash, beans |
| Partial Sun | 3–6 hours | Lettuce, spinach, kale, herbs |
| Shade | Under 3 hours | Mint, parsley, some ferns |
Once you are familiar with your sun zones, create a rough sketch of what your yard looks like on paper. Mark where the sun shines most and where shade lingers longest. This becomes your backyard mini farms planning blueprint.
Also note water sources, slopes, and any structures that might disrupt airflow. It is these little details that define your whole design.
Tip 2: Go Up — Walls and Fences Are Vertical Growing Space
When space is at a premium, look up.
Vertical gardening is one of the most powerful techniques in backyard mini farms planning. Fences, walls, trellises — even old ladders — can become growing structures.
What You Can Grow Vertically
Many plants enjoy climbing or can be trained upward:
- Pole beans climb by nature and produce heavily
- Cucumbers grow up trellises easily
- Peas are natural climbers and do best growing up
- Tomatoes can be tied to tall stakes or cages
- Small squash (like zucchini) can be grown vertically with support
Even strawberries and herbs thrive in wall-mounted pocket planters or stacked pots.
Simple Vertical Structures to Try
You don’t need expensive systems. An A-frame trellis made with bamboo poles costs virtually nothing. A cattle panel arch forms a tunnel for beans or cucumbers. Pegboard mounted on a fence holds pots of herbs at eye level.
The key idea: your backyard has vertical square footage. Use it.
Tip 3: Select the Right Layout for Your Yard Shape
Not all small yards are shaped the same. Your backyard mini farms planning will have to fit your actual yard shape — not some generic template from a gardening book.
Common Yard Shapes and Ideal Layouts
Long and narrow yards work best with a single raised bed running lengthwise, with vertical structures on each long side. This creates a garden corridor that takes advantage of every foot.
Square yards offer the most flexibility. A keyhole bed design — a circular bed with a small path cut in — works well here and gives you access to the center without stepping on plants.
L-shaped yards can use one arm for tall plants (tomatoes, corn, sunflowers) that won’t shade the other arm, which can hold low-growing crops.
Sloped yards benefit from terraced beds built across the slope. This also keeps water from running off before it has time to soak in.
Whatever your shape, always leave a path at least 18 inches wide so you can reach all plants comfortably without compacting the soil.
Tip 4: Build Your Soil First — Everything Else Will Follow
Great soil is the foundation of any successful backyard mini farms planning. You may have the perfect layout and the right plants, but bad soil will undermine your best efforts.
What Healthy Garden Soil Looks Like
Good garden soil is dark, crumbly, and smells earthy. It retains moisture without getting waterlogged. It is teeming with worms and microbes.
Most small yards don’t have this naturally. That’s fine — you build it.
The No-Fail Soil Mix for Raised Beds
If you’re building raised beds (which is highly recommended for small spaces), this classic mix works really well:
| Ingredient | Percentage | Purpose |
|---|---|---|
| Topsoil | 60% | Base structure |
| Compost | 30% | Nutrients and biology |
| Perlite or coarse sand | 10% | Drainage and aeration |
Mix it all together before filling your beds. It drains well, feeds plants naturally, and improves with every season as you add compost.
If planting in the ground, loosen the soil 12 inches deep at the start. Remove rocks and roots. Add 3 to 4 inches of compost and work it in. Then test your soil pH — most vegetables prefer a range of 6.0 to 7.0.
Tip 5: Plan Your Crops With Succession Planting
One of the biggest missed opportunities in small yard gardening is planting everything at once.
Succession planting means staggering your plantings over time so that when one crop finishes, another is ready to take its place. This turns your small space into a continuous food machine from early spring through late fall.
How Succession Planting Works
Say you have one 4×8 raised bed. Rather than filling it all with lettuce in April, you do this:
- Early spring: Plant half the bed with lettuce and radishes (fast growers, ready in 30–45 days)
- Mid spring: Plant the other half with tomato seedlings
- Early summer: When lettuce is done, replant that half with bush beans or basil
- Late summer: When beans finish, plant kale or spinach for a fall harvest
This one bed is now producing food for 7+ months instead of 2.
Succession planting is one of the most underused techniques in backyard mini farms planning. Once you try it, you’ll never go back to one-and-done planting.
Tip 6: Water Wisely, Not Excessively
Watering is where a lot of small-space gardeners either overdo it or underdo it. Both hurt your plants.
Smart watering matters even more in compact gardens where plants grow close together. Without good moisture management you get disease, root rot, and wasted water.
Drip Irrigation: The Best Investment for Mini Farms
Drip irrigation provides water directly to the root zone, right where plants need it. It does not wet leaves, which reduces fungal disease. It uses 30% to 50% less water than overhead watering.
An entry-level drip system for a small yard runs about $30 to $80 and can be installed in an afternoon. Hook it up to a basic timer and your watering becomes automatic.
When to Water
The best time to water is in the early morning. Plants take up water throughout the day and foliage dries quickly, reducing disease pressure.
Avoid watering in the evening — wet leaves at night invite mold and mildew.
An easy way to check whether watering is needed: push your finger about an inch into the soil. If it’s dry at that depth, water. If it’s still moist, wait.
Tip 7: Companion Planting — Let Plants Help Each Other
This is where backyard mini farms planning gets genuinely exciting. Certain plants actually help each other grow when planted nearby. This is called companion planting.
The right plant combinations can repel pests, improve flavor, fix nitrogen in the soil, and make the most of your limited space.
The “Three Sisters” — A Classic Combination
Indigenous farmers have used this combination for centuries:
- Corn grows tall, providing a natural trellis
- Beans climb the corn and fix nitrogen in the soil
- Squash spreads along the ground, shading weeds and retaining moisture
All three grow together in one space, supporting each other naturally.
More Winning Companion Pairs
| Plant | Good Companion | Why It Works |
|---|---|---|
| Tomatoes | Basil | Basil may deter aphids and whiteflies |
| Carrots | Onions | Onions repel carrot fly |
| Cabbage | Dill | Dill attracts beneficial insects |
| Cucumbers | Nasturtiums | Nasturtiums deter cucumber beetles |
| Peppers | Marigolds | Marigolds repel nematodes and pests |
Avoid planting fennel near most vegetables — it releases compounds that inhibit growth in many plants.
Want to go deeper on planning your mini farm layout? Visit Backyard Mini Farms for more guides, growing plans, and tips tailored to small-space food gardeners.
Tip 8: Start Composting — Even in a Tiny Yard
Compost is liquid gold for your mini farm. It improves soil structure, feeds plants slowly and naturally, and reduces what you send to the trash.
The good news: you do not need much space to compost.
Small-Space Composting Options
Worm bins (vermicomposting) are perfect for tiny yards and even apartments. A bin the size of a storage tote, kept under a bench or in a garage, can turn your kitchen scraps into rich compost within 60 to 90 days. Worms do all the work.
Tumbler composters are enclosed, pest-resistant bins that you turn every few days. They speed up decomposition and take up less than 4 square feet. Many produce finished compost in 4 to 6 weeks.
Bokashi systems ferment kitchen waste — including meat and dairy — in a sealed bucket. They work fast (2 weeks), produce no smell when sealed, and fit under a kitchen sink.
What to Compost
| Add Freely (Greens) | Add Freely (Browns) | Never Add |
|---|---|---|
| Vegetable scraps | Cardboard | Meat (in worm bins) |
| Coffee grounds | Dry leaves | Diseased plants |
| Grass clippings | Paper | Pet waste |
| Fruit peels | Straw | Oily foods |
Aim for roughly equal parts greens and browns by volume. This keeps your compost from smelling bad.
Apply finished compost to your beds each season. Over time your soil gets better and better — meaning less work and more food.
According to the University of Missouri Extension, finished compost applied regularly can increase soil organic matter significantly within just two to three seasons — a major boost for small-space food gardens.
Tip 9: Track, Learn, and Adjust Every Season
The most successful mini farm gardeners all share one habit: they keep notes.
A simple garden journal doesn’t have to be fancy. A small notebook, a phone note, or even photos with dates work perfectly. The goal is to remember what worked and what didn’t.
What to Track Each Season
- What you planted and when
- When seeds germinated or transplants were set out
- What pest or disease problems appeared
- Which crops produced the most in your space
- Varieties that did well (or didn’t)
- The timing of the first and last frost
This information is gold for next year’s backyard mini farms planning. After two or three seasons, you will have a personalized growing calendar perfectly matched to your specific yard, climate, and taste preferences.
Adjust Based on Results
If tomatoes became leggy and pale last year, your sun mapping may need revisiting. If squash always gets powdery mildew, try spacing plants farther apart or switching to a resistant variety.
Every mistake is data. Every success is something to repeat.
Good gardeners are not born — they are made over seasons of paying attention.
Bonus: The Best Crops for Tiny Yards
Not all crops are worth growing in a small space. It’s all about maximizing food per square foot.
Here are the highest-value crops for small backyard mini farms:
| Crop | Yield Per Sq Ft | Days to Harvest | Space Needed |
|---|---|---|---|
| Lettuce | High | 30–45 days | 6 inches apart |
| Radishes | Very High | 25–30 days | 2 inches apart |
| Kale | High | 55–70 days | 12 inches apart |
| Bush beans | High | 50–60 days | 6 inches apart |
| Cherry tomatoes | Very High | 60–80 days | 24 inches (vertical) |
| Herbs (basil, parsley) | Very High | 30–60 days | 6–8 inches apart |
| Spinach | High | 40–50 days | 4 inches apart |
Don’t worry about growing things your family doesn’t eat. There’s no point in growing a bumper crop of something no one touches.
A Simple Backyard Mini Farm Planning Checklist
Before you plant your first seed, run through this:
- [ ] Observed sun patterns throughout all areas of the yard
- [ ] Sketched a layout that fits your yard shape
- [ ] Identified vertical growing areas (fences, walls, trellises)
- [ ] Prepared or built good soil with compost
- [ ] Chosen crops suited to your sun levels and climate
- [ ] Planned a succession planting schedule
- [ ] Set up or planned an efficient watering system
- [ ] Mapped companion plant combinations
- [ ] Set up a composting method
- [ ] Started a simple garden journal
If you are checking most of these off, you are already ahead of the average gardener beginning their first mini farm.
FAQs About Backyard Mini Farms Planning
Q: How much space do I actually need to start a backyard mini farm? You can begin with as little as 4×4 feet — one raised bed — and grow a significant amount of food. Even balcony container gardens count. Space matters less than how effectively you use what you have.
Q: Is backyard mini farms planning different in urban areas? The basic principles are the same, but urban gardeners often face more shade from buildings, higher pollution levels (which influence soil choices), and tighter water access. Raised beds with fresh soil are especially critical in urban settings.
Q: What is the easiest crop to start with for a total beginner? Radishes, lettuce, and herbs are the best starting points. They are fast-growing, forgiving of beginner mistakes, and give you quick wins that build confidence for taking on larger crops.
Q: Do I need to test my soil before starting? It is strongly recommended, particularly if planting in the ground. A basic soil test (available for $10–$20 at most garden centers or by mail) gives you your pH and nutrient levels so you know exactly what to add.
Q: Can I build a mini farm on a rented property? Yes. Container gardens, fabric grow bags, and freestanding raised beds that sit on the ground (not attached to anything) are excellent options for renters. All of them can be moved when you leave.
Q: How much time does maintaining a backyard mini farm take? A well-designed small garden takes on average 15 to 30 minutes a day, mostly for watering and quick checks. With drip irrigation on a timer, that drops even lower. Plan well up front and you will have less work all season long.
Q: When is the best time to start planning? Winter is actually ideal. Use the cooler months to sketch layouts, order seeds, test soil, and build beds. When spring arrives, you will be ready to hit the ground running — literally.
Growing Small, Living Big
Backyard mini farms planning is not about having the perfect yard. It’s about recognizing the potential in the space you already have.
A fence becomes a trellis. A narrow strip of soil transforms into a salad garden. A concrete corner becomes a container farm. Every season teaches something new, and every harvest — however small — is deeply satisfying.
You don’t have to transform everything at once. Take one or two tips from this guide and start there. Build one raised bed. Map your sunlight. Try one vertical structure.
Momentum builds fast once you see things growing. And before long, you will have a little mini farm producing real food right outside your back door.
Start small. Think smart. Grow big.