I still remember the summer I decided to “finally do it.” I’d been watching YouTube videos for months, pinning raised bed layouts on Pinterest, and convincing myself I had a solid plan. I ordered seeds, bought lumber, borrowed a drill from my neighbor — and then I just… started.
No measurements. No soil tests. No real plan.
By the end of that first season, I’d killed half my plants, wasted close to $300, and had a chicken situation that I genuinely don’t like talking about. But here’s the thing — every single mistake taught me something I now consider non-negotiable. If you’re about to set up your first backyard farm (or even if you’re on your second attempt like I was), this list might save you a whole season of frustration.
Let’s get into it.
1. I Skipped the Soil Test and Paid for It All Summer
This was probably my most expensive mistake, and it sounds so simple in hindsight.
I filled my raised beds with “garden soil” from a big box store, threw in some compost, and thought I was set. The tomatoes went in, looked great for about two weeks, then started yellowing from the bottom up. The lettuce bolted weird. The peppers just… sat there, doing nothing.
After weeks of troubleshooting, I finally ordered a basic soil test kit from Amazon (the Luster Leaf Rapitest is what I used — it’s like $20). Turns out my pH was sitting around 5.2. Way too acidic for most vegetables. The nutrients were there, but the plants literally couldn’t absorb them at that pH.
Once I added some garden lime and got the pH up closer to 6.5, things changed almost overnight. I’m not exaggerating — the yellowing stopped within a week.
What I do now: Before I plant anything in a new bed, I test the soil. Full stop. I also recommend sending a sample to your local cooperative extension office if you want more detailed results for around $10–$20. They’ll tell you exactly what amendments you need.
| pH Level | What It Means for Veggies |
|---|---|
| Below 5.5 | Too acidic — nutrients lock out |
| 6.0 – 6.8 | Sweet spot for most vegetables |
| Above 7.5 | Too alkaline — causes deficiencies |
| 7.0 | Neutral — fine for most crops |
2. I Ignored Sun Mapping and Planted Everything in the Wrong Spots
Here’s something nobody tells you when you’re watching those beautiful garden transformation videos: your backyard isn’t the same as theirs.
I had what I thought was a “sunny” yard. And parts of it were. But I didn’t actually track which areas got full sun (6+ hours) versus partial shade versus deep shade throughout the day — and throughout the seasons.
I planted tomatoes in a spot that got great morning sun but was completely shaded by my neighbor’s fence by 1 PM. I planted shade-tolerant herbs in the sunniest corner. Basically, I did it completely backwards.
The fix: Spend one full day — ideally during the season you plan to grow — walking your yard every two hours and noting where the sun is hitting. Take photos. Or better yet, use a free app like Sun Seeker or Sun Calc to model sun paths throughout the year. It takes maybe 30 minutes of setup and saves you from planting in the wrong place.
Here’s a quick reference I now keep posted in my garden shed:
| Plant Type | Sun Requirement |
|---|---|
| Tomatoes, peppers, squash | 8+ hours full sun |
| Beans, cucumbers | 6–8 hours |
| Lettuce, spinach, kale | 4–6 hours (tolerates partial shade) |
| Mint, parsley, cilantro | 3–4 hours okay |
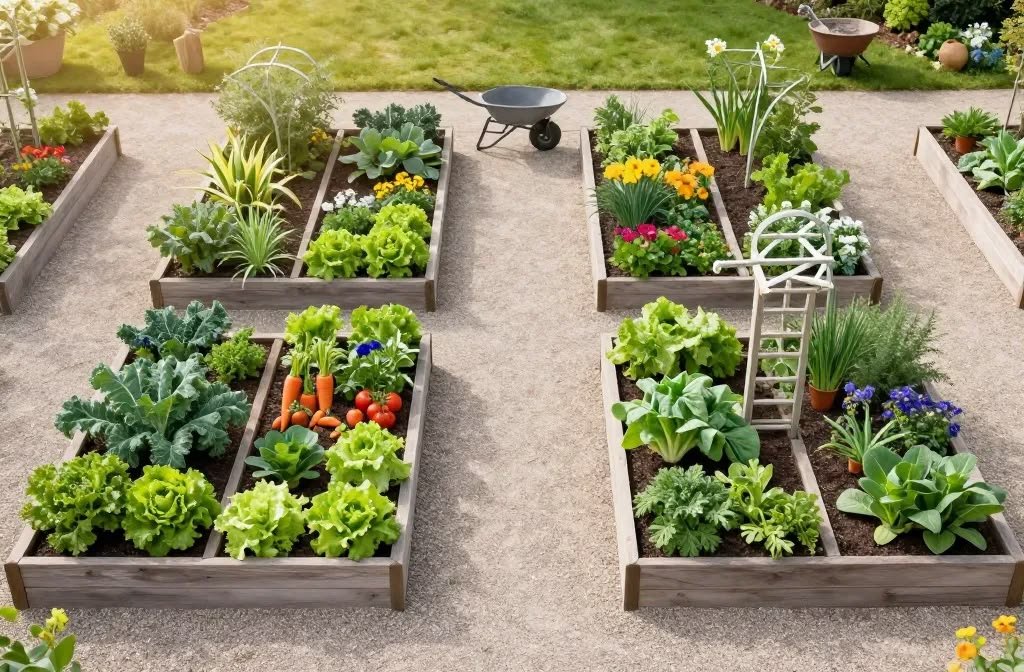
If you want to see some smart layout ideas that account for sun and space, that article breaks it down really well with small-yard examples.
3. I Bought Too Many Seeds and Planted Everything at Once
I call this “catalog fever.” You get excited, you order 30 varieties of vegetables, and then you direct-sow all of them in the same week because — why not, right?
Wrong. So wrong.
First, I had massive germination all at once and couldn’t keep up with thinning, watering, or transplanting. Second, everything matured at the same time, and I ended up drowning in zucchini for three weeks straight while having nothing else to harvest. Third, some of those seeds really needed to be started indoors weeks earlier — I just didn’t read the packets closely enough.
Succession planting changed everything for me. Instead of putting in all your lettuce seeds at once, plant a small batch every two to three weeks. You get a continuous harvest instead of a flood-and-famine cycle. I use a basic Google Sheets calendar to track planting dates now — nothing fancy, just a grid with what goes in when.
Also: start small. Seriously. Pick 7 easy vegetables that are actually forgiving for beginners. Master those before you try growing artichokes or watermelon in a 10×10 plot.
4. I Underestimated How Much Water Management Actually Matters
My first watering strategy was basically: “go out there with a hose when I remember.” Some days that was morning, some days it was evening, some days I forgot entirely and then overcompensated the next day.
The result? Blossom end rot on my tomatoes (from inconsistent watering causing calcium uptake issues), split carrots, and bolting lettuce from heat stress that proper watering could have prevented.
Here’s what I learned about watering:
- Consistency matters more than quantity. Plants handle drought better when it’s predictable. What kills them is the swing between bone dry and waterlogged.
- Water at the base, not the leaves. Wet foliage invites fungal disease. I learned this after a bad powdery mildew outbreak on my cucumbers.
- Morning watering is best. It gives plants what they need for the day and lets the soil surface dry before nightfall.
I eventually set up a basic drip irrigation system connected to a Rainbird timer. It runs every morning for 20 minutes, and I barely think about watering anymore. The whole setup cost me around $85 and paid for itself in plant survival within the first month.
If you want to go deeper on this, these water-saving tricks for backyard farms go into the details of setting up efficient systems even in tiny yards.
5. I Added Animals Before I Had the Infrastructure Ready
Okay, this is the chicken situation I mentioned at the beginning.
I got six hens in April. I had a coop — emphasis on “a” — that I’d thrown together from a kit I found on Craigslist. No proper ventilation. No predator-proofing on the bottom. Run was too small. No dedicated feed storage.
Within the first two weeks, I lost one hen to what I think was a raccoon that dug under the run. Two more got respiratory issues from a poorly ventilated coop in warm weather. I was constantly driving to the feed store because I had no good storage system.
It was a mess — and it was completely preventable.
Before you add any animal to your backyard farm:
- Have the housing fully built and tested (not “almost done”)
- Confirm your run is predator-proofed on all sides including the bottom
- Set up your feed and water systems before the animals arrive
- Have a basic first-aid kit and a vet contact ready
- Know your local ordinances — some areas limit hen counts or ban roosters
If you’re thinking about starting with chickens specifically, this beginner guide to backyard chickens walks you through exactly what you need before you bring birds home.
And honestly, the mistakes I made with animals weren’t unique to me. There’s a whole pattern of common backyard livestock mistakes that most beginners stumble into — worth reading before you get started.
6. I Didn’t Plan for Pest and Disease Management Until It Was Too Late
I was firmly in the “I’ll deal with it when it happens” camp when it came to pests. Bad strategy.
By the time you notice a squash vine borer infestation, it’s already been tunneling through your zucchini stems for weeks. By the time you see aphid colonies, they’ve already invited themselves to every tender shoot in your garden. And tomato hornworms? Those things are basically invisible until they’ve defoliated half your plant.
What shifted things for me was starting to think about pest management as prevention rather than reaction. Here’s my actual routine now:
Weekly scouting: Every Sunday morning, I walk the whole garden slowly. I check the undersides of leaves (that’s where eggs hide), look at stems near the soil line, and check for anything that just looks “off.”
Row covers early: I use lightweight floating row covers on brassicas and squash from the moment they go in. This keeps out cabbage moths and squash vine borers before they even get a chance to lay eggs.
Companion planting: I plant basil near tomatoes, marigolds as border plants, and nasturtiums as trap crops for aphids. It’s not a silver bullet, but it helps.
Organic sprays on hand: I keep neem oil and insecticidal soap mixed and ready. The moment I spot early-stage aphids or spider mites, I spray — don’t wait.
The goal is to catch problems when they’re small, not after they’ve become disasters.
7. I Tried to Scale Up Too Fast and Lost the Joy of It
This one is more mindset than mechanics, but it’s probably the mistake that almost made me quit entirely.
After my second season — which went pretty well — I decided I was ready to go big. I doubled my bed space, added more chickens, started a compost system, tried building a small greenhouse, and started selling eggs to neighbors. All in one year.
By midsummer I was burned out. I dreaded going into the backyard. What used to feel like a peaceful hobby now felt like a part-time job I didn’t enjoy. The whole point was to grow food, save money, and decompress. Instead I was stressed every morning before work because I had too many things to manage.
What I should have done: Added one new element per season. Master the basics. Get your systems dialed in. Then expand.
Now I follow a simple rule — if something in my backyard farm feels chaotic, I don’t add anything new until I fix the chaos. Stable, simple, and sustainable beats big and overwhelming every time.
Here’s a rough progression I’d recommend for beginners:
| Season | Focus |
|---|---|
| Year 1, Spring | 2–3 raised beds, easy veggies, no animals |
| Year 1, Fall | Add a second planting rotation, try new crops |
| Year 2, Spring | Consider small animals (hens or rabbits) |
| Year 2–3 | Expand beds, improve systems, add storage |
| Year 3+ | Scale with intention based on what’s actually working |
The Honest Truth About Backyard Farming
None of these mistakes are unique to me. Almost every person I’ve talked to who’s set up a backyard farm has hit at least three or four of them in their first year. It’s kind of a rite of passage.
But here’s what I genuinely believe: the learning curve is worth it. Growing your own food — even a small fraction of what your family eats — connects you to something that’s really hard to explain until you’ve experienced it. There’s a specific kind of satisfaction in eating a tomato you grew from seed, or collecting eggs from hens you raised.
The key is just giving yourself permission to start imperfectly, learn fast, and adjust. Don’t let the possibility of mistakes stop you from starting. Let the mistakes be your teachers instead.
Looking to get started the right way from day one? Check out these 5 easy backyard mini farm setup steps for beginners — it’s one of the most practical starting points I’ve come across for anyone just getting into this.