Meta Description: 7 Smart Backyard Mini Farms Layout Ideas for Small Yards — these plans help you grow fresh food at your house while keeping a limited outdoor space.
7 Smart Backyard Mini Farms Layout Ideas for Small Yards
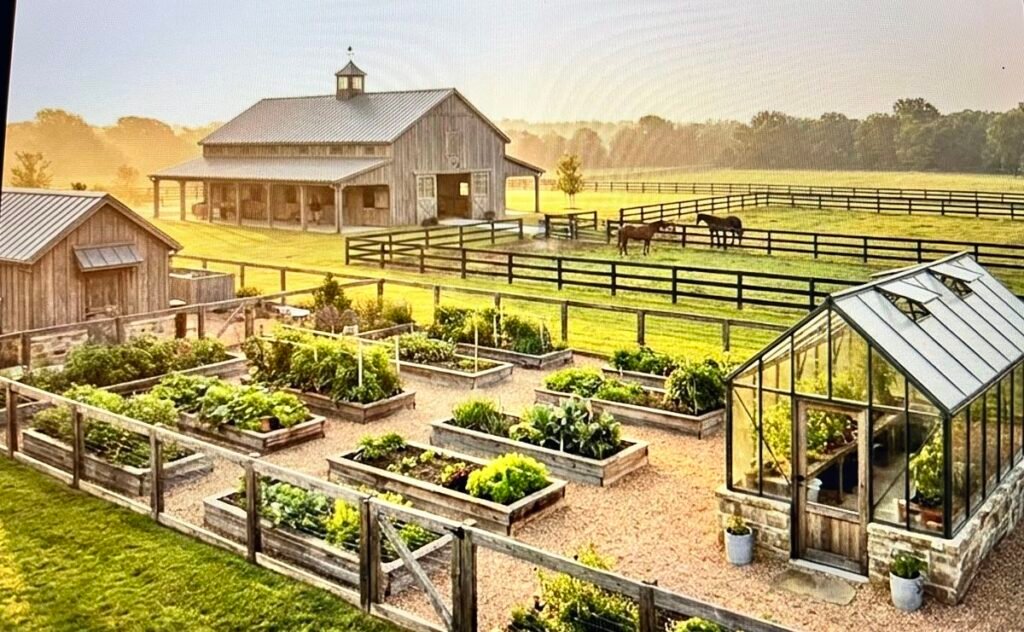
Your Small Yard Can Provide Food for Your Family — Here’s How
Many people believe you need a sizable plot of land to grow your own food. That’s simply not true.
Even a small yard — or just a patio — can be transformed into an abundance-generating mini farm. You don’t need acres. You need a smart plan.
A backyard mini farm layout helps you use every square foot wisely. It tells you where to put your beds, in what direction to orient them, how to save water, and how not to let plants outgrow each other and block sunlight.
This guide gives you 7 clever layout ideas that are super effective for any small yard. Whether you have a 10-foot strip of dirt or a 20×20 concrete patio, there’s something here for you.
Let’s dig in.
Why the Layout You Choose Matters More Than You Realize
Choose your layout before choosing seeds.
How you arrange your growing spaces affects everything — access to sunlight, water flow, ease of reaching your plants, and how much you can actually grow.
A bad layout is wasteful and a source of frustration. A clever layout transforms a small yard into an unexpectedly productive food source.
Here’s a brief overview of which layout idea works best:
| Layout Idea | Suitable For | Skill Level | Space Needed |
|---|---|---|---|
| Raised Bed Grid | Beginners, neat yards | Beginner | 50–200 sq ft |
| Vertical Tower Garden | Tiny patios, renters | Beginner | 10–30 sq ft |
| Keyhole Garden | Water-saving, dry climates | Intermediate | 60–100 sq ft |
| Food Forest Guild | Long-term, low-maintenance | Intermediate | 100–300 sq ft |
| Container Cluster | Renters, concrete areas | Beginner | 20–60 sq ft |
| U-Shaped Perimeter Beds | Long narrow yards | Intermediate | 80–200 sq ft |
| Square Foot Garden | Intensive production | Beginner | 16–64 sq ft |
Now let’s explore each one.
Layout Idea #1 — The Standard Raised Bed Grid
The raised bed grid is the most popular backyard mini farm layout for good reason. It works.
The idea is simple. You construct rectangular boxes (generally 4 feet by 8 feet) and set them in tidy rows. The 4-foot width is crucial — you can access the middle of the bed from either side without stepping on the soil.
Why It Needs to Be 4 Feet Wide
Stepping on garden soil compacts it. Packed soil is bad for roots.
With 4-foot-wide beds, you never need to step inside. You reach in from the path. Your soil stays loose, and your plants thrive.
Space beds at least 2 feet apart. This leaves room to walk, kneel, and wheel a barrow.
What to Plant in a Grid Layout
This layout works for nearly everything — tomatoes, peppers, lettuce, carrots, beans, herbs, and more.
Pro tip: Place the tallest plants (like tomatoes or corn) on the north side of the grid. This way, they don’t shade the shorter plants next to them.
Materials and Cost Snapshot
| Bed Size | Lumber Needed | Soil Volume | Approx. Cost |
|---|---|---|---|
| 4 x 4 ft | 16 linear ft | 8 cubic ft | $30–$60 |
| 4 x 8 ft | 24 linear ft | 16 cubic ft | $50–$100 |
| 4 x 12 ft | 32 linear ft | 24 cubic ft | $75–$140 |
Cedar or redwood is best — they resist rot naturally. Do not use treated lumber near food plants.
Layout Idea #2 — The Vertical Tower Garden
When floor space is your biggest problem, go up instead of out.
A vertical tower garden grows food on walls, fences, or freestanding structures. It’s ideal for patios, balconies, or narrow side yards.
How to Set One Up
You can keep it as simple or as advanced as you’d like.
The simplest version: hang fabric pocket planters on a sunny fence. Each pocket holds a small plant — herbs, strawberries, lettuce, or spinach work great.
More advanced options include PVC pipe towers, stacked planter towers, or tiered pallet gardens.
Best Plants for Vertical Growing
Not every plant enjoys growing vertically. Stick to these for best results:
- Strawberries
- Herbs (basil, mint, parsley, chives)
- Lettuce and spinach
- Nasturtiums
- Green onions
- Small peppers
Heavy vegetables like squash, melons, or large tomatoes are too heavy for most vertical systems. Save those for raised beds.
Space Efficiency Comparison
Here’s how vertical growing compares to traditional in-ground planting:
| Growing Method | Plants per Square Foot | Maintenance Level |
|---|---|---|
| In-ground flat planting | 1–4 | Low |
| Standard raised bed | 4–9 | Low–Medium |
| Vertical tower/wall | 8–16 | Medium |
The figures illustrate why vertical gardens thrive in tight spaces. You can grow four times as much food in the same footprint.
Layout Idea #3 — The Keyhole Garden
This arrangement seems a bit strange at first. But once you understand how it works, you’ll see the genius.
A keyhole garden is a circular raised bed with a small path cut into it — like the shape of an old-fashioned keyhole. A compost basket sits in the center of the circle.
The Brilliant Design Behind It
The round shape means every part of the bed is within arm’s reach. No corner is ever too far away.
The central compost basket is the real innovation. You keep adding kitchen scraps, water, and organic material to it regularly. As it decomposes, nutrients and moisture slowly radiate outward throughout the entire bed.
This means you water and fertilize the whole bed just by tending to that center basket. It saves water. It saves time. And it creates amazing soil over time.
Keyhole Garden Dimensions Guide
| Garden Size | Outer Diameter | Path Width | Compost Basket Diameter |
|---|---|---|---|
| Small | 5 ft | 12 inches | 12 inches |
| Medium | 7 ft | 14 inches | 14 inches |
| Large | 9 ft | 16 inches | 16 inches |
This layout was developed in Africa to address dry climates and food shortages. It’s simply that effective, which is why it’s now used globally.
It works especially well in hot, dry climates where water is scarce.
Layout Idea #4 — The Food Forest Guild
This one is different from all the others. It’s not quite a garden in the usual sense.
A food forest guild is a mini ecosystem. You layer plants at different heights — just like a real forest — so they support each other naturally.
The Seven Layers of a Food Forest
A full-sized food forest has seven layers. For a small backyard, you’ll work with three to four:
- Canopy layer — a small fruit tree (dwarf apple, pear, or fig)
- Shrub layer — currants, gooseberries, or blueberries
- Herb layer — comfrey, yarrow, nasturtiums
- Ground cover — strawberries, clover, thyme
Each layer supports the others. The fruit tree gives shade to heat-sensitive herbs. The herbs attract pollinators for the fruit tree. Ground covers help suppress weeds and hold moisture.
The Long-Term Payoff of This Layout
This layout takes 2–3 years to fully establish. But once it does, it mostly manages itself.
You’re not replanting every season. The perennial plants come back year after year. The soil keeps improving. The yields keep increasing.
For a 10×10 foot section of yard, a food forest guild can produce fruit, berries, and herbs from a single planting.
If you want to explore more in-depth guides and resources on planning a productive small-space food garden, Backyard Mini Farms is a great place to start.
Ideal Plant Combinations for Small Yards
| Canopy | Shrub | Herb/Ground Cover |
|---|---|---|
| Dwarf apple | Currants | Comfrey + strawberries |
| Fig tree | Gooseberry | Borage + thyme |
| Dwarf pear | Blueberry | Yarrow + clover |
| Dwarf cherry | Elderberry | Nasturtium + mint |
For best results, choose plants that are suited to your climate zone.
Layout Idea #5 — The Container Cluster
Don’t own your home? Renting an apartment with a small patio? The container cluster layout is made for you.
This method transforms pots, buckets, grow bags, and other containers into a mini farm. Everything is portable. You can rearrange it, take it with you when you move, and start small.
How to Arrange Containers for Maximum Results
Cluster your containers by size.
Place the tallest pots (tomatoes, peppers, small fruit trees) in the back row. Medium containers (leafy greens, herbs) go in the middle. Small pots (strawberries, radishes, green onions) go up front.
This tiered arrangement ensures every container gets sunlight. It also looks neat and intentional — like a real garden, not a random collection of pots.
Best Container Sizes by Crop
| Container Size | Volume | Best Crops |
|---|---|---|
| Small (6–8 inch) | 1–2 qt | Herbs, green onions, radishes |
| Medium (10–14 inch) | 2–5 gal | Lettuce, spinach, beets, strawberries |
| Large (16–20 inch) | 7–10 gal | Tomatoes, peppers, eggplant |
| Extra-large (24+ inch) | 15–25 gal | Dwarf citrus, cucumber, beans |
The Most Important Thing to Know About Container Gardening
Containers dry out faster than raised beds or in-ground soil. In summer, you may need to water once or even twice a day.
Consider self-watering containers, or install a drip irrigation system. This is a lifesaver for your plants — and your sanity.
Layout Idea #6 — The U-Shaped Perimeter Bed
Got a long, narrow yard? Maybe a fenced backyard that’s more rectangular than square?
The U-shaped perimeter bed layout is your answer.
You build growing beds along three sides of the yard — along the back fence and both side fences. The interior of the U becomes open lawn or mulched pathway space. It can double as a kids’ play area, seating space, or simply open breathing room.
The Design That Does Double Duty
People love this layout because it doesn’t dedicate your whole yard to food production.
You keep usable outdoor space. You keep the visual openness. But along the edges, you’re growing food.
It also works beautifully with fences. Trellises attached to fences let you grow vertical crops (beans, cucumbers, peas) without using any additional floor space.
Suggested Planting Plan for U-Shaped Beds
| Section | Facing | Best Plants |
|---|---|---|
| Back fence (North wall) | South-facing | Tomatoes, peppers, squash |
| Left side fence | East-facing | Lettuce, herbs, spinach |
| Right side fence | West-facing | Beans, cucumbers, peas |
This planting plan takes advantage of natural light from all directions. Morning light on the east side suits leafy greens. Afternoon western light works well for beans and cucumbers. The south-facing back wall gets the most sun — perfect for heat-lovers like tomatoes.
Layout Idea #7 — The Square Foot Garden
The square foot garden method was created by Mel Bartholomew in the 1970s. It’s one of the most efficient food production systems ever developed for small spaces.
The concept is simple: divide your growing area into a grid of 1-foot squares. Each square gets a specific number of plants based on its size.
How Many Plants Per Square Foot?
| Plant Type | Plants per Square Foot |
|---|---|
| Tomatoes | 1 |
| Peppers | 1 |
| Lettuce | 4 |
| Spinach | 9 |
| Beets | 9 |
| Carrots | 16 |
| Radishes | 16 |
| Green onions | 16 |
This system eliminates wasted space between plants. In a traditional row garden, the vast majority of space is aisle and empty path. In a square foot garden, nearly every inch is productive.
According to the University of Minnesota Extension, intensive planting methods like square foot gardening can significantly increase yields while reducing water use and weeding time — making them ideal for home gardeners with limited space.
The Mel’s Mix Soil Recipe
This method works best with a special soil blend called “Mel’s Mix”:
- 1/3 compost
- 1/3 peat moss or coconut coir
- 1/3 coarse vermiculite
This blend is light, fluffy, and drains well. Roots grow fast in it. It requires far less watering than normal garden soil.
A 4×4 foot square foot garden has 16 planting squares. Managed well, it can yield a steady supply of salad greens, herbs, and vegetables throughout the entire season.
How to Choose the Right Layout for Your Yard
Still unsure which layout suits your yard? Here’s a straightforward way to figure it out.
Ask yourself these three questions:
- Do I own or rent? If renting, go with containers or vertical gardens.
- How much time can I give each week? Food forests require less ongoing maintenance. Square foot gardens need more frequent attention.
- What’s my main goal? More variety means raised beds or square foot gardens. Long-term fruit production means a food forest. Water conservation means a keyhole garden.
No layout is perfect for everyone. But one of these seven will fit your yard, your schedule, and your food goals.
6 Tips to Make Any Backyard Mini Farm Layout Work Better
No matter which layout you choose, these tips apply to all of them.
Face south if possible. In the Northern Hemisphere, south-facing beds get the most sunlight throughout the day.
Start small. One or two raised beds is much easier to manage than six. Expand as you gain confidence.
Mulch everything. A 2–3 inch layer of wood chip mulch keeps weeds down, holds moisture, and improves soil over time.
Compost actively. Even a small compost bin turns kitchen scraps into free fertilizer. It’s one of the best investments you can make.
Grow what you actually eat. Don’t plant zucchini if you don’t like zucchini. Focus on your family’s favorites.
Track what you grow. Keep a simple notebook or phone note. Write down what worked, what didn’t, and what you’ll do differently next year.
FAQs About Backyard Mini Farm Layout Ideas
What is a backyard mini farm? A backyard mini farm is a small-scale food production setup at your home garden. It can include raised beds, containers, vertical planters, fruit trees, herbs, and more — all designed to grow real food in a small space.
How much space do I need to start a backyard mini farm? You can start with as little as 10–20 square feet. A single 4×4 raised bed or a grouping of containers on a patio is enough to grow fresh herbs, salad greens, and small vegetables.
What is the easiest backyard mini farm layout for beginners? The raised bed grid and the container cluster are the two easiest layouts to start with. Both are forgiving, flexible, and easy to expand as your skills grow.
Can I have a mini farm if I’m renting a home? Yes. Container clusters and vertical wall gardens are ideal for renters. They don’t alter the property, and you can take them with you when you move.
What do I do if my yard doesn’t get a lot of sun? Choose shade-tolerant crops like lettuce, spinach, arugula, mint, and parsley. Most vegetables need 6–8 hours of sun, but leafy greens can manage with as little as 4 hours.
Do I have to water a mini farm every day? It depends on your layout and climate. Raised beds may only need watering 2–3 times per week. Container gardens dry out faster and may need daily watering in summer. Keyhole gardens are the most water-efficient design of all.
What’s the most productive layout for a very small yard? The square foot garden method fits the most plants into the least space. A 4×4 bed with square foot spacing can yield more food than a 4×8 traditional row garden.
When is the best time to plan my mini farm layout? Late winter or early spring — before the planting season — is ideal. This gives you time to build beds, prepare soil, order seeds, and get everything ready before the growing season begins.
It All Starts With a Plan
You don’t need a farmhouse. You don’t need acres of land. You don’t even need a huge budget.
What you need is a plan.
A good backyard mini farm layout turns wasted outdoor space into a real, productive food source. Whether you go with a raised bed grid, a vertical tower, a keyhole garden, or a food forest — the most important step is simply to start.
Pick one layout. Start small. Learn as you go.
Your backyard is more powerful than you realize. Give it a good plan, and it will reward you with nourishment.