Meta Description: 6 Backyard Mini Farms lessons every beginner must know — real mistakes, smart fixes and practical tips to grow food in your own backyard.
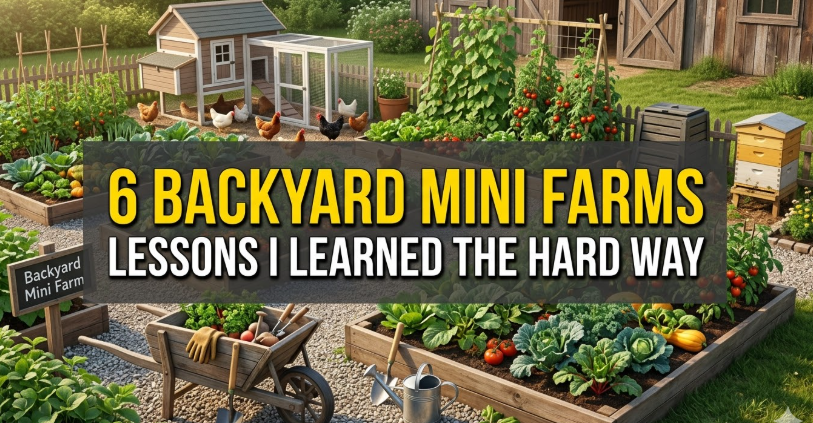
I Learned These 6 Backyard Mini Farms Lessons the Hard Way
I imagined it would be easy to grow my own food.
Dig a hole. Drop a seed. Water it. Done.
That’s what I thought, three years ago when I started my own backyard mini farm. I was mistaken — utterly, cringingly mistaken.
My first season was a disaster. Plants died. Pests took over. I spent money on things I didn’t need and passed over things I did. But with every mistake I learned something valuable.
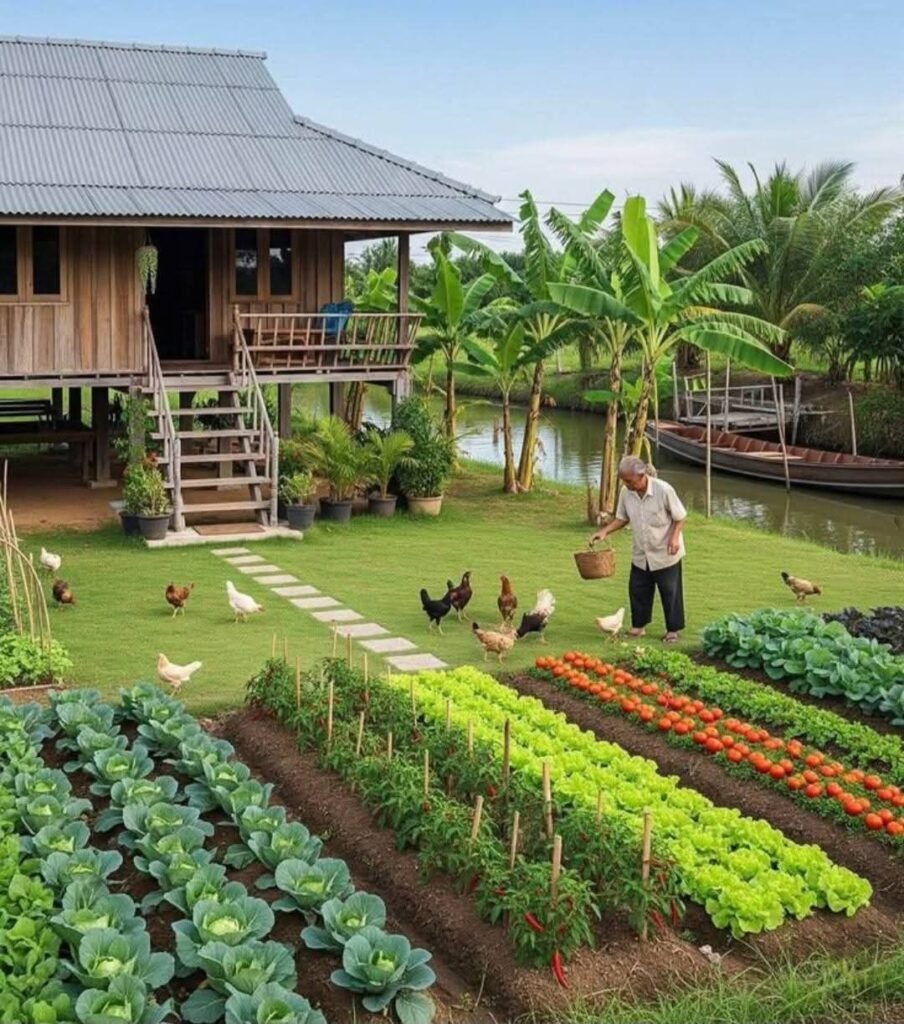
That’s the thing about backyard mini farms — they appear simple from afar. But once you get down in the dirt, you see that there’s a lot happening below the surface.
This article tells the six biggest lessons I learned the hard way, in no-nonsense guide fashion. Whether you’re just starting out or already off to a rocky start, these real-world lessons can save you time, money, and a number of headaches.
Let’s dig in.
Lesson 1 — Your Soil Is Everything (And Mine Was Bad)
The Error I Made Before Planting My First Seed
My very first mistake? I skipped the soil test.
I figured the soil in my backyard was OK. It looked dark. It felt soft. I figured that was enough. It wasn’t.
Three weeks later, my seedlings were pale, stunted and hardly growing at all. I added more water. Nothing changed. I added fertilizer. Still nothing. It took a neighbor — a retired farmer — to tell me the obvious: my soil was compacted, low in nitrogen and had pH levels that were just plain wrong for growing vegetables.
I had been attempting to build a house on a broken foundation.
Why Good Soil Is Essential to Your Mini Farm
Plants get everything from the soil — the nutrients, the water and the support. The best seeds won’t thrive in poor soil.
Here’s what I discovered about the three things your soil needs:
| Soil Factor | What It Affects | Ideal Range |
|---|---|---|
| pH Level | Nutrient absorption | 6.0 – 7.0 for most veggies |
| Nitrogen (N) | Leaf and stem growth | Moderate to high |
| Drainage | Root health | Well-draining, not waterlogged |
| Organic Matter | Soil life and moisture | 5% or more |
Most garden centers sell simple soil test kits for about $15. It’s the least expensive investment you will make for your backyard mini farm.
The Fix That Actually Worked
Once I realized what was wrong, the solution was straightforward.
I mixed compost in, spread a little aged manure and loosened the soil. The difference was night and day inside a single season. My plants grew faster, produced more and were better able to deal with stress.
The takeaway: Don’t skip the soil test. Fix your foundation first. Everything else comes after.
Lesson 2 — I Had Planted Too Much, Too Quickly
How Excitement Turned Into Overwhelm
I was pumped my second season.
I bought 22 kinds of seeds. I planned plots for tomatoes, peppers, zucchini, cucumbers, lettuce, kale, carrots, beans and herbs. I planted them all in one weekend.
It felt great — for a couple of weeks.
Then the watering became unmanageable. The weeding never ended. Some plants crowded others. Pests moved from one bed to another before I could catch them. Come July, I was burnt out and half my plants were struggling.
This is one of the most common backyard mini farms mistakes beginners make. More is not always better.
How to Scale a Backyard Mini Farm the Smart Way
Starting small gives you control. It means you can really learn each plant before adding another.
Here is a basic beginner framework that really works:
Year 1 — Keep It Simple
- Pick 4 to 5 crops maximum
- Pick easy growers: tomatoes, zucchini, lettuce, herbs, green beans
- Use raised beds or containers if you’re short on space
Year 2 — Expand Intentionally
- Add 3 to 4 new crops based on what was successful
- Use companion planting to make the most of space
- Start composting to reduce waste
Year 3 and Beyond — Optimize
- Rotate crops for soil health protection
- Plant perennials like strawberries or asparagus
- Try trellising and growing vertically
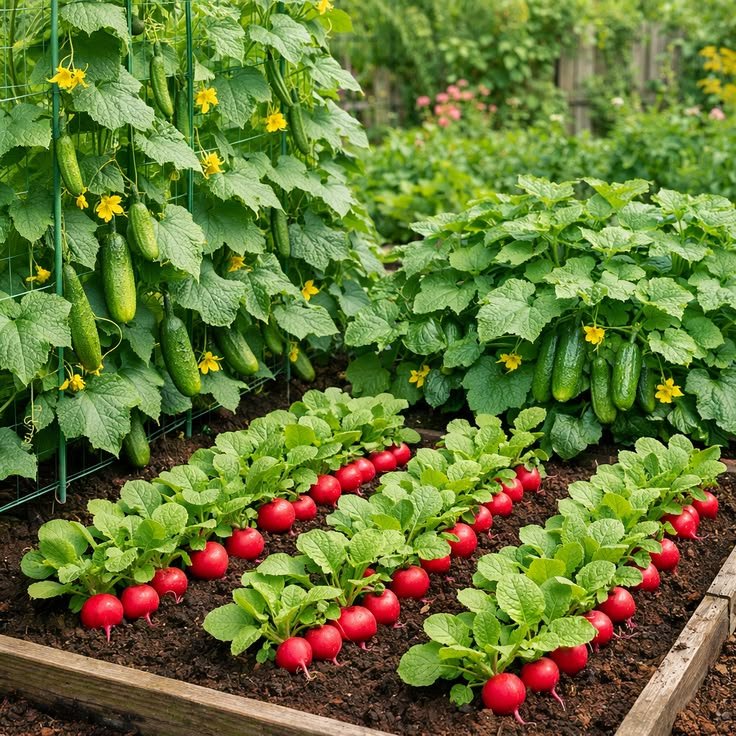
How Much Space Do You Really Need?
A 4×8-foot raised bed — roughly the dimensions of a big door — can yield an astonishing amount of food. You don’t need a big yard. You need a smart plan.
| Space Available | What You Can Grow |
|---|---|
| 4×4 feet | Herbs, lettuce, radishes, one tomato plant |
| 4×8 feet | Complete salad garden plus two pepper or tomato plants |
| 10×10 feet | Family of four partial supply of vegetables |
| 20×20 feet | Serious mini farm with mixed crops |
The takeaway: Grow less, learn more. It’s always easier to expand than it is to do damage control.
Lesson 3 — I Completely Overlooked Watering Schedules
Watering by Feel Is a Formula for Failure
I used to give my plants a drink whenever I walked by and thought they looked thirsty. Sometimes I watered every day. There were four-day stretches when I forgot entirely.
My tomatoes cracked. My lettuce bolted early. My peppers were dropping flowers before setting any fruit.
That was all due to uneven watering.
Plants don’t just require water — they require water at the right time, in the right amount, delivered the right way. Getting this wrong is more damaging for plants than any pest or disease ever could be.
Overwatering vs. Underwatering — Knowing the Difference
Most beginners overwater, not underwater. Here’s how to determine what’s going on with your plants:
| Sign You See | Likely Cause |
|---|---|
| Yellow leaves (lower) | Overwatering |
| Wilting in the morning | Underwatering |
| Cracked fruit (tomatoes) | Inconsistent watering |
| Brown leaf tips | Underwatering or low humidity |
| Soggy, smelly soil | Overwatering + poor drainage |
| Slow growth, pale color | Waterlogged roots |
The System That Fixed Everything
Installing a drip irrigation system was the single best thing I did for my backyard mini farm. It cost me around $60 and took one afternoon to set up.
Here’s why it works so well:
- Water goes directly to the roots, not the leaves
- Consistent moisture prevents cracking and stress
- It runs on a timer so I don’t have to think about it
- It reduces water wastage by up to 50% compared to sprinklers
If a drip system is too much for your budget right now, try this instead: water deeply but less often. Give your plants a long, deep drink two to three times per week rather than a quick splash once daily. Deep watering forces roots to grow down, making plants stronger.
The takeaway: Water on a schedule, not a feeling. Your plants will thank you.
Lesson 4 — Pests Almost Wiped Out My Whole Garden
The Morning I Found My Plants Stripped Bare
I was walking out to my garden one Tuesday morning in late June. The evening before, my bean plants were lush and green. That morning, they looked like skeletons.
Caterpillars. Dozens of them. Hiding under every leaf.
I panicked. I rushed to the hardware store and got the most powerful pesticide I could find. I sprayed everything.
That was my second mistake — because that spray also killed the beneficial insects that had been guarding my garden. My ladybugs, lacewings and ground beetles were gone. Within two weeks, aphids moved in and claimed what the caterpillars had left behind.
Why Chemical Pesticides Usually Make Things Worse
This is a lesson many backyard mini farm beginners learn painfully. Chemical pesticides don’t discriminate. They wipe out the bad bugs — and the good ones too.
When you get rid of the good bugs, you destroy your garden’s natural defense system. Pest populations then explode without anything to keep them in check.
A Better Pest Management Approach
Integrated Pest Management (IPM) is the smarter way. It emphasizes prevention first, then natural solutions, and chemical options only as a last resort.
Here’s a simple IPM ladder:
Step 1 — Prevention
- Rotate crops each season
- Protect vulnerable plants with row covers
- Plant pest-repelling herbs nearby such as basil, mint and marigolds
Step 2 — Physical Removal
- Hand-pick large insects like caterpillars
- Use sticky traps for flying pests
- Blast aphids off with a strong spray of water
Step 3 — Natural Sprays
- Neem oil is effective on soft-bodied insects
- Insecticidal soap kills aphids and spider mites on contact
- Diatomaceous earth deters crawling insects
Step 4 — Biological Controls
- Attract or introduce ladybugs, lacewings and parasitic wasps
- Plant flowers like dill and fennel to attract beneficial insects
Step 5 — Chemical Intervention (Last Resort Only)
- Use targeted, organic-approved pesticides
- Apply in the evening to avoid harming pollinators
- Never spray during bloom time
For a deeper look at how to build a thriving growing space from scratch, visit Backyard Mini Farms — a great resource for beginner and intermediate growers alike.
The lesson: Work with nature, not against it. Build a garden ecosystem, not a sterile zone.
Lesson 5 — Crop Rotation? I Had Never Heard of It (And My Soil Paid the Price)
Three Seasons of Planting Tomatoes in the Same Spot
I loved tomatoes. So I planted them in the same bed, year after year.
By the third year, my tomato plants were a mess. Spotted leaves. Stunted growth. A disease called early blight decimated half my crop before summer could even hit its stride.
The problem? I was building up soil-borne diseases and draining certain nutrients from the same patch of ground, season after season. This is one of the biggest backyard mini farms mistakes you can make.
Why Crop Rotation Is Non-Negotiable
Different plants extract different nutrients from the soil. And different plant families attract different pests and diseases that can survive in the soil between seasons.
When you grow the same crop in the same spot repeatedly, you’re basically rolling out a welcome mat for those problems to take up permanent residence.
According to the University of Minnesota Extension, rotating crops each year is one of the most effective ways to prevent disease buildup and maintain long-term soil health.
Here’s a simple 4-bed rotation system that works incredibly well:
| Bed 1 | Bed 2 | Bed 3 | Bed 4 | |
|---|---|---|---|---|
| Year 1 | Tomatoes / Peppers | Beans / Peas | Brassicas (Cabbage, Broccoli) | Root Veggies (Carrots, Beets) |
| Year 2 | Beans / Peas | Brassicas | Root Veggies | Tomatoes / Peppers |
| Year 3 | Brassicas | Root Veggies | Tomatoes / Peppers | Beans / Peas |
| Year 4 | Root Veggies | Tomatoes / Peppers | Beans / Peas | Brassicas |
The Added Benefit of Rotation: Better Soil
Legumes, including beans and peas, fix nitrogen back into the soil. When you rotate them after heavy feeders such as tomatoes, they help return some of what was removed.
Less fertilizer, healthier soil and better harvests — all from just moving your plants around.
The lesson: Never plant the same family of plants in the same bed two years running. Move things around every season.
Lesson 6 — I Didn’t Record Anything (And Made All the Same Mistakes Again)
The Most Boring Lesson That Changed Everything
This one might sound dull. But it could be the single most important lesson on this whole list.
I didn’t keep records.
I couldn’t remember which tomato variety performed well in Year 1. I don’t recall when I last fertilized. I was completely clueless as to which parts of my yard received more sun in August than June. I kept repeating the same errors because I had nothing to refer back to.
Even a tiny backyard mini farm needs just a little bit of intentional record-keeping to run well.
What to Track and How to Do It Simply
There’s no need for an elaborate system. A simple notebook or a free app will do just fine.
Here’s what I track now, and why each item matters:
| What to Record | Why It Matters |
|---|---|
| Planting dates | Helps to time succession planting |
| Seed varieties and sources | Know what did and didn’t work |
| Fertilizer type and dates | Prevent over or under feeding |
| Pest and disease sightings | Spot patterns before they become problems |
| Harvest amounts | Measure your actual productivity |
| Weather notes | Understand how your climate affects results |
| Bed layout map | Makes crop rotation planning easy |
Simple Tools That Make Tracking Easy
You don’t need anything fancy. Here are a few options:
- A spiral notebook stored in a waterproof bag in the garden shed
- Google Sheets on your phone — free and syncs automatically
- Garden planning apps like Planter, Seedtime or GrowVeg
- A photo journal — simply snap photos of every bed with your phone each week
Even five minutes of journaling after each garden session adds up to a huge difference over an entire growing season.
The takeaway: A garden journal is your cheat sheet for every season to come. Use it.
What a Realistic Backyard Mini Farm Timeline Actually Looks Like
Here’s an honest guide to what to expect in your first three years:
| Season | Focus | What to Expect |
|---|---|---|
| Year 1 | Learn the basics — soil, watering, pests | Some success, many failures and big lessons |
| Year 2 | Execute fixes — rotation, scheduling, tracking | Noticeably improved harvests and fewer crises |
| Year 3 | Optimize — expanding, companion planting, composting | Consistent produce and real savings on groceries |
By Year 2, most backyard mini farms are beginning to pay for themselves in true time and money savings. In Year 1, be patient with yourself.
Quick-Win Tips for New Backyard Mini Farmers
Before we jump into the FAQs, here are a few extra tips that didn’t quite make it into the key lessons but are worth knowing:
- Start seeds indoors 6 to 8 weeks before your last frost date so you can get a jump on the season.
- Mulch your beds with straw or wood chips to retain moisture, suppress weeds and keep soil temperature steady.
- Plant flowers alongside vegetables — marigolds, nasturtiums and zinnias attract pollinators and deter common pests.
- Build paths between your beds so you never have to walk on — and compact — the soil you worked hard to improve.
- Know your hardiness zone — the USDA plant hardiness zone map tells you which plants will thrive in your climate and when to plant them.
FAQs About Backyard Mini Farms
Q1: What does it cost to start a backyard mini farm? A basic setup — a raised bed, soil, compost, seeds and basic tools — typically runs $150 to $400. You can start smaller with containers for under $100. Costs drop significantly in Year 2 when you’re saving your own seeds and making your own compost.
Q2: How many hours a week does a backyard mini farm take? During the active growing season, expect to spend 30 to 60 minutes per day on a small farm under 200 square feet. That includes watering, checking for pests, weeding and harvesting. A drip irrigation system cuts that time substantially.
Q3: What vegetables are the easiest to grow for beginners? The best starter crops are zucchini, green beans, cherry tomatoes, lettuce, radishes, herbs (basil, chives, mint) and kale. They are forgiving, productive and require little specialized care.
Q4: Do I need a big yard to start a backyard mini farm? Not at all. You can build a successful mini farm in a small patio, balcony or side yard using containers and raised beds. You need sunlight — a minimum of 6 hours per day — more than you need square footage.
Q5: Should I spray pesticides on my backyard mini farm? No. Most pest problems can be resolved without chemical pesticides by using prevention, physical removal and natural sprays such as neem oil and insecticidal soap. Building a healthy garden ecosystem is more effective in the long run.
Q6: What is the best time to start a backyard mini farm? The best time to plan is late winter — January to February. Warm-season crops should be planted after your last frost date in spring. Cool-season crops such as lettuce and spinach can be sown in early spring and again in fall.
Q7: What is companion planting and does it really work? Companion planting is the practice of growing certain plants next to each other because they benefit one another. Basil, for example, protects nearby tomatoes from aphids and whiteflies. Marigolds planted near any vegetable repel many soil pests. Yes, it works — and decades of organic gardening research support it.
Closing Thoughts — The Garden That Taught Me Everything
My backyard mini farm has provided me with more than just fresh vegetables.
It’s taught me patience. It has made me learn to observe, adapt and then try again. It has humbled me more times than I can count and rewarded me more often than not.
The six lessons in this article are not theoretical. They grew out of real dirt, real failures and real seasons of learning what works.
If this is your first time on the backyard mini farm journey — welcome. You’re going to make mistakes. That is not a warning, it’s a guarantee. But every failure is a tuition-free semester.
Test your soil. Start small. Water consistently. Watch for pests the right way. Rotate your crops. And keep a journal.
Do those six things and your backyard mini farm will produce more than you ever thought possible.
Now go get your hands dirty.