META DESCRIPTION
Backyard mini farms tricks for small yards can help to create a successful food garden even in the tiniest of yards. Find 10 time-tested, easy-to-implement techniques that take advantage of every square foot.
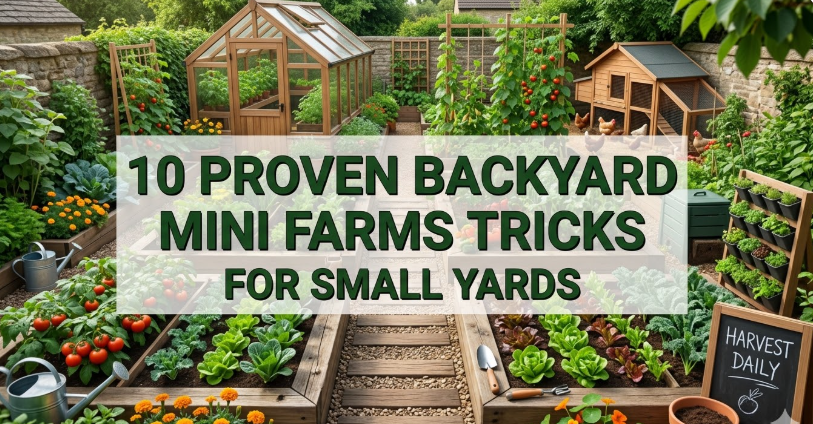
10 Backyard Mini Farms Hacks for Small Yards
Formerly Known As Small: Your Yard Has More Potential Than You Think
Take a small backyard, for example. Most people see a limitation. Sensible gardeners look at the same area and see potential.
Backyard mini farming is the term used for as much food as can be grown in limited outdoor space. It’s not about owning a large piece of land. It’s all about using every inch wisely — the ground, the fences, walls and even the air over your head.
Families around the country are already doing this. A 10×12 foot patch. A narrow side yard. A patio lined with containers. These little spaces are growing hundreds of pounds of fresh food each season.
There’s a world of difference between an overwhelmed small garden and a thriving backyard mini farm. It all comes down to some strategic little tricks. When you use them, your yields go through the roof. Ignore them, and you’ll be incessantly battling weeds, struggling to harvest anything worthwhile, or wasting space because crops weren’t planned effectively.
Here are the 10 backyard mini farms tricks that work in small yards. All of them are actionable, beginner-friendly and supported by real-world results.
Let’s get into it.
| Quick Stats | Numbers That Matter |
|---|---|
| Minimum space required | 4×4 feet (16 sq ft) |
| Potential annual food production per 100 sq ft | 150–200 lbs of produce |
| Water savings using drip irrigation | Up to 50% |
| Yield increase with vertical growing | 2x to 3x more per sq ft |
| Average grocery savings per year | $500–$1,200 |
Trick #1 — Grow Up, Not Away: The Vertical Growing Game-Changer
Small-yard growers’ number one mistake is thinking in two dimensions. They plant everything flat on the ground and wonder why space disappears so quickly.
Vertical growing flips this completely. Rather than sprawling out, you train plants to grow up — on fences, trellises, wire panels and walls.
This one change can triple the food you grow in the same space.
What Plants Grow Well on Vertical Structures?
Not all plants are natural climbers, but many of the highest-yielding crops are. Here’s a quick breakdown:
| Plant | Vertical Method | Approximate Height |
|---|---|---|
| Pole beans | Trellis or bamboo poles | 5–8 feet |
| Cucumbers | Wire mesh or A-frame trellis | 4–6 feet |
| Tomatoes | Cage, stake or string | 4–7 feet |
| Vining squash | Strong trellis with support slings | 6–8 feet |
| Peas | Netting or chicken wire fence | 3–5 feet |
| Melons (small) | Trellis with fabric slings | 4–6 feet |
A basic A-frame trellis, built from two wooden panels and a little wire mesh, can easily be constructed for less than $20. It covers a raised bed, accommodates dozens of plants and doubles your growing area instantly.
Better airflow is another bonus. Vertical plants dry out quicker after rain, resulting in fewer fungal diseases and fewer pest problems overall.
Trick #2 — Raised Beds: The Essential Base for Every Mini Farm
Raised beds are more than just a gardening trend. They are one of the most useful tools you’ll have in a backyard mini farm.
The formula is simple: you are in charge of everything inside the bed. The quality of the soil, the drainage, how deep it is. Native backyard soil is usually too dense, too rocky or too nutrient-deprived. With raised beds, you can begin fresh with the perfect growing conditions.
Ideal Raised Bed Sizes for Smaller Yards
The most basic rule: never make your bed wider than 4 feet. You should be able to access the center from both sides without stepping in, because stepping in will compact the soil — and compacted soil is one of the main killers of root health.
| Bed Size | Best Use | Notes |
|---|---|---|
| 4×4 feet | Corner spaces, beginners | Great starter size |
| 4×8 feet | Main growing area | Most popular size for mini farms |
| 2×6 feet | Narrow side yards, pathways | Perfect for herbs and greens |
| Stacked/tiered | Maximum small-space output | Provides visual interest too |
Fill your raised beds with a combination of quality compost, topsoil and a drainage material such as perlite. This “living soil” retains moisture, drains well and feeds plants naturally — resulting in less need for fertilizer and fewer problems season after season.
Cedar wood is the best material for raised bed frames. It’s naturally rot-resistant and can last 10–15 years without chemical treatment. Never use pressure-treated lumber near edible plants.
Trick #3 — The Succession Planting Method: Crops From Spring to Fall
Here’s a scene most beginners know well: you sow an entire bed of lettuce in April. By May, you’re swimming in salad your family can’t eat. Then by June — nothing. That crop is done for the season.
Succession planting solves this completely.
Rather than planting everything all at once, you plant small batches every two to three weeks. When one batch is done producing, another one is just beginning to peak.
A Simple Succession Schedule
| Week | Action |
|---|---|
| Week 1 | Plant 6 lettuce seedlings, 1 row of radishes |
| Week 3 | Plant another 6 lettuce seedlings, add spinach seeds |
| Week 5 | Plant a third lettuce batch, add bush beans |
| Week 7 | Replant radishes in empty spots |
| Repeat | Continue all summer until first frost |
This method works best for fast-growing crops: lettuce, spinach, radishes, cilantro, arugula and bush beans. These will grow from seed to harvest in 3 to 6 weeks, making them ideal for rotation.
For small yards with backyard mini farms, this is one of the highest-impact tricks you can use. Your garden stays productive from early spring through the first frost of fall, instead of peaking once and going dormant.
Trick #4 — Square Foot Gardening: A Zero-Waste Garden Blueprint
Mel Bartholomew devised the square foot gardening system in the 1970s and, decades later, it’s still one of the most effective ways to produce food in a small space.
The idea is clean and simple. Divide your raised bed into a grid of one-foot squares. Each square is assigned a certain number of plants based on its mature size. No long rows. No wasted spacing. Every inch is used intentionally.
How Many Plants Per Square Foot?
| Crop | Plants Per Square | Key Tip |
|---|---|---|
| Carrots | 16 | Thin seedlings to prevent crowding |
| Radishes | 16 | Quick to grow — excellent for filling gaps |
| Lettuce | 4 | Harvest outer leaves, will continue producing |
| Spinach | 9 | Bolt-resistant varieties last longer |
| Basil | 4 | Pinch off flowers to prolong harvest |
| Green onions | 9 | Regrows after cutting |
| Tomatoes | 1 | Needs trellis or cage |
| Peppers | 1 | Great companion for basil |
A 4×8 foot bed gives you 32 squares. That is enough for a whole salad garden, a few tomato plants, herbs and root vegetables — all in a space smaller than a bathroom floor.
Planning is also simple with this method. You can design your grid on paper before the first seed ever touches the soil.
Trick #5 — Companion Planting: Position Your Plants Wisely
Plants are not isolated individuals. They engage with everything around them — the soil, insects and, above all, neighboring plants.
Companion planting is the practice of growing specific plants close together for mutual benefit. The right pairings can deter pests naturally, attract pollinators, improve soil fertility and even boost flavor.
It’s one of the best low-effort backyard mini farms tricks because it costs nothing extra. You’re just making smarter decisions about what grows next to what.
Winning Plant Combinations
| Plant | Best Companion | Why It Works |
|---|---|---|
| Tomatoes | Basil | Repels aphids and whiteflies |
| Corn | Beans + Squash | The “Three Sisters” — classic method that enriches soil |
| Carrots | Rosemary | Confuses carrot flies with its fragrance |
| Cabbage | Dill | Attracts beneficial predator insects |
| Peppers | Marigolds | Repels soil nematodes |
| Cucumbers | Nasturtiums | Trap crop, draws aphids away |
What NOT to Plant Together
Some plants make terrible neighbors. Keep these pairs separated:
- Onions and beans — they stunt each other’s growth
- Fennel and nearly anything — fennel releases chemicals that suppress most vegetables
- Potatoes and tomatoes — they share diseases and compete heavily with each other
Trick #6 — Container Gardening: Turn Any Surface Into Growing Space
No in-ground space? Containers completely change the equation.
A patio, a driveway edge, a balcony, a rooftop — all of these become productive growing areas when you use the right containers. Pots, buckets, fabric grow bags, window boxes or old barrels can all be turned into mini farm plots.
The most common container growing mistake is using the wrong size. Too small, and roots get cramped. Too big, and the soil stays too wet for too long.
Container Size Guide for Common Crops
| Container Size | Best Crops |
|---|---|
| 2-gallon pot | Herbs, lettuce, green onions |
| 5-gallon bucket | Tomatoes, peppers, eggplant |
| 7-gallon fabric bag | Cucumbers, bush beans |
| 10-gallon fabric bag | Potatoes, sweet potatoes |
| 15-gallon tub | Dwarf fruit trees, blueberries |
| 24-inch window box | Strawberries, herbs, spinach |
Fabric grow bags are especially good for small backyard mini farms. They naturally “air-prune” roots, encouraging more branching and healthier plants overall. They’re also low-cost, lightweight and easy to store during winter.
Group your containers close together. Clustered pots create a warmer microclimate, retain moisture better and look more intentional as a growing space.
If you’re just getting started and want more guidance on planning your setup, Backyard Mini Farms is a great resource packed with practical tips for small-space growers.
Trick #7 — Build a Compost System Right in Your Backyard
The greatest soil amendment on earth is also completely free. Compost — made from kitchen scraps and yard waste — transforms what would go to landfill into rich, dark fertilizer that plants love.
Building a small compost system is one of those backyard mini farms tricks that keeps paying dividends year after year. You stop buying bags of fertilizer. Your plants get a continuous, natural food source. And your household waste shrinks dramatically.
The Basic Compost Recipe
| Greens (Nitrogen) | Browns (Carbon) |
|---|---|
| Vegetable and fruit peels | Dry fallen leaves |
| Coffee grounds and paper filters | Cardboard torn into small pieces |
| Fresh grass clippings | Straw or hay |
| Plant trimmings | Newspaper (non-glossy) |
| Eggshells | Paper bags |
The magic ratio is roughly 3 parts brown to 1 part green. Keep the pile moist — like a wrung-out sponge. Turn it every week or two to speed up decomposition. In 6 to 10 weeks, you’ll have finished compost ready to mix into beds and containers.
For small yards, a sealed tumbler composter is most suitable. It sits off the ground, produces no smell, keeps pests out and processes compost faster than an open pile.
Never add: meat, dairy, oils, pet waste or diseased plant material. These either attract pests or introduce harmful bacteria.
Trick #8 — Set Up Drip Irrigation and Stop Wasting Water
Hand-watering works. But it’s inconsistent, slow and all too easy to get wrong. Overwatering causes root rot. Underwatering leads to stress and stunted growth. Wet leaves invite fungal disease.
A basic drip irrigation system solves all of these problems at once.
Drip systems deliver water slowly, directly to the root zone of each plant. There’s no splash. No wet foliage. No guesswork. And since water goes exactly where it’s needed, you use up to 50% less water than overhead watering methods.
According to the University of California Division of Agriculture and Natural Resources, drip irrigation is one of the most water-efficient methods available to home gardeners, particularly in raised bed and container setups.
Drip System Options and Costs
| Setup | Approximate Cost | Best For |
|---|---|---|
| Basic soaker hose | $12–$20 | One raised bed |
| Starter drip kit with emitters | $25–$40 | 2–3 beds |
| Timer + drip system combo | $45–$70 | Full small yard |
| Automated multi-zone system | $90–$160 | Larger mini farm setups |
A basic hose-end timer costs around $20 and can automate everything. Set it to run for 20 minutes every morning — before the heat of the day peaks — and you never have to think about watering again.
This is one of those backyard mini farms tricks that pays for itself through water bill savings alone within a single growing season.
Trick #9 — Stretch Your Growing Season With Simple Cold-Weather Tools
When temperatures start to drop, most small-yard gardeners stop growing. That’s a missed opportunity. With a few affordable tools, you can extend your growing season by weeks — sometimes months — at both ends of the year.
You don’t need a greenhouse. Simple, low-tech solutions work remarkably well.
Season Extension Tools Compared
| Tool | Protection Level | DIY Possible? | Approximate Cost |
|---|---|---|---|
| Row cover fabric (fleece) | Light frost (down to 28°F) | Yes | $10–$20 |
| Cold frame (old window + wood box) | Hard frost (down to 20°F) | Yes | $20–$50 |
| Plastic hoop tunnel | Light frost + wind | Yes | $15–$40 |
| Wall-O-Water plant protector | Down to 16°F | No | $10–$15 each |
| Mini greenhouse tent | Light to moderate frost | Yes | $40–$90 |
A cold frame is just a four-sided wooden box with a clear lid — usually an old glass window frame — placed over a raised bed. On sunny days it acts like a greenhouse. At night it traps enough residual heat to protect plants well below freezing temperatures.
With the right tools, growers in cooler climates can harvest salad greens for 10 to 11 months of the year. That’s a dramatic increase in production from a backyard mini farm that would otherwise go dormant from October to April.
Trick #10 — Choose Compact, High-Yield Varieties From Day One
Not all seeds are created equal. Many common vegetable varieties were bred for large commercial farms. They sprawl. They need wide spacing. They’re not designed for small spaces.
Choosing compact or dwarf varieties from the start changes everything. These plants produce the same amount of food — sometimes more — in a fraction of the footprint.
Best Compact Varieties for Small Yards
| Vegetable | Best Compact Varieties | Space Required |
|---|---|---|
| Tomato | Tumbling Tom, Tiny Tim, Patio | 5-gal pot or 1 sq ft |
| Zucchini | Bush Baby, Patio Star, Astia | 2–3 sq ft |
| Cucumber | Spacemaster, Bush Pickle | 1–2 sq ft on trellis |
| Pepper | Lunchbox, Baby Belle, Redskin | 1 sq ft |
| Kale | Dwarf Blue Curled, Red Russian | 1 sq ft |
| Bush Beans | Contender, Provider, Blue Lake 274 | 1 sq ft (9 seeds) |
| Squash | Patio, Bush Acorn Table Queen | 2–3 sq ft |
When shopping for seeds or seedlings, look for labels that say “bush,” “dwarf,” “compact,” “patio” or “container.” These are almost always the right choice for backyard mini farms where space is limited.
Just this one trick alone — simply choosing the right varieties — can double the number of crops you fit into your yard without changing anything else about your setup.
Your Complete Backyard Mini Farm Tricks Cheat Sheet
| # | Trick | Primary Benefit | Effort Level |
|---|---|---|---|
| 1 | Vertical growing | 2–3x more yield per sq ft | Low to Medium |
| 2 | Raised beds | Better soil, full control | Medium |
| 3 | Succession planting | Harvests all season | Low |
| 4 | Square foot gardening | Zero wasted space | Low |
| 5 | Companion planting | Fewer pests, healthier plants | Low |
| 6 | Container gardening | Grow on any surface | Low |
| 7 | Composting | Free fertilizer forever | Medium |
| 8 | Drip irrigation | 50% water savings, less work | Medium |
| 9 | Season extension | More months of growing | Low to Medium |
| 10 | Compact varieties | More crops, same small space | Low |
Frequently Asked Questions About Backyard Mini Farms
How much land do I need to start a backyard mini farm? You can begin with a 4×4 foot raised bed — just 16 square feet. Even that modest space, well tended with these backyard mini farms tricks, can yield a significant amount of fresh herbs, greens and small vegetables over the course of a season. Others begin with only 4–6 containers on a patio if there’s no in-ground space available.
What are the least expensive crops to grow in a small yard? Lettuce, radishes, spinach, kale and herbs such as basil or chives provide the best return. A packet of lettuce seeds costs under $3 and will produce dozens of salads in a season. Fresh herbs are particularly valuable, as store-bought herbs come in small packages, cost a lot and go bad quickly.
Can I start a backyard mini farm if I rent my home? Absolutely. Container gardening and portable raised beds make renting no obstacle at all. You carry everything with you when you move. Fabric grow bags are especially renter-friendly since they fold flat for transport and leave no trace behind.
How much time does it take to maintain a backyard mini farm each week? A properly set-up mini farm with drip irrigation and mulched beds takes about 2–4 hours a week during the growing season. The greatest time investments come at the start of the season — building beds and planting — and during heavy harvest periods. Once systems are in place, daily maintenance is minimal.
Do I need special tools to get started? No. A hand trowel, a hand fork, a watering can and some basic seeds are all you need to begin. You can expand your setup over two or three seasons as your needs and confidence grow. Most experienced mini farmers add drip systems, trellises and season extension tools gradually — not all at once.
What soil mix works best for raised beds and containers? A popular recipe is one-third compost, one-third coconut coir or peat moss, and one-third coarse perlite or vermiculite. This combination drains well, holds moisture and stays loose enough for roots to penetrate easily. Never fill raised beds or containers with straight garden soil — it compacts too quickly and drains poorly.
As a total beginner, which of the 10 tricks should I try first? Start with raised beds (Trick #2) and square foot gardening (Trick #4) together. These two tricks work hand in hand and give you the best possible foundation. Once your first bed is planted and producing, add succession planting (Trick #3) and vertical growing (Trick #1) in your second season.
What do I do about pests on a small backyard mini farm? Prevention is key: use companion planting (Trick #5), select disease-resistant varieties (Trick #10) and keep your beds clean. For active pest problems, handpick larger pests like caterpillars, use row covers to block flying insects, and apply neem oil spray for soft-bodied pests like aphids and spider mites. Stay away from broad-spectrum chemical pesticides — they kill beneficial insects along with the pests.
The Bigger Picture: Why Mini Farms Matter More Than Ever
Grocery prices are climbing. Supply chains get disrupted. Even when it looks fresh, produce in stores often traveled hundreds or thousands of miles before arriving on your table.
A backyard mini farm is a small but significant answer to all of this. It empowers you to know where your food comes from, what’s in it and how fresh it is when you eat it.
It also connects you — and your family — to the rhythm of growing seasons, soil health and the simple satisfaction that comes from eating something you grew yourself. That is a value that doesn’t show up on any grocery receipt.
Wrapping It All Up
These backyard mini farms tricks don’t require a lot of space, an expensive setup or years of gardening expertise. They’re all built on simple principles: work with your space, use it wisely and keep improving one season at a time.
Start with one raised bed. Try succession planting in your first season. Add a trellis. Grab a bag of compost. And before you know it, instead of seeing a constraint, you’ll look at your yard and see a rich, thriving mini farm that feeds your family real food all season long.
The best time to start was last spring. The second best time is today.